Don Doko Don (Arcade)
| Don Doko Don |
|---|
|
Developer: Taito
|
Don Doko Don is another one of those fixed-camera hundred-round Taito games like The Fairyland Story and Bubble Bobble. Bob & Jim are two dwarves who have to save the princess of Maryland Marry Land from a dragon or some such.
This game's gimmick: Slamming your foes with wooden hammers. Squash 'em down, scoop 'em up, and throw 'em around.
Contents
Kumagaya Easter Egg

Taito Kumagaya Laboratory developed this game; the proof of this is a hidden company logo in the attract mode. To see it, wait for a demo to start playing (not the tutorial), then press 1P Button 1 3 times.
Stage Select

Don Doko Don uses the Taito Code:
- While the game boots up, hold the Service Coin button until the "SERVICE SWITCH ERROR" message pops up on the screen.
- Then, press 1P Start (x3), Service Coin, 1P Start. The error message should be replaced with "ROUND SELECT ON !!"
- Start a new game and a stage select menu should appear.
Press Up / Down to select a round, Left / Right to switch between Omote (Normal) and Ura (Reverse) modes, and 1P Start to start the game.
Level Editor
Put the following code in MAME's dondokod.xml cheat file to replace the default service test with a fully functioning level editor.
  <cheat desc="Level Editor">
    <script state="run">
      <action>maincpu.mw@00E08=0x4E75</action>
      <action>maincpu.mw@1AA7E=0x4EB9</action>
      <action>maincpu.mw@1AA80=0x0001</action>
      <action>maincpu.mw@1AA82=0xB790</action>
    </script>
    <script state="off">
      <action>maincpu.mw@00E08=0x41FA</action>
      <action>maincpu.mw@1AA7E=0x41F9</action>
      <action>maincpu.mw@1AA80=0x0000</action>
      <action>maincpu.mw@1AA82=0x12AE</action>
    </script>
  </cheat>
General Controls
- 1P Joystick: Moves cursor.
- 1P Start: Switch to Tile Mode.
- 1P Start + 1P Button 1: Switches to Warp Mode.
- 1P Start + 1P Button 2: Switches to Item Mode.
- 2P Start: Switches to Object Mode.
- Service: Starts game.
Tile Mode
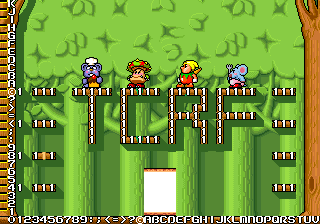
Use this to place platforms and other tiles in a room.
- 1P Button 1: Places tile.
- 1P Button 2: Erases tile.
- 2P Left / Right: Jumps to the next / previous round.
- 2P Up / Down: Jumps ahead / backwards by ten rounds.
- 2P Button 1: Changes tile type. This ranges from 00 (Nothing) to 03. Most rounds will only use 00 and 01.
- 2P Button 2: Toggles a grid of sorts on the left and bottom of the screen, and displays the IDs of every tile on the stage.
Warp Mode

It's not what you might be thinking. This lets you place "warp" objects, which teleport the player to a different warp object on the same screen.
- 1P Button 1: Selects next warp object by number.
- 1P Button 2: Selects previous warp object.
- 2P Left / Right: Selects between "Warp To", "Type", and "Number" variables.
- Warp To: This number represents the warp object to which the player will be transported.
- Type: This is the type of warp object. The available types depend on the current room number.
- Number: This is the ID of the current warp object. Only 4 warp objects can be in any given room.
- 2P Up / Down: Increases / decreases the value of the currently selected variable.
- 2P Button 1: Increases Type number.
- 2P Button 2: Decreases Type number.
Item Mode

Control the placement and type of the round's bonus item and how many seconds it takes before the timer devil appears.
- 1P Button 1: Increases the Time variable by 8. Time maxes out at 248.
- 1P Button 2: Decreases the Time variable by 8.
- 2P Left / Right: Jumps to the next / previous round.
- 2P Up / Down: Jumps ahead / backwards by ten rounds.
- 2P Button 1: Increases Item number.
- 2P Button 2: Decreases Item number.
Object Mode
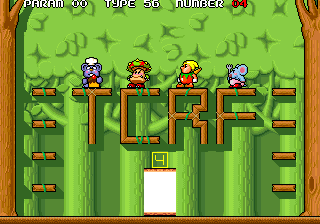
Use this mode to place objects in a room, naturally.
- 1P Button 1: Selects next object by number.
- 1P Button 2: Selects previous object.
- 2P Left / Right: Selects between "Param", "Type", and "Number" variables.
- Param: This is the sub-type of the currently selected object type. For most object types, this does nothing.
- Type: It's the type of object selected. I probably didn't need to tell you that.
- Number: Represents the object's room ID number. Only 16 objects can be in any given room.
- 2P Up / Down: Increases / decreases the value of the currently selected variable.
- 2P Button 1: Increases Type number.
- 2P Button 2: Decreases Type number.
Unused Rounds
To access the first set of unused rounds, just enter the stage select code and choose Rounds 51-60 on Omote mode.
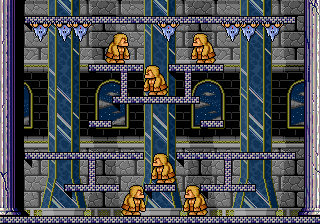
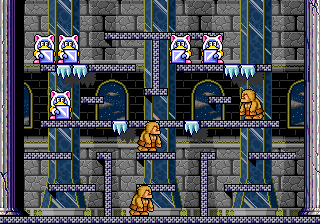
| Round 51 | Round 52 |
|---|---|
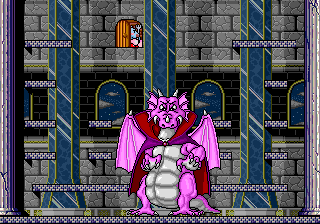
| This is the super-secret final boss seen in Round 101 with an alternate platform arrangement.
Maybe, at one point, you'd have been able to fight him even in a normal game? |
Rounds 51-60 don't have entrances defined, so players will spawn in the upper-left corner.
As a result, it's impossible to legitimately clear this stage. |
| Round 53 | Round 54 |
| All of the levels here besides Round 51 seem to be round candidates for World 3. | None of them match up well with any of the rounds used in the game, though. |
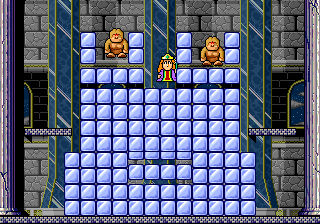
| Round 55 | Round 56 |
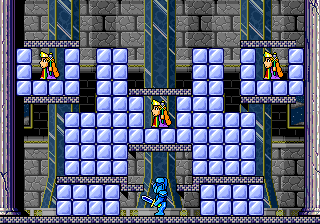
| The ice cubes in the middle of the stack will fall shortly after the round starts. | The tileset used in these rounds only appears on Round 101 in the final game. |
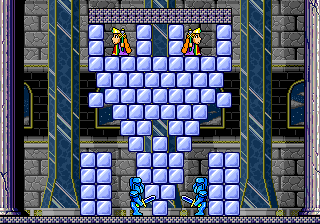
| Round 57 | Round 58 |
| The loose ice cubes on either side fall after the round starts. | More ice cube structures, more Crystalmen, more Hirudas. Hrm. |
| Round 59 | Round 60 |
| Stop fidgeting, it's almost over now. | And the boss is the dragon from Round 50 with the rat spawner from Round 20. Weird. |
The next set of stages requires a more complicated access method. Place the following code in dondokod.xml and activate to warp to one of the following unused rounds:
  <cheat desc="Warp To...">
    <parameter>
      <item value="0x08">Round 128</item>
      <item value="0x09">Round 129</item>
      <item value="0x0A">Round 130</item>
      <item value="0x0B">Round 131</item>
      <item value="0x0C">Round 132</item>
      <item value="0x0D">Round 133</item>
      <item value="0x0E">Round 134</item>
      <item value="0x0F">Round 135</item>
      <item value="0x11">Round 137</item>
      <item value="0x12">Round 138</item>
      <item value="0x13">Round 139</item>
      <item value="0x14">Round 140</item>
    </parameter>
    <script state="change">
      <action>maincpu.pb@105B41=(param)</action>
      <action>maincpu.pb@105B44=FF</action>
    </script>
  </cheat>
| Round 128 | Round 129 |
|---|---|
| Almost all of the following rounds are level candidates for World 2. | This round, however, seems to test how the Rabit enemy reacts with different platforms. |
| Round 130 | Round 131 |
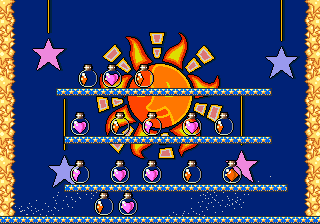
| This is identical to Round 10. It's only here for completion's sake. | This sun background matches well with the backgrounds seen in World 4.
It's set up like a bonus round but only seems to exist to test how the bonus jars work. |
| Round 132 | Round 133 |
| Another World 2 candidate that didn't make it into the game. | The first of three rounds that use a background seen nowhere else.
If you look closely, you should be able to see why it wasn't used. Rude. |
| Round 134 | Round 135 |
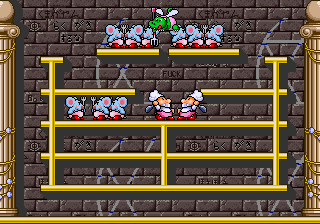
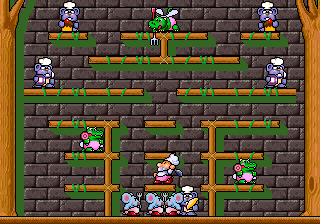
| Look in the unused graphics section to see the whole background up close! | Too many chefs spoil the round. |
| Round 137 | Round 140 |
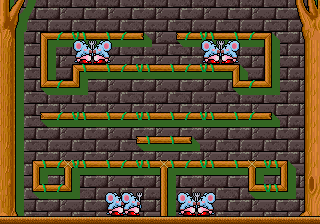
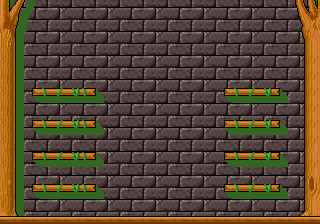
| Rats. | Round 140 looks like an early version of one of the tutorial rounds. |
| Round 138 | Round 69 |
|---|---|
 |
 |
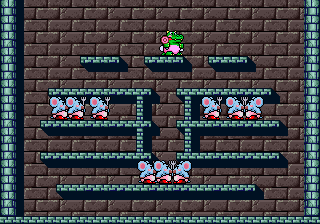
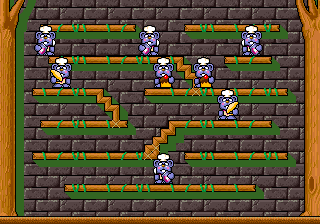
Round 138 is one of the few unused rounds with a final game analog. It's similar to Round 69, but with a more open platform arrangement and two less Rakots.
| Round 139 | Round 19 |
|---|---|
 |
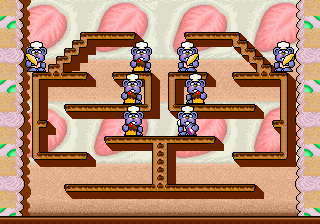 |
Round 139 is almost identical to Round 19. The only difference is that the Rakot on the middle-right platform was moved closer to the center. Now they're all symmetrically placed, which is nice.
Unused Objects
The following objects use preliminary graphics but are more or less complete code-wise.
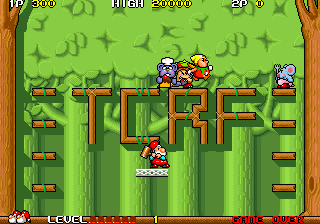
ID: 15 (Vertical), 16 (Horizontal)
Simple moving platforms. It slowly moves in one direction until it collides with a platform or wall tile, at which point it switches direction.

ID: 12
Once placed on a stage, snow will continuously fall from the top of the screen. The snow falls at four different speeds. Once a snow sprite reaches the bottom of the stage, it's destroyed, and a new snow object is spawned at the top.
There's a minor but noticeable graphical glitch: When the snow object falls below the camera, it flashes in the middle of the screen for 2 frames before being destroyed. This bug might be why it's not used in the final game.

ID: 34
Like the snow object, this will cause rain to continuously fall from the top of the screen. Unlike the snow, rain falls at only two different speeds. Once a rain sprite collides with any platform tile, it's destroyed, and a new rain object is spawned at the top.
Unused Graphics

The full background graphic used in Round 131.
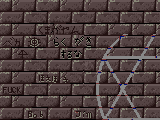
The full background graphic used in Rounds 133-135. The scribblings, from left to right and top to bottom, are:
- くまがやん - "Kumagayan", referring to Taito Kumagaya Laboratory.
- バカ - "Idiot"
- A vulva symbol. Yes, really.
- らく がき するな - "Don't do graffiti" ...says the graffiti.
- An Ai Ai Gasa. The idea is to write your name under the left side and your lover's name under the right, but there aren't any names here (unless the stuff right above it is meant to be connected).
- ほえほえ - "Bark bark"
- FUCK - yeah, well, same to you.
- Bob and Jim - the game's main characters.
| To do: Comparison with the used fruit. |
![]()
An alternate design of the spiked purple fruit spit out by plants in World 1. Simultaneously manages to look less dangerous and more frightening.
Unused Text
| World 1 (0x167AE) | World 2 (0x16874) | World 3 (0x16928) |
|---|---|---|

|
|
|
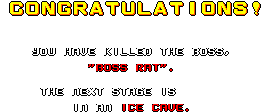
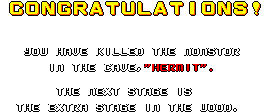
These messages would have appeared after beating the bosses in Worlds 1, 2, and 3 respectively. Worlds 4 and 5 have no messages. Note that the message for World 3 mentions that the next stage is in the woods again; in the final game, World 4 takes place in the sky and outer space.
- Pages missing developer references
- Games developed by Taito
- Pages missing publisher references
- Games published by Taito
- Arcade games
- Pages missing date references
- Games released in 1989
- Games released in July
- Games with unused areas
- Games with unused objects
- Games with unused graphics
- Games with unused text
- Games with debugging functions
- Games with hidden level selects
- To do
Cleanup > Pages missing date references
Cleanup > Pages missing developer references
Cleanup > Pages missing publisher references
Cleanup > To do
Games > Games by content > Games with debugging functions
Games > Games by content > Games with hidden level selects
Games > Games by content > Games with unused areas
Games > Games by content > Games with unused graphics
Games > Games by content > Games with unused objects
Games > Games by content > Games with unused text
Games > Games by developer
Games > Games by developer > Games developed by Square Enix > Games developed by Taito
Games > Games by platform > Arcade games
Games > Games by publisher
Games > Games by publisher > Games published by Square Enix > Games published by Taito
Games > Games by release date > Games released in 1989
Games > Games by release date > Games released in July


