Metal Slug 5 (Neo Geo)
| Metal Slug 5 |
|---|
|
Developers: Playmore,
Noise Factory
|
| This page sucks. If you could make it suck less, that would be awesome. Specifically: This page needs a lot of cleanup/rewriting. |
| To do: Add stuff from here. |
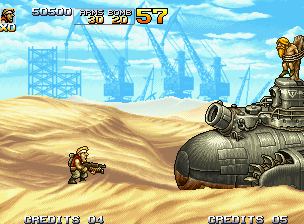
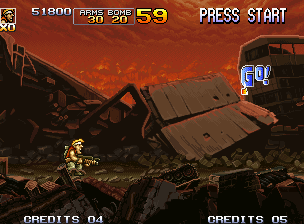
Metal Slug 5 is the first main Metal Slug game not to feature General Morden as the main villain. Kind of odd, considering that the enemy sprites are just sprite edits of the Soldiers from the previous games. This is the first Metal Slug game to be developed by SNK Playmore after SNK's resurrection, and the last to be released on the Neo Geo. The game is also notoriously unfinished as it was heavily rushed. As a result, a huge amount of content remains unused.
Contents
- 1 Sub-Pages
- 2 Debug Menu
- 3 Unused Areas
- 3.1 1:2 3_2 つり てんじょう
- 3.2 1:6 3_6 にかいだて
- 3.3 1:B 3_1 イセキテスト
- 3.4 3:3 1_2 ろうか
- 3.5 3:4 1_3 はい こうじょう
- 3.6 3:8 1_7 ぬきあし
- 3.7 3:9 T_1 アニメーション テスト (Animation Test)
- 3.8 3:A T_2 アイテム テスト (Item Test)
- 3.9 3:B T_3 エネミー テスト (Enemy Test)
- 3.10 3:C T_4 ハイチ テスト
- 3.11 3:D T_5 コウセイ テスト
- 3.12 3:E T_6 アニメ テスト
- 3.13 4:5 2_4 Boss2-1
- 3.14 5:2 5_2 ちかてつ いりぐち
- 3.15 5:6 Boss だいぶA
- 3.16 5:8 5_T かめBoss (Turtle Boss)
- 3.17 5:9 5_E ぞうBoss (Elephant Boss)
- 4 Region-exclusive Messages
Sub-Pages
| Unused Graphics A whole boatload of recycled and unused assets. |
Debug Menu
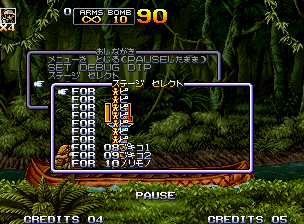
おしながき
- メニューを とじる(Pauseしたまま) - Close the Menu (While Paused)
- Set Debug Dip
- ステージ セレクト - Stage Select
- Test Stage
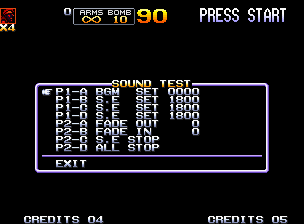
- サウンド テスト - Sound Test
- リセット - Reset
It is worth noting this Debug menu is shared by Metal Slug 2, X, 3, 4, and 5.
To access the debug mode, open the game in Console Mode and set debug developer mode On at the Neo Geo boot-up screen: this can be done via the Kawaks emulator, the Nebula emulator or using the Neo Geo UniBios.
Start the game, and press COIN up twice during gameplay: after pausing, the debug menu will appear - with options to activate the debug dipswitches (which can be activated separately through other options using Kawaks) and even the ability to play on any regular level, and even some test levels not available in the actual game. There is also a Sound Test screen.
Set Debug Dip
- ムテキ - Invincibility.
- View Information - View debug information.
- イツデモPause - Allows pausing during score tally, cutscenes, and credits.
- View Geo Scroll A - 1st plane check, shows the walkable ground, makes the foreground choppy as it scrolls when activated. May linger if not turned off properly.
- View Geo Scroll B - 2nd plane check, makes the background choppy as it scrolls when activated.
- View Attack Rect - View attack hitbox.
- View Body Rect - View body hitbox.
- View Push Rect - View objects that block the player's path.
- ムセイゲン グレネード - Infinite grenades.
- ムセイゲン POWガン - Infinite ammunition.
- View PA ポイント - A sprite appears, showing the player's respawn point.
- Dボタン、テキ ゼンメツ - Press D to destroy all onscreen enemies (no score bonuses).
- "Pause"ヒョウジOff - Disables the blinking pause message.
- BGM Off - Turns off the BGM.
- Warn パレット オーバー - Has something to do with the palette.
Test Stage
- For 08ブキコ1 - FOR 08Armory1
- For 09ブキコ2 - FOR 09Armory2
- For 10ノリモノ - FOR 10Vehicle
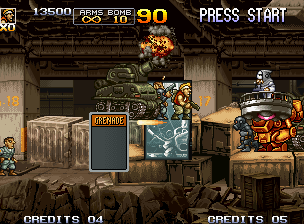
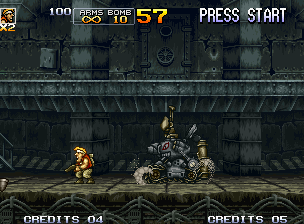
A set of test stages can also be played from the debug menu, although compared to Metal Slug 2, X, and 3, they are very lacking. Out of the 10 test stage entries, only three are functional: FOR 08 (a vehicle and weapon test room), FOR 09 (a dual machine gun test room), and FOR 10 (another vehicle test room). They all use the underground subway stage as their background and are devoid of enemies.
Sound Test
SFX and BGM test screen.
Reset
The final option of the debug menu resets the game.
Unused Areas
1:2 3_2 つり てんじょう
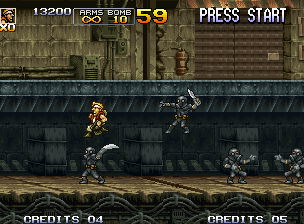
While this area is actually used being the very second screen of the game, it actually has a hidden alternate path at the end, hidden by a floor sprite. The tunnel boundaries can be seen with VIEW GEO SCROLL active, but the tunnel ends in an invisible wall as it does not have an exit coded to it.
To scroll the camera with Cheat Engine: enter area 1:3, search for hex value 00001000, then enter area 2:2. Looking for hex value 00002000. The horizontal axis can be edited using the first two and last two numbers, and the vertical axis with the center four.
1:6 3_6 にかいだて
An empty tunnel with the upper floor lacking collision. At the end the path leads to the boss fight (1:9). It's possible this was to be a continuation of the final room (1:5), which ends with a similar two-tiered layout.
1:B 3_1 イセキテスト
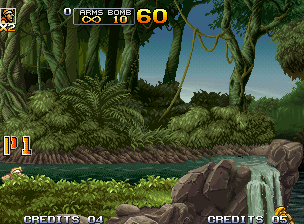
This spawns you at the waterfall in Mission 1, directly to your death and later respawning on the raft. You're stuck on it even after destroying the helicopter, however.
3:3 1_2 ろうか
The path starts off with a waiting Augensterm, with several enemies as you progress in this unused tunnel area.
The end of the path will lead to 3:6, though you will have to ditch the Augensterm first.
3:4 1_3 はい こうじょう
Originally, you are to spawn a bit further back to show a room of a group of robots deploying (the same seen at the end of the area, only longer) as evidenced by the pre-release videos, though that appears to have been cut as well.
As a result, your spawn point is moved further forward and the room in the final, while still available, needs some camera trickery to see it proper.
3:8 1_7 ぬきあし
A short tunnel area with gas mask soldiers dropping down from the upper floor. This leads to the final area before the boss, 3:4.
3:9 T_1 アニメーション テスト (Animation Test)
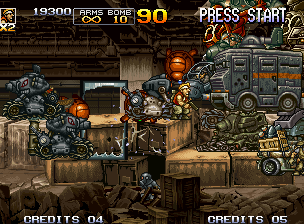
While on the surface it looks like the second area of Mission 3 (3:2), it’s actually been stripped of the normal items placement and is chock full of enemies - both used and unused - for testing purposes spawned from out of nowhere when you walk up to the crates, to the point of lagging the game.
Enemies drop weapons and items (the cut Flame Shot being one of them), and a few prisoners can be found as you progress. This area contains a prisoner unique to this area (often fan-dubbed as Achilles, though his name is actually randomized).
Should you choose to not proceed, the start of the area is actually a sprite viewer with controls similar to 3:D (see below).
This area leads to the unused tunnel area with the Augensterm (3:3).
3:A T_2 アイテム テスト (Item Test)
Spawns you to a tunnel similar to 3:3, devoid of vehicles, obstacles and enemies.
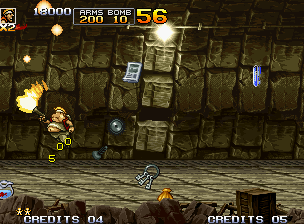
Shooting various parts of the ceiling will drop a mix of used and unused items, though shooting the ceiling above the first light will cause the game to crash and reset. Unlike 3:3, the tunnel leads to a dead end.
3:B T_3 エネミー テスト (Enemy Test)
Appears to be the same as area 3:6, but instead of a Slug Gunner as usual you will find the Black Hound from Mission 1 instead. The fight is similar (aside from the enemy appearing to sink a little lower before correcting itself), except as it goes offscreen the Black Hound will appear in the top floor instead. It does not go back down on subsequent tries however.
Once it is defeated, the music stops, and you're stuck with nowhere else to go.
3:C T_4 ハイチ テスト
Another tunnel, this time with a container for a Slug Gunner, some ruins (some destructible) from the raft segment of Mission 1, and an invincible hover jet passing through.
It's possible this room was used for testing movement across slopes and irregular surfaces. Again, you won’t find a light at the end of this tunnel.
3:D T_5 コウセイ テスト
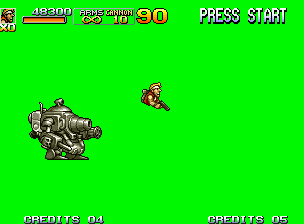
Brings you to an internal sprite viewer. This version displays static sprites and you can manually scroll through each frame of animation. The controls are as follows:
- Player 1 A – Next frame.
- Player 1 B – Previous frame.
- Player 1 C – Next sprite.
- Player 1 D – Previous sprite.
- Player 2 A – Next palette.
- Player 2 B – Previous palette.
- Player 2 C – Toggles game speed.
- Player 2 D – No apparent purpose.
- Player 2 Joystick – Moves sprite.
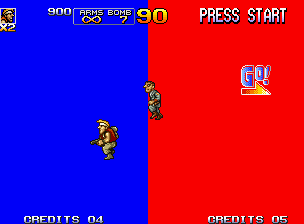
It should be noted that this section doesn't contain everything, the rest can be viewed in 3:E. Walking forward will change the background colors from green, then blue, red, black, white, and then cycles through the last two repeatedly.
The sprite viewer also plays the sounds associated with the first frame of animation; for example, if you get the first frame of a soldier dying, their death scream will play.
3:E T_6 アニメ テスト
The second internal sprite viewer, and this time they are animated and have a bigger library than 3:D. The controls are slightly different, as shown below.
- Player 1 A – Next animation.
- Player 1 B – Previous animation.
- Player 1 C – Next object.
- Player 1 D – Replays animation.
- Player 2 A – Next palette.
- Player 2 B – Previous palette.
- Player 2 C – Shrinks sprite.
- Player 2 D – Expands sprite.
Aside from the sprites playing sound like the previous sprite viewer, if a sprite plays an animation that creates an object, i.e. a grenade or a landmine, that object will appear and are able to kill you.
4:5 2_4 Boss2-1
This appears to be a duplicate of the boss stage.
5:2 5_2 ちかてつ いりぐち
Another area with a small unseen chunk of the map, you only see from the purple curtain and onwards as you enter this area.
5:6 Boss だいぶA
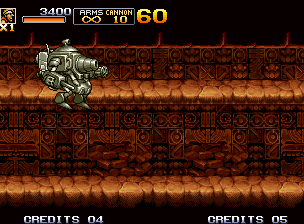
A normal stage warp, though it is notable that far below the screen boundary there is an unseen backdrop of spinning cogs.
5:8 5_T かめBoss (Turtle Boss)
A warp of 5:4 after the fight through the apartment. It leads to the tower full of cultists and robots (5:5).
5:9 5_E ぞうBoss (Elephant Boss)
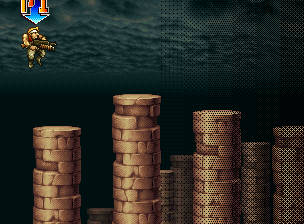
The same as the second-to-last area (5:6), but instead spawns you on one of the pillars. It is otherwise exactly the same, complete with its unused underside.
Region-exclusive Messages
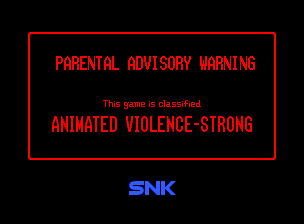
Depending on what BIOS is used, the message shown at startup will be different.
| US | Japan |
|---|---|
 |
 |
The Metal Slug series
| |
|---|---|
| Neo Geo | Metal Slug • Metal Slug 2 • Metal Slug X • Metal Slug 3 • Metal Slug 4 • Metal Slug 5 |
| Game Boy Advance | Metal Slug Advance |
| Atomiswave | Metal Slug 6 |
| Nintendo DS | Metal Slug 7 |
| PlayStation Portable | Metal Slug XX |
| See Also | |
| King of Fighters • Ikari Warriors | |
- Pages missing developer references
- Games developed by Playmore
- Games developed by Noise Factory
- Pages missing publisher references
- Games published by SNK Playmore
- Neo Geo games
- Arcade games
- Pages missing date references
- Games released in 2003
- Games released in November
- Games released on November 13
- Games with unused areas
- Games with unused graphics
- Games with debugging functions
- Games with hidden sound tests
- Games with hidden level selects
- Games with regional differences
- Pages requiring cleanup
- To do
- Metal Slug series
Cleanup > Pages missing date references
Cleanup > Pages missing developer references
Cleanup > Pages missing publisher references
Cleanup > Pages requiring cleanup
Cleanup > To do
Games > Games by content > Games with debugging functions
Games > Games by content > Games with hidden level selects
Games > Games by content > Games with hidden sound tests
Games > Games by content > Games with regional differences
Games > Games by content > Games with unused areas
Games > Games by content > Games with unused graphics
Games > Games by developer > Games developed by Noise Factory
Games > Games by developer > Games developed by Playmore
Games > Games by platform > Arcade games
Games > Games by platform > Neo Geo games
Games > Games by publisher > Games published by SNK Playmore
Games > Games by release date > Games released in 2003
Games > Games by release date > Games released in November
Games > Games by release date > Games released in November > Games released on November 13
Games > Games by series > Metal Slug series


