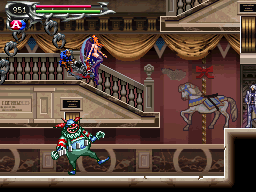
Proto:Castlevania: Dawn of Sorrow
This page details one or more prototype versions of Castlevania: Dawn of Sorrow.
A demo was created for Castlevania: Dawn of Sorrow.
Contents
Game Comparison
Compared to the final version, the demo version made some changes:
- The Seizure Warning and ESRB Rating (T) appear after the game starts up, followed by the game's logo, then the game boots up like it does in the final version.
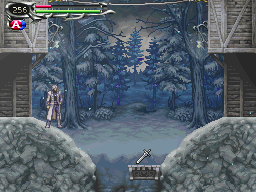
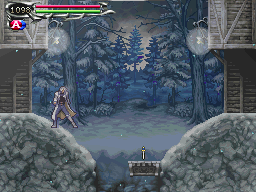
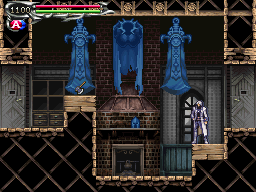
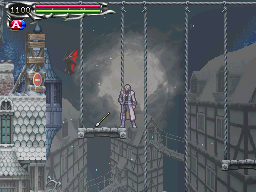
- Removed accessibility to all (but one) rooms by adding blockades and walls to various exits. The only room that was not blocked off (but can only be accessed by patching in abilities to jump further) is on the other side of the bridge. However, the exit on the far right side (leading to the Demon Guest House) is blocked off.
- Removed one blockade that is normally in front of a warp point near the beginning of the game.
- All enemies after the warp point had their HP reduced to reflect the lower level the player would have when entering the last area.
- Starting equipment is slightly different: the player starts with a Short Sword instead of a Knife.
- Game starts outside the castle instead of in town, so the player will not have three souls to start with.
| Demo | Final |
|---|---|
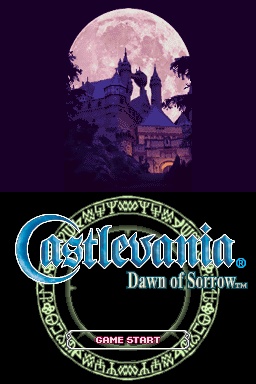
|

|
Only GAME START is available in the demo version.
Area Differences
This does not account for any barricades and walls added to limit access within the game.
Enemy Changes
Killer Clown's Soul Rarity:
| Demo | Final |
|---|---|
| * | ** |
Persephone's Soul, HP Recovery
| Demo | Final |
|---|---|
| +1, all levels. | +2, Levels 1-4
+4, Levels 5-8 +6, Level 9 |
Persephone's soul cannot be obtained under normal circumstances.
Level/Experience Formula
Experience uses a fixed incremental system. The increment itself increases by 18(final) with each level up, which is added to the NEXT value.
So for the amount of experience for the Next Level EXP, it goes:
Current EXP Needs + 28 + (18 * Current Level)
| Demo | Final |
|---|---|
| Next Level EXP = Current EXP Needs + 20 + (12 * Current Level)
Does not apply to levels 1 and 2. |
Next Level EXP = Current EXP Needs + 28 + (18 * Current Level)
Does not apply to level 1. |
Chart Sample
| Demo | Final | |||
|---|---|---|---|---|
| Level | EXP | NEXT | EXP | NEXT |
| 1 | 0 | 36 | 0 | 48 |
| 2 | 36 | 60 | 48 | 84 |
| 3 | 96 | 104 | 132 | 148 |
| 4 | 200 | 160 | 280 | 230 |
| 5 | 360 | 228 | 510 | 330 |
| 6 | 588 | 308 | 840 | 448 |
| 7 | 896 | 400 | 1288 | 584 |
| 8 | 1296 | 504 | 1872 | 738 |
| 9 | 1800 | 620 | 2610 | 910 |
| 10 | 2420 | 748 | 3520 | 1100 |
| 20 | 17640 | 2688 | 26040 | 3990 |
| 30 | 57660 | 5828 | 85560 | 8680 |
| 40 | 134480 | 10168 | 200080 | 15170 |
| 50 | 260100 | 15708 | 387600 | 23460 |
| 60 | 446520 | 22448 | 666120 | 33550 |
| 70 | 705740 | 30388 | 1053640 | 45440 |
| 80 | 1049760 | 39528 | 1568160 | 59130 |
| 90 | 1490580 | 49868 | 2227680 | 74620 |
| 99 | 1980000 | 0 | 2960100 | 0 |
In short, a lot less EXP is required to level up in the demo version.
Text Comparison
| Demo | Final |
|---|---|
| (Pickup Weapon / Item) | |
| Press START to display menu screen. |
N/A
|
| (Save Room) | |
| Save Room
To restore HP and MP, press You cannot save the game data |
Save Room
Press ↑ in front of the statue to |
| (Soma encounters two familiar faces) | |
| Soma Cruz
Huh? Those two... Yoko Belnades Julius Belmont I just remembered something. Yoko Belnades (Julius escapes) Yoko Belnades Oh, forget it... Here, take this. (Receives Magic Seal 1) Soma Cruz Yoko Belnades Soma Cruz Yoko Belnades Soma Cruz Yoko Belnades (Option: Sure, I'll give it a try.) Yoko Belnades Okay, now you try it. (Success) (Failure) The small circles indicate Oh, yes, and you also have Soma Cruz. Yoko Belnades (Option: Okay, once more) Yoko Belnades (Option: No, that's okay. / No, it's okay.) Yoko Belnades (Continuing on) Yoko Belnades You can practice drawing If you're not sure how Soma Cruz Yoko Belnades Oh, remember we ran into I'll be with you. Soma Cruz |
Soma Cruz Huh? Those two... Yoko Belnades Julius Belmont Soma Cruz Yoko Belnades I'm investigating with Julius Belmont If the darkness draws you in... Soma Cruz Julius Belmont Yoko Belnades Soma Cruz I'm not gonna stop Julius Belmont Then, I have nothing more Yoko Belnades Julius Belmont Yoko Belnades Julius Belmont Yoko Belnades (Julius escapes) Yoko Belnades I bet you have no intention Soma Cruz Yoko Belnades (Receives Magic Seal 1) Soma Cruz Yoko Belnades Soma Cruz Yoko Belnades Monsters exposed to that Soma Cruz Yoko Belnades Want to practice using it? (Option: Sure, I'll give it a try.) Yoko Belnades Okay, now you try it. (Success)
Yoko Belnades (Failure)
Yoko Belnades The small circles indicate Oh, yes, and you also have Soma Cruz Want to try again? (Option: Okay, once more) Yoko Belnades (Option: No, that's okay. / No, it's okay.) Yoko Belnades (Continuing on) Yoko Belnades You can practice drawing If you're not sure how Soma Cruz Yoko Belnades Okay, now... Let's go, Soma. Soma Cruz Yoko Belnades Only Julius could get in We should go back and find Soma Cruz Yoko Belnades Will you escort me? Soma Cruz Yoko Belnades |
| (1st Sealed Door) | |
| Yoko Belnades Yes, here it is! Most likely, you'll need a Just be calm and focus. Soma Cruz |
Yoko Belnades This door... Most likely, you'll need a Just be calm and focus. Soma Cruz |
| (After Flying Armor is defeated) | |
| Yoko Belnades You did it! Soma Cruz. Yoko Belnades Soma Cruz. Yoko Belnades Once you find the right Soma Cruz. Yoko Belnades Yoko Belnades |
Yoko Belnades You did it! Soma Cruz. Yoko Belnades Soma Cruz. Yoko Belnades Soma Cruz. Yoko Belnades If they don't, the gates to Soma Cruz. Yoko Belnades Soma Cruz. Yoko Belnades Julius may have some new And Soma, please don't do Soma Cruz. (Further Diuscussion) Yoko Belnades |
Various spelling and grammar errors were left intact.
Graphics Comparison
| Demo | Final |
|---|---|

|

|
The two versions used different screens for when Soma lost all HP. The demo also used the Game Over screen after defeating Puppet Master.
Possible Glitch
In the room past the drawbridge, a Skeleton Ape will appear (same as in the normal game). While rare, it is possible the enemy will not die properly, continue to move around the map, but it will not impede Soma, nor will it receive or do any damage.
