If you appreciate the work done within the wiki, please consider supporting The Cutting Room Floor on Patreon. Thanks for all your support!
Proto:Crash Bandicoot/April 8th, 1996 build/Level Differences
Jump to navigation
Jump to search
This is a sub-page of Proto:Crash Bandicoot/April 8th, 1996 build.
Contents
- 1 Level Arrangement
- 2 Levels
- 2.1 N. Sanity Beach
- 2.2 Jungle Rollers
- 2.3 The Great Gate
- 2.4 Hog Wild
- 2.5 Upstream
- 2.6 Papu Papu
- 2.7 Rolling Stones
- 2.8 Boulders
- 2.9 Native Fortress
- 2.10 Up the Creek
- 2.11 Ripper Roo
- 2.12 The Lost City
- 2.13 Temple Ruins
- 2.14 Boulder Dash
- 2.15 Sunset Vista
- 2.16 Jaws of Darkness
- 2.17 Koala Kong
- 2.18 Cortex Power
- 2.19 Heavy Machinery
- 2.20 Generator Room
- 2.21 Toxic Waste
- 2.22 Pinstripe Potoroo
- 2.23 Road to Nowhere
- 2.24 The High Road
- 2.25 Lights Out
- 2.26 Slippery Climb
- 2.27 Nitrus Brio
- 2.28 The Lab
- 2.29 Fumbling in the Dark
- 2.30 Dr. Neo Cortex
Level Arrangement
The level arrangement differs considerably to the final order. The tentative order as follows, with differences emphasized on the table in bold:
| April 8 | Final | |
|---|---|---|
| The First Island | N. Sanity Beach Jungle Rollers The Great Gate Hog Wild Upstream Papu Papu Rolling Stones Boulders Native Fortress Up the Creek Ripper Roo |
N. Sanity Beach Jungle Rollers The Great Gate Boulders Upstream Papu Papu Rolling Stones Hog Wild Native Fortress |
| The Second Island | The Lost City Temple Ruins Boulder Dash Sunset Vista Jaws of Darkness Koala Kong |
Up the Creek Ripper Roo The Lost City Temple Ruins Road to Nowhere Boulder Dash Whole Hog Sunset Vista Koala Kong |
| The Third Island | Cortex Power Heavy Machinery Generator Room Toxic Waste Pinstripe Potoroo Road to Nowhere The High Road Lights Out Slippery Climb Nitrus Brio The Lab Fumbling in the Dark levelH (not present in disc) Stormy Ascent Dr. Neo Cortex |
Heavy Machinery Cortex Power Generator Room Toxic Waste Pinstripe Potoroo The High Road Slippery Climb Lights Out Fumbling in the Dark Jaws of Darkness Castle Machinery Nitrus Brio The Lab The Great Hall Dr. Neo Cortex |
- Boulders and Hog Wild were switched around (likely due to difficulty balance, as Boulders is considered one of the easiest levels in the game).
- Up the Creek and Ripper Roo conclude the first island as opposed to starting off the second.
- Jaws of Darkness was originally situated on the second island before being relocated midway through the third. Jaws of Darkness being a ruin-themed level in the same style as Temple Ruins would fit better in its original position, amongst others, but again, difficulty likely pushed it to the third island. Road to Nowhere underwent the opposite shift, initially a very late level before being moved to an earlier spot between Temple Ruins and Boulder Dash.
- Cortex Power comes before Heavy Machinery and thus serving as the first level of the third island. Seeing as the level starts before Crash moves inside the building, this actually makes sense compared to the final where Crash sort of just starts inside an industrial location.
- Slippery Climb comes after Lights Out, seamlessly blending into Cortex Castle and directly leading to Nitrus Brio as opposed to just kind of coming after The High Road. Seeing how Stormy Ascent, which shares the same theme, leads directly to Neo Cortex in the prototype, it serves as a nice parallel in terms of having to climb up Cortex Castle to fight both doctors.
- Fumbling in the Dark serves as a normal level as opposed to a hidden one, likely due to the lack of functional Cortex bonus rounds, which meant the concept of hidden levels and keys did not exist at this point.
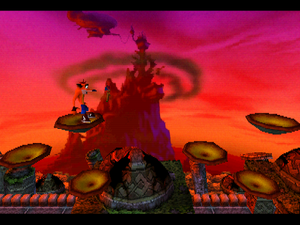
Additionally, the prototype features the infamous unused level Stormy Ascent as the penultimate level of the game. Whole Hog and Castle Machinery are also exempt in the prototype because, as previously mentioned, the Cortex bonus rounds (and therefore the key which would have unlocked Whole Hog) were not yet developed.
Levels
N. Sanity Beach
- There is an extra basic crate at the beginning of the level. The crates are also more spaced.
| April 8 | Final |
|---|---|
 |
 |
- There is an extra hole, and the ? crate is placed further to the left side.
- The ? crate contains a single fruit instead.
- The basic crate ahead is also placed further to the left side.
- These two stack of crates are placed further to the right side.
- The second Aku Aku crate and the basic crate are placed further to the sides.
- The ? crate contains single fruit only
- There is another layer of crates in the first stack of basic crates during the stone stairs climb.
- The second stack of crates is taller, also featuring an extra layer of basic crates.
- There are two bounce crates on each side of the first checkpoint.
- The wall of basic crates before the split-path contains an extra layer.
- The beginning of the left path contains two arrow crates with bounce ones on top.
- The beginning of the right path contains a basic crate on the left, and a pile of two ? crates on the right.
- The crates at the end of the left path are placed further away from each other in the sides. The right one is also clipping through the wall.
- The final ? crate is placed further to the left side.
Jungle Rollers
- At the beginning of the level, the arrow with a bounce crate are placed further ahead. Aku Aku crate is placed next to the player's spawn point, and the TNT is missing.
- The ? crate containing the first Tawna token is placed further to the left.
- After the second rolling stone, the TNT puzzle was placed here instead, on the left, while there is an extra a pile of two crates on the right.
- The inside of the building which houses the green gem path looks much different in this build, with deep orange walls as opposed to the gray and blue walls present in the final game.
- There is an extra basic crate next to the ? crate containing the second Tawna token.
The Great Gate
- At the beginning of the level, the pile of ? and basic crates are placed on the right side of the scenery.
- There is an extra basic crate on the right, in the first climb section.
- The floating Aku Aku crate is placed further to the left.
- The crate formation where the second Tawna token is located contains an iron crate in the middle, and a TNT crate on the bottom.
- The final ? crate containing the third Tawna token is placed after the last spiky pole.
| April 8 | Final |
|---|---|
 |
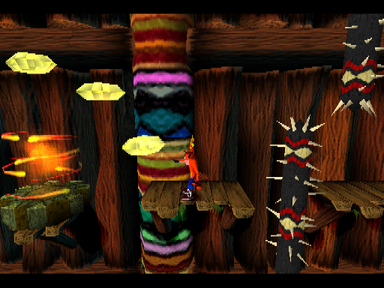 |
- The final set of hazards are arranged quite differently - two slippery platforms with a torch pad wedged between them are placed right before the exit portal. This arrangement was removed and the exit portal was moved forward slightly in the final game, likely to accommodate the revised gem path.
- The yellow gem path is missing.
Hog Wild
- While the level layout is mostly identical to what is seen in the retail game, the surrounding geometry is less detailed, with far more repeating huts on either side of the level and no sun-patterned doors decorating the level. The final version would also add a number of thick trees, totem poles and foliage to further embellish the level.
- The warthog has only 1 sound effect for when it jumps - a low pitched "snorting" sound which isn't present in the final game at all.
- The shielded tribesmen have a simpler weaving animation, which was updated in the final game to be bouncier and more dynamic.
| April 8 | Final |
|---|---|
 |
 |
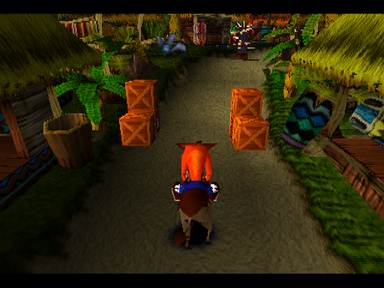
- The crates are arranged differently, and if gems had been implemented in this build it would be impossible to collect because at one point there are two sets of boxes on each side of the level.
- Two shielded tribesmen are present in the closing segment of the level. Only one remained in the final game.
- There is no curtain at the end of the level. You can see the warthog simply disappear and Crash being transported to another level.
- There is a bug where, if you fall into a pit, the trotting noise continues. You can continue to "stack" the trotting sound effects by consecutively falling into more pits.
Upstream
- The Aku Aku crate at the very beginning of the level is completely offscreen, though it can still be broken. In the final it was moved upward a little bit so you could see it right from the get-go.
- A checkpoint crate is missing after the first waterfall climb.
- The extra life and second Tawna token crates are switched.
- An Aku Aku crate is missing above the second life crate.
- Next to the second waterfall climb, there is a ! switch on the left side of the scenery that triggers lily pads backtracking to the platform before the waterfall, which activates two new crates, an interesting function that is only seen in Up the Creek in the final game. This would be replaced with the orange gem path.
- The ? crate that would contain the third Tawna token is missing in the final game.
- The level is longer than the in the final game. Since there are no gems, the first exit does not exist and the level just continues on normally, which would later be become the gem path.
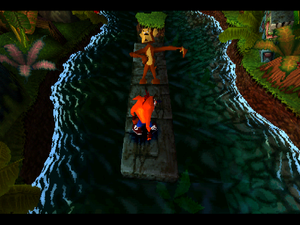
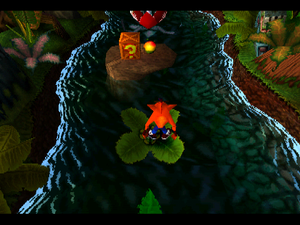
- The final segment was cut down in size considerably in the final game, leaving a removed segment of the level:
- Starting with a stone platform with a monkey on it, leading to a grassy platform with two leaves ahead. They lead to a blue venus fly trap.
- Leading to a red venus fly trap and another lily pad ahead, taking to another platform containing the last ? crate, which contains the third Tawna token.
- Afterwards, there is another blue venus fly trap and a leaf ahead, leading to the end of the level.
Papu Papu
- You can skip the cutscene and move around until Papu Papu wakes up.
- The wall torches don't hurt Crash.
- Papu Papu lacks a knockback collision. You can also pass through his body while performing a spin.
- Papu Papu doesn't blink nor hurt the player after taking a hit. Instead, jumping on his staff will just bounce the player.
- Papu Papu's swing attack can hurt Crash even if he is standing on his chair.
- The sound effects for Papu's stick slamming the ground, and Papu Papu himself toppling over in defeat aren't present in this build, and so re-use a "slam" sound file instead.
Rolling Stones
- There are no N. Brio tokens.
- There is a pit at the beginning of the level that is not in the final game.
- The wall of crates is placed after the first rolling stone and features two POW crates.
- The pit before the second rolling hazards is larger.
- The arrow with a bounce crate is placed right after that pit instead, but due to a bug, the bounce crate despawns when approaching it.
- There is a ? crate afterwards, instead of a life crate.
- The first checkpoint crate is missing afterwards.
- The explosive crates holding an Aku Aku crate in the middle are POWs instead of TNTs.
- The second checkpoint crate is placed where the second Tawna token would be located in the final game, being the only checkpoint present in this build.
- The bounce crate was replaced by a ? one containing the second Tawna token.
- The man-eating plant is placed further ahead, the arrow with a bounce crate is placed further to the right side, and the POW crate is present ahead instead of an Aku Aku crate. There are also four ? crates floating over the pit, which by exploding the POW will also break those other crates - which the third one contains the second Tawna token.
- The ? crate that would be present right ahead containing the third Tawna token in the final game is missing.
- From this point onwards, the following collapsing stone platforms were replaced with standard stationary ones in the final game.
| April 8 | Final |
|---|---|
 |
 |
- The grassy platform before where the gem path would be located was replaced with a normal ground in the final game.
- The blue gem path is missing. The pit that Crash accesses to get the hidden crates is just a normal pit.
Boulders
- Before the second boulder chase, there is a basic and ? crates next to each other. They were changed to a bounce and life crate respectively. The ? crate is also placed further ahead.
- The basic crate is placed further to the left.
- There are no basic crates during the the second boulder chase.
- Before the third boulder chase, there is a basic crate on the left, and a formation of two ? crates with a TNT in the center.
- There are two extra fences where there would be the two basic crates during the third boulder chase.
- The pink foliage at the end of the level has thinner edges akin to thorns in this build. The final game gives them a thicker appearance in line with the rest of the leaves surrounding it.
Native Fortress
- There is an extra stack of two basic crates at the beginning of the level; the final only has two. The second one containing Tawna token is also placed on the right side.
- The Aku Aku crate and ? crate you reach from bouncing on the turtles are not present.
- The first checkpoint crate is missing. Instead, there are two turtles.
- Before the first climb, there is a bounce crate on the left side instead of a ? crate with the second Tawna token.
- The Wumpa placement on the lowest iron arrow crates is different. The ? crate with the second Tawna token is instead placed on mid-air.
- The second checkpoint crate is missing.
- A life crate above the first shielded trisbesman is missing.
- There is a ? crate instead of a second life crate in the pile of crates.
- Before the second climb, the ? crate with the third Tawna token is missing.
- A basic crate is present during the climb, instead.
- The fourth checkpoint crate is missing.
- A spiky pole was removed and a life crate was added.
- The gem path airborne route is missing.
- A shielded tribesman is present where the gem path would be located above.
- A arrow with a bounce was removed before the last torch pads.
- The stack of life crates is missing at the end of the level.
- A floating life crate next to the exit portal is missing.
Up the Creek
- A life crate is missing at the beginning of the level.
- The first ? crate containing the first Tawna token is a bounce crate instead.
- The first checkpoint crate is missing. A river fish after the platform is also removed.
- A life crate over the grassy platform after the second waterfall climb is missing. The platform is also disconnected from the slippery log.
- Afterwards, a blue venus fly trap is present after the green one. It was replaced by a lily pad in the final game.
- Next to the third waterfall climb, the TNT crate that would be spawned by the ! switch is missing.
- After the ! switch, there is a pile of two basic crates with a bounce one in the middle. In the final game, there is a life crate and the ? crate containing the second Tawna token.
| April 8 | Final |
|---|---|
 |
 |
- Two iron crate platforms suspended over the water are present near the end of the level. These were replaced with lily pads in the final game.
- After the iron crates, a life crate is suspended over the water. In the final game, a stone platform holding that crate was added. Another lily pad is present afterwards.
- The Tawna bonus round is the same as in Native Fortress.
Ripper Roo
- Ripper Roo lacks the jumping sound effects.
- Ripper Roo's laugh is slowed down.
- Crates periodically drop onto platforms, seemingly at random, with TNT crates spawning on the platform Crash is standing on if he waits on it for longer than 5 seconds. This feature of the battle was scrapped in the final build.
The Lost City
- There are two Cortex tokens and only one N. Brio token in this level, rendering you incapable of accessing either bonus round. The final game correctly has three N. Brio tokens.
- The wall of iron crates situated at the beginning of the level is totally absent at this point.
- Stack of three life crates and a bounce one are missing inside the passage. Instead, there is just a bounce one in the left corner.
- An extra stone platform ahead is missing.
- The first checkpoint crate is missing.
- A floating extra life and an extra stone platform are missing ahead.
- A floating life was moved further to the right.
- There is a basic crate instead of ? one inside the passage.
- The second checkpoint crate is missing, along with an extra stone platform.
- The second bonus token is the Cortex one. Both extra life and token are also switched.
- The floating floor next to the pusher blocks in the first climb section is just two rectangular platforms.
- An extra life is missing in the climb, next to the ! switch.
- There is an extra torch above the ! switch, making it harder to jump on it.
- The first lizard is green jumping one instead of red.
- An extra life is missing in the top.
- There are two green jumping lizards on each platform instead of a red one.
- The fourth checkpoint crate is missing.
- Another extra life is missing, and the ovular platform is smaller.
- The fourth lizard is red instead of green.
- The following platform is also smaller.
- There are two extra decorative pillars in the level scenery afterwards.
- The ? crate with the third Tawna token is missing. There is also an extra decorative pillar in the scenery.
- The ovular platform ahead was changed to a pair of rectangular ones, plus with a stack of two life crates.
- The last two lizards are red instead of green.
- The third Tawna token is inside the activable ? crate on the left side.
Temple Ruins
- This level features two Tawna tokens. There are no tokens in the final game.
- The decorative torches have a very audible sound effect which will stack on top of one another in corridor areas. This does not affect Jaws of Darkness, however.
- The first checkpoint crate is missing, including an extra platform that would be behind of it.
- The first Tawna token is located in the first crushing walls section.
- An extra basic crate is present right ahead.
- The second Tawna token is located before the first checkpoint (the second one in the final). The bottom side of the platform is closed off.
- Respawning in the second checkpoint will spawn Crash in a moving platform.
- The invisible box bridge is composed entirely of basic crates, as opposed to a mix of a few basic crates and mostly iron ones. The bottom side of the platform is closed off.
- The third checkpoint crate is missing, including an extra platform. Instead, there are two smaller rectangular platforms ahead.
- A life crate right is missing ahead.
- Another life crate is missing before the moving platforms, and there is only a round platform instead of two rectangular ones where the life would be located.
- After the rotating platforms section, two life crates are missing, which the one in the right is a basic one instead.
- The last crate is a bounce crate instead of basic one.
- The third Tawna token is missing, making it impossible to access the bonus round.
Boulder Dash
- At the beginning, left crate is a basic instead of a bounce one, and the pile of two crates is placed further behind, and the bottom one is a basic crate instead of a life one.
- Before the final chase section, the crate arrangement is different: the TNT is placed in the middle as opposed in the bottom, and the crate on the right is a basic one instead of a bounce one.
- The gem path missing.
- The exit portal placed in the middle.
Sunset Vista
- The life crate at the beginning is missing. The wall is also smaller.
- The Aku Aku crate is missing inside the passage after the first pusher blocks section.
- The first lizard is a red one instead of green.
- An extra stone platform is missing on the last iguana before the first checkpoint section.
- The first checkpoint and life crates are missing.
- In the first set of rotating platforms, there is an extra platform with a jumping green lizard in the center.
- An extra stone platform is missing with a stack of two life crates between the two set of rotating platforms.
- In the second set of rotating platforms, an extra platform with an iguana is in the center.
- A log platform is missing afterwards.
- The following section contains a bat spawner that was removed in the final game.
- The second checkpoint is placed further ahead. Instead, four extra pusher blocks are present.
- A red lizard is present instead of a green one. Also, the first checkpoint crate is placed here instead. The lizard will clip through it when jumping from platform to platform.
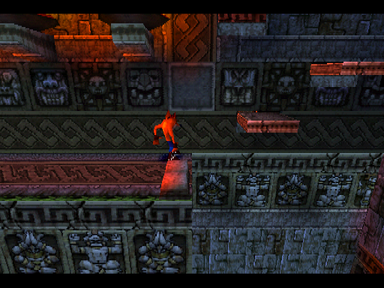
- In the first climb section, there is an extra torch on the left side, and the third checkpoint crate is missing.
- The platform above the torches was changed from a single rectangular one to a proper floor.
- The pile of crates in the climb is inverted - the ? crate is on the top, while the bounce one is on the bottom. The ? one also lacks the first Tawna token.
- The bounce crate and Wumpa fruits inside the passage are misplaced on mid-air after the climb.
- The edge before the second set of pressure platforms was expanded in the final game.
- An extra rectangular platform is missing on the right edge before the second checkpoint (fourth in final). The jumping green lizard was also removed.
| April 8 | Final |
|---|---|
 |
 |
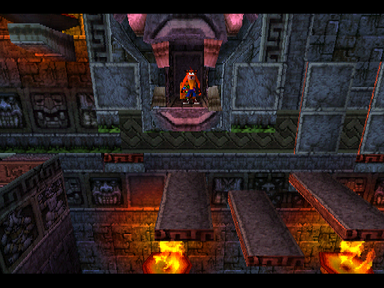
- There is an inside the passage section containing an Aku Aku crate slightly before the second climb that was removed in the final game.
- The stack of crates before the second climb is missing.
- The left bat is placed further below, and the rectangular platform below it is missing. Also, the timed platform has a faster pattern.
- The pile of crate in the climb has a ? crate on the top instead of another bounce one.
- After the second climb, the fifth checkpoint crate is placed further ahead, inside the ruins building. There are two lizards ahead, and the outlined crates are missing.
- The extra Aku Aku mask is also missing.
- After the pusher blocks, the spawn and despawn points of the swarm of bats are not placed next to the hanging bats.
- The first set of pusher blocks has a different pattern.
- Afterwards, there is a downslope instead of a stairway of two basic crates leading to the top of the following pusher blocks to collect the second Cortex token and an extra life.
- A bat spawner was removed afterwards. The Aku Aku crate in the first platform is missing and the iguana was replaced by a life crate. The platform is also lower.
- The sixth checkpoint and the ? crate with the second Tawna token are missing.
- The pile of crates with an iron one is missing in the scenery between two walls.
- A bat spawner was removed in the section with two sets of rotating platforms.
- The ? crate with the third Cortex token is missing behind the pillars in the background.
| April 8 | Final |
|---|---|
 |
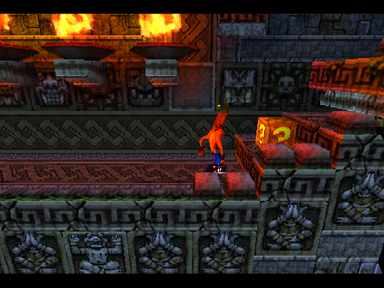 |
- There are two torches instead of three, and they are placed higher up. The beginning of the third climb contains timed platforms that were changed to a staircase instead. The ? crate with the third Tawna token is also missing.
- The rectangular platforms were changed to a proper floor in the final game in the climb.
- The timed platforms at the beginning of the third climb have a faster pattern.
- The seventh checkpoint at the middle of the third climb is missing.
- An extra pile of crates is present at the top, including a removed bat spawner.
| April 8 | Final |
|---|---|
 |
 |
- The checkpoint is placed further ahead in the background. Notice how it is also misplaced.
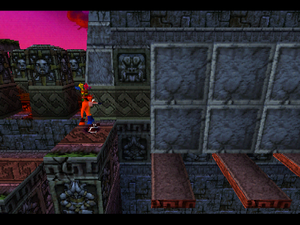
- The following segments have drastic changes, with a significant amount of object arrangements are used here which are not present in the final game - these include isolated pressure platforms and rotating series of torches.
- There is a pusher blocks section ahead that was removed in the final game.
- After the pusher blocks, there will be a rotating platforms section. The first set contains four stone platforms that spin faster. Afterwards, the set of platforms are all made of torches.
- After that, there will be another pusher blocks section with longer timed platforms below, followed by a set of four longer timed platforms, including a bat spawner. There will be also a misplaced pile of crates in the background.
- Again, there is a final platforming section featuring a set of pressure platforms with two rotating ones inside, followed by another two sets of rotating torches.
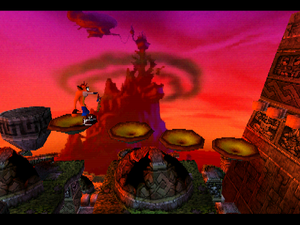
- It ends up with three ovular platforms with a red lizard jumping on them, although the final crates are missing.
Jaws of Darkness
- There are no Cortex tokens in this level.
- The basic crate in the corridor was changed to a life one.
- A rectangular platform past the first cave section was moved forward slightly in the final game so that Crash can safely walk onto a circular pad rather than being forced to jump onto it from a distance.
- The arrowslits were removed before the first checkpoint crate. The bottom side of the platform is closed off.
- The ? crate next to first checkpoint contains the first Tawna token, which was replaced by a life in the final game.
- The basic crate in the downside section right ahead was changed to a ? one with the first Tawna token. The bottom side of the platform is also closed off.
- The round platform before the moving platforms section was changed to two rectangular ones.
- An invisible bridge of basic crates is present where the gem path would be on this level. However, it only goes as far as where the first gem platform would take you - the bottom side of the platform is closed off in this build.
- The second Tawna token is in the ? crate instead.
| April 8 | Final |
|---|---|
 |
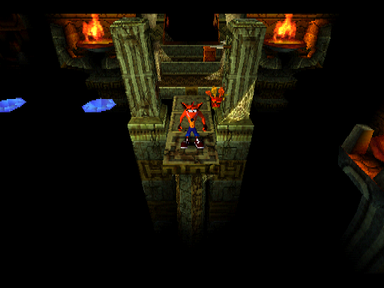 |
- The arrowslits hazard is missing before the second corridor.
- There is a POW crate instead of a TNT one where the second Cortex token would be located.
- The third Tawna token is in the secret path where the third Cortex token would be located.
- Before the last torch pad, there is a basic crate instead of ? one with the second Tawna token. The bottom side of the platform is also closed off.
- There is a basic crate in the final corridor instead of a ? one with the third Tawna token.
- There is an extra ? crate right before the exit portal.
Koala Kong
- Koala Kong takes 5 hits to defeat as opposed to 4.
- Crash spawns in the center.
- No minecart sound effects.
- Boulder destruction sound effect uses the generic ! switch sound.
- Lava uses the generic death animation.
- Corresponding with the above change, a final phase where 6 TNT drop down in quick sequence was removed.
- The boulders you use to damage Koala Kong allegedly have to be aimed towards him. They automatically target where Kong is in the final game.
- The crystals are colored a bright purple as opposed to green.
Cortex Power
- The camera is set on a upright view rather than a top-down view.
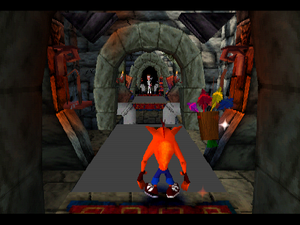
- The entrance to Cortex Power looks very different, with a textureless brown & red door opening up to reveal another door featuring the same Pinstripe "Safety first!" texture used in Generator Room. The final game removes the first entrance, and switches the Pinstripe style door with the uniform "N" door used throughout the level.
- The mafia slim lacks a laugh sound effect and features Pinstripe's gunshot sound effects, including the riccochet noises.
- The first split-path contains two basic crates on each side.
- The checkpoint on the right path is missing.
- Before the split-path on the right path, there is a door.
- The life crates at the end of the split-paths are missing before the final checkpoint crate.
| April 8 | Final |
|---|---|
 |
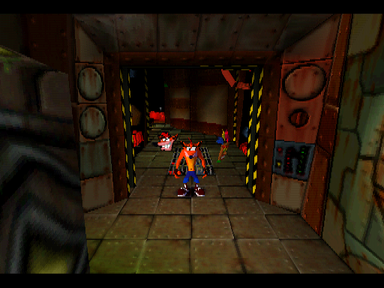 |
- Next to the mafia slim in the mafia slim section on the first left path, there is a checkpoint crate on the left, and a pile of crates on the right. The door behind is also different.
- After that, there is a set of small electricity hazards that were removed, replaced by a single extra life instead.
- A basic crate was also removed ahead, and the corridor is narrower.
- Before the following split-path on the left path, there is a door.
- The route normally accessible via the blue gem has much narrower pits at both ends, which was changed to accommodate the gem platforms.
| April 8 | Final |
|---|---|
 |
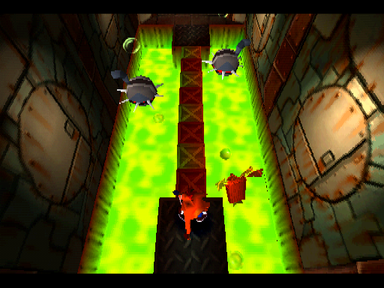 |
- The gem path lacks the bridge of TNT crates. In its place is a rather bland corridor with an extra platform above a acid pool. There is also one spiked saucer instead of two.
| April 8 | Final |
|---|---|
| 384px | 384px |
- The end of the last right split-path contains an extra section with a mafia slim, followed by a set of hot pipes that were replaced in the final game with a set of small electricity hazards.
- The final bridge doesn't feature two crates enabled by default, which means if the player doesn't trigger the ! switch, they won't be able to complete the level. It also contains a spiked robot.
Heavy Machinery
- The trampoline doesn't automatically spring when walking on it.
- The hidden area you drop down into early on in the level is a shortcut which allows you to skip to where the second checkpoint would be in the final game. It would later be repurposed into a secret area with a platform transporting you back to where you initially fell.
- There are two basic crates between the first falling platform.
- The extra Aku Aku mask is placed in the middle of the pit, featuring a Wumpa fruit on his sides.
- The hole is also larger, since a platform is missing on the right edge.
- The TNT is placed on the middle afterwards.
- There are two more TNT crates ahead, which were replaced by a single ? crate containing the first Tawna token. An extra hot pipe was removed, and a cold pipe was added on the edge.
- A hot pipe was removed in favor of another ? crate containing the second Brio token.
- The first arrow with a bounce crate was moved further to the right.
- After the first conveyor belt, an extra platform was added on the edge, and the crate was moved to it.
- After the first descent to the lower floor, the pile of Wumpa fruits and spiked saucer are switched in the stairs. The last platform is also placed further down.
- The spiked saucer in the falling platforms section goes up and down. In the final game, it's static.
- The ? crate ahead containing the second Tawna token in the final game is missing.
- The first set of steam vents have a different pattern.
- After the first steam vents, a hot pipe was replaced by a life crate.
- The wall where the third Tawna token would be located in the final game extends itself leftwards until the end of the area. There are two steam vents, a falling platform, and another steam vent leading to a final platform containing a big pile of crates with the first Tawna token and a life crate on the top.
- A platform is present at the end that takes back the player.
- Two falling platforms are missing before the first trampoline.
- The crate placement in the trampoline section is different. There is a 2x3 stack of basic crates with three ones above them, with a ? contaning the second Tawna token and Aku Aku on the top. In the final game, it's just a straight pile of crates.
- More falling platforms are missing afterwards.
- The camera after the first trampoline until the hot pipes gets zoomed out.
- An extra cold pipe was added in the middle, in the second conveyor belt section.
- The set of steam vents ahead have a slower pattern.
- The part where it contains the third Brio token in the final game holds the third Tawna token instead. There is also two TNTs below the ? crate.
- A hot pipe on the left side was removed in the final climb.
- A pile of three life crates is missing next to the exit portal.
Generator Room
- The scenery doesn't electrocute Crash unlike in the final game, and there is more of it.
- The frozen pipes have a slightly different appearance.
- The small sparks around the pipes poles aren't animated.
- There is an extra surveillance robot before the ! switch.
- The falling platform returns almost instantly.
- The first Aku Aku crate was replaced by a ? one with the first Tawna token.
- The bridge activated by the ! switch is made of basic crates only.
- The first checkpoint crate with a ? crate above are missing.
- A single Wumpa fruit was replaced by a ? crate with the second Tawna token.
- A checkpoint crate is placed in the edge, next to where the ? crate with the third Tawna token would be present in the final game.
- A spiked saucer is placed between the first and second vertical moving platform, while a surveillance robot is placed between the second and third one.
- There is a vertical moving platform before leading to the moving one in the face camera section.
- The moving platform ahead moves back and forth by default. In the final game, it's static until the player steps on it.
- An Aku Aku crate was removed afterwards.
- A generator was removed in the left side of the background.
- A life crate is missing in the stack of crates.
- The second spiked saucer moves slower afterwards.
- Two extra platforms are missing, including a surveillance robot.
| April 8 | Final |
|---|---|
 |
 |
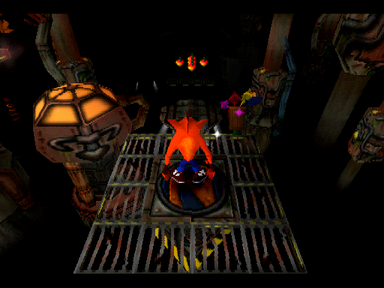
- The moving platform was replaced by a bridge in the area preceding the airborne pipes.
- The three life crates at the end of the level are missing.
- The floor textures at the end of the level are messed up.
Toxic Waste
- The light fixture textures are small and more abundant, and in some halls they are placed in the edges.
- Barrels feature a proper shadow, which were disabled in the final game.
- Touching the mafia fat won't hurt the player.
- The mafia fat lacks a laugh sound effect when throwing the barrels.
- The scenery in the sideways that drop the barrels to the mafia fat doesn't harm Crash.
- This level appears to be rather unstable in this build, causing frequent slowdown and even freezing outright on occasion.
- Barrels lack their appropriate sound effects, instead using the bounce sound as a placeholder.
- Bouncing barrels bounce lower than they do in the final game, leaving slightly less time for Crash to pass under them.
- There is ! switch above the acid pool on the left side in the second hall.
- The pile of crates on the sides are all basic ones in the third hall.
- There is a basic crate instead of two ? ones, which holds the first Tawna token in the final game.
- The basic crate on the left in the sixth hall was changed to a life one in the final game.
- In the ninth hall, there is a pile of crates with TNT in the middle, and two ? crates, which both of them contain Tawna tokens. It was changed to a single basic crate on a TNT.
- After the second checkpoint, there are two floating crates above the acid pool on the right side, plus an extra life above them. One of these crates holds the third Tawna token, which forces Crash to spawn over the acid pool it appears on after the bonus round, killing him indefinitely if he does not immediately jump after spawning.
- The ? crate in the penultimate hall is missing, which holds the third Tawna token in the final game.
Pinstripe Potoroo
- Pinstripe features a proper shadow, which was disabled in the final game.
- Pinstripe has a slightly randomized pattern, where sometimes he starts the fight jumping to the right side of the screen, rather than to the left.
- The ambient sounds produced by Pinstripe's gunshots and the generator in the background are significantly louder than in the final.
Road to Nowhere
- The ? crate in the TNT puzzle contains the first Tawna token.
- The first checkpoint and the two crates around are missing, and the crate arrangement is differet: there are two iron crates on each side, and the left one contains a pile of crates. The pile contains a POW, basic, and a arrow at the top. There is a life crate floating offscreen, which can be either destroyed by jumping on the arrow crate, or POW's explosion.
- In the third section, an extra life floating offscreen is missing.
- In the fourth section, the checkpoint is placed on the edge and the life crate along with the extra life are missing. Instead, there are two basic crates floating outside the bridge, with a POW in the middle.
| April 8 | Final |
|---|---|
 |
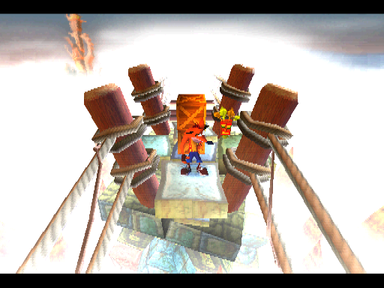 |
- In the fifth section, the two crates in the middle are missing. Instead, there is an arrow crate in the right side outside the bridge with a bounce crate above, and another ? one on the top.
- Gem path is missing.
| April 8 | Final |
|---|---|
 |
 |
- After the second checkpoint, there is a small platform of iron crates on the right side outside the bridge with four crates ahead.
- The third checkpoint is missing, along with an extra life in the seventh section.
- Before the eight section, a wild hog was removed in the final game.
- The eight section contains the third checkpoint instead, along with a basic crate. In the final game, there is just a ? crate.
- In the ninth section, there is a TNT puzzle with the third Tawna token in the middle. It was changed to a ? crate containing her token and a pile of two basic ones.
- While the gem path leading to the TNT puzzle is missing, the invisible bridge path at the end of the level can be accessed, even with gems not being implemented.
The High Road
- Instead of two extra lives on each side, there are two Wumpas fruits. But due to a glitch, they despawn when getting closer.
- The floor collision in the middle is not set properly, causing the player to fall through it sometimes.
- There are extra Wumpa fruits in the secret area.
- The arrow crate in the first section is made of wood instead of iron.
- In the second section, the ? crate next to the first checkpoint with the first Tawna token is missing, including an extra life.
| April 8 | Final |
|---|---|
 |
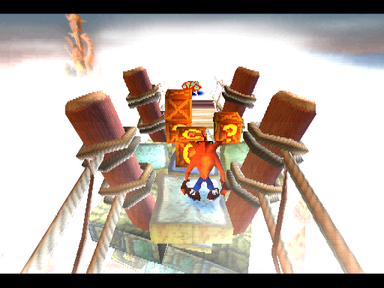 |
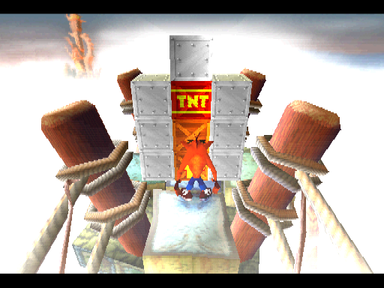
- The second checkpoint crate and the crates around it are missing in the third safe section. Instead, there is a TNT puzzle covered by an iron crate wall.
- In the fourth section, the second checkpoint (third one in final) is placed instead, and there is a wall of basic crates. It was changed to a single basic crate in the final game.
| April 8 | Final |
|---|---|
 |
 |
- Afterwards, two crates are placed in a hugely inconvenient position directly under a pair of crumbling planks. Needless to say, they were removed in the final game.
- The fourth checkpoint crate is missing. The basic crate was also replaced by a ? one here.
- There is a third checkpoint crate where the last ? crate containing the third Tawna token is located in the final game.
Lights Out
- The background is completely missing and marked by a bright grey void, making the level incredibly easy to navigate, even without any Aku Aku lights.
- The first checkpoint crate is missing.
- There are no life crates through the level.
- The game normally crashes about a third of the way through the level.
Slippery Climb
- The lightning flashes are red.
- The vulture uses the bounce sound effect when stepping on it.
- Vultures don't give a chain combo Wumpa fruit.
- This level features Tawna tokens as opposed to the Brio tokens seen in the final game.
- Evil hand enemies are colored a pale blue as opposed to bright orange, and the eyes are further away from each other.
- There is a spike in the center of the second pair of rotating platforms.
- There is a spike under the gap in the third pair of rotating platforms.
- Two collapsing stairs are bizarrely placed in the first V-shaped staircase.
- A spike on the top was removed in the section with two evil hand enemies.
- Afterwards, the spikes placed under the vulture are placed slightly upwards.
- There is a ? crate instead of a bounce one before the first climb, which contains the second Tawna token.
- A spike was removed before the collapsing stairs after the first elevator.
- The basic crates ahead are placed inside the gap instead.
- The spike under the second elevator is different.
- A spike was removed between the horizontal moving platform and the small staircase leading to the third elevator.
- The first checkpoint and the basic crate above are also placed inside the gap instead.
- A spike was removed next to the fourth elevator on the right side of the climb before the top.
- A spike was removed at the bottom of the collapsing stairs after the first lab assistant.
- A stationary platform is missing after the vulture. Instead, the following rotating platforms also move in a circular pattern surrounding a log.
- Removed gap with a life and basic crates in the third set of rotating platforms.
- The two basic crates ahead were replaced by a life crate and a ? one with the second Brio token.
- After the bonus, there are three instead of two rotating platforms.
- The second set of rotating platforms moves in a circular pattern surrounding a log in this build.
- The third set of rotating platforms are contains three instead of two platforms and moves faster.
- A vulture is missing afterwards.
- There is just one life crate at the end of the level, while the rest are just basic and ? ones.
Nitrus Brio
- The room is longer, going further behind.
- The lightning actually flashes the room pitch black instead of making it bright.
- Brio's health bar is represented differently - dots appear depending on the number of blobs onscreen, rather than showing how many hits Brio himself has taken.
- The blobs are red and invulnerable when spawned. After chasing Crash for a while, they stop and become green and vulnerable. Waiting too long during this phase makes them turn yellow, before quickly shifting to the red phase again.
- After Brio transforms, his health bar shows three remaining health points as in the final version, but you're supposed to hit him six times more to defeat him.
- The models for the blobs are less detailed, lacking the small cells inside.
- The decorative candles next to the desk are missing.
- An extra decorative beaker was added to both of the desks behind Brio.
- Taking a hit from the blobs won't knock them back away.
- Stomping on three blobs in a row you give you an extra life.
- Multiple glitches are present in this fight. One of these renders Crash incapable of defeating Brio if he comes too close to Crash's edge of the screen, as no slabs drop down to let you jump on Brio's head, while Brio himself is locked into perpetual forward & backward movement. The level also occasionally softlocks after defeating Brio, leaving the player stuck.
The Lab
- All boxes, with the exception of ! switches and checkpoint crates, are absent in this level.
- The floor and general background aesthetics of this level are very similar to the early version of dark levels, with decorative carpets and walls looking almost identical.
- Electricity sparks have a different pattern.
- Doors have more stone-like textures, as opposed to the grey metallic appearance seen in the final game.
- The doors from the first checkpoint onwards (except the last one) open up incredibly slowly when compared to the final game, requiring keen precision to make it past them.
- Certain parts of the level, including decorative pipes, the wooden trapdoor triggered by ! switches, and even certain parts of the scenery, are completely untextured.
- Electric lab assistants can only electrify you after you attack them or while they approach you as opposed to their electrification being timed, making them easier to approach. However, due to a glitch, they damage Crash if they are killed while he faces them, forcing Crash to turn around while spinning to avoid taking damage.
| April 8 | Final |
|---|---|
 |
 |
- The monitors at the start of the level have a completely different appearance, being thicker, rust orange as opposed to a faded grey, complete with brighter circular buttons, and a blank white center.
- Machines shown later in the level also look totally different, having a washed out grey color as opposed to the more vibrant blue coloration seen in the final game. The small displays on it also aren't animated.
- "N" barrels are colored a rust brown color as opposed to blue.
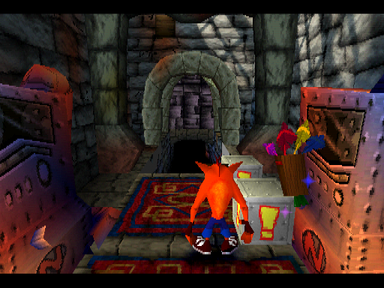
- The blobs are colored yellow instead of orange and turn green when defeated, which does not occur in the final game.
| April 8 | Final |
|---|---|
 |
 |
- This section contains two wooden trapdoors, where the first one is triggered by the first ! switch, while the second one triggers the door. In the final game, the door is triggered by the ! switch inside the first set of crates.
- Afterwards, the door frame decoration before the first electric lab assistant segment is missing.
- The door frame decoration after the electric lab assistant segment was moved after the two ! switches instead.
| April 8 | Final |
|---|---|
 |
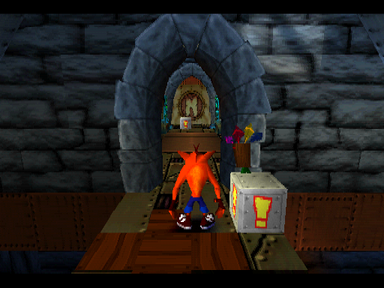 |
- After the second checkpoint, another ! switch is placed on the left side that triggers the door ahead, while the right one triggers the first wooden trapdoor. In the final game, the first trapdoor was replaced by a normal floor, with a door added, and one of the switches was placed ahead, inside the stack of TNT crates.
- Afterwards, there is a pit after the door, and the door frame is narrower and placed further ahead. The ! switch is also missing as the wooden floor before the second electric lab assistant is a timed one.
- The electric pole before the second electric lab assistant segment is also misplaced inside the wall.
- Afterwards, the pit is present before the door, and both ! switches are placed on the right side.
- The following electric poles have no electricity sparks present by them, although they can still harm Crash.
- The ending segment of the level is completely different, with the exit portal being revealed behind a closed door after a disappearing floor segment, in a corridor similar to the finishing corridor in Lights Out. The first section features two trapdoors with a beaker lab assistant at the end. Afterwards, there is another trapdoor leading to a misplaced electricity sparks before another trapdoor, leading to another beaker lab assistant and an electric fence without electricty sparks. The final game requires Crash to cross a bridge of TNT crates, with the exit portal being in a far more narrow doorway instead.
Fumbling in the Dark
- All changes from Lights Out apply, except for the background which is now black.
- The secret area right behind the start of the level is missing.
- This level is also rather unstable, with occasional slowdowns and freezes being common occurrences.
Dr. Neo Cortex
- The sound effects play at such low volume that is near impossible to hear it properly.
- The island has occasional explosions.
- Cortex has no dialogue or laughs.
- The level grants you a free Aku Aku pickup here. The final game gives you a golden Aku Aku for every boss fight, rendering this unnecessary.
- The orange shots were changed to purple ones in the final game.
- During the last phase, where Cortex only shoots a single green plasma blast, the blast is colored purple instead (but can still be spun).
- Dying on the fight will corrupt the game memory and will eventually crash the game.
- The island background stops rotating when Crash dies.
- There is no ending upon beating Cortex - it instead sends you back to the map, and corrupts the game's memory or crashes the game entirely. A fitting end.
