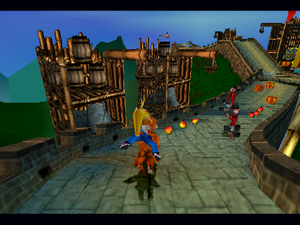
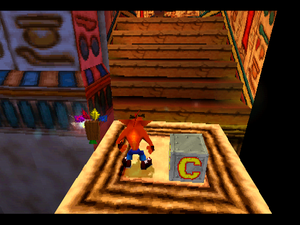
Proto:Crash Bandicoot: Warped/August 26th, 1998 build
This is a sub-page of Proto:Crash Bandicoot: Warped.
This prototype is documented on Hidden Palace.
The August 26th, 1998 prototype of Crash Bandicoot: Warped is a preview version of the game dated over a month and a half before the final NTSC-U release version. It was released on May 1st, 2021.
Contents
- 1 Cheat Features
- 2 General Differences
- 3 Warp Room
- 4 Level Differences
- 4.1 Toad Village
- 4.2 Under Pressure
- 4.3 Orient Express
- 4.4 Bone Yard
- 4.5 Tiny Tiger
- 4.6 Hang'em High
- 4.7 Hog Ride
- 4.8 Tomb Time
- 4.9 Midnight Run
- 4.10 Dingodile
- 4.11 Dino Might!
- 4.12 Deep Trouble
- 4.13 High Time
- 4.14 Road Crash
- 4.15 Double Header
- 4.16 N. Tropy
- 4.17 Sphynxinator
- 4.18 Bye Bye Blimps
- 4.19 Tell No Tales
- 4.20 Future Frenzy
- 4.21 Tomb Wader
- 4.22 N. Gin
- 4.23 Gone Tomorrow
- 4.24 Orange Asphalt
- 4.25 Flaming Passion
- 4.26 Mad Bombers
- 4.27 Bug Lite
- 4.28 N. Cortex
- 4.29 Ski Crazed
- 4.30 Area 51?
- 4.31 Rings of Power
- 4.32 Hot Coco
- 5 Soundtrack Differences
- 6 Unused Content
Cheat Features
Cheat Menu
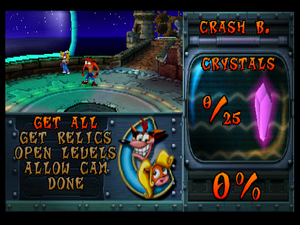
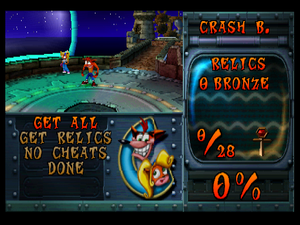
This build contains a small menu that can be accessed by inputting Up, Up, Down, Down, Left, Right, Left, Right, Circle while the game is paused. There are five features to be seen: GET ALL, GET RELICS, OPEN LEVELS, ALLOW CAM, and NO CHEATS.
- GET ALL: Gives 25 crystals and 25 Bronze relics from the start, as well as all colored gems and all abilities for Crash.
- Notably, Tomb Time is the only level where the crystal is not retrieved when enabling this. Instead, a crystal will be assigned to ID 09, which does not belong to any level.
- GET RELICS: Gives 25 Bronze relics from the start.
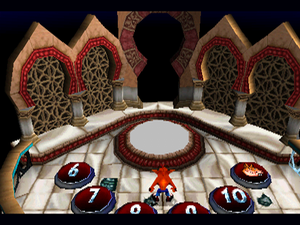
- OPEN LEVELS: Unlocks all areas of the warp room. Logically not available if you are not in the warp room.
- ALLOW CAM: Enables a free camera with the second controller. The pause menu is disabled on the first controller, but you can access it by holding down R2 and pressing Start. See the full instructions below.
- NO CHEATS: Ditto. This only appears if a toggleable cheat is enabled.
Freecam Controls
These controls are specific to the DualShock controller. D-Pad and left analog stick are interchangeable.
- Left/Right: Modify X position.
- Up/Down: Modify Y position.
- L1/R1: Modify Z position.
- Triangle/X: Modify X rotation.
- Square/Circle: Modify Y rotation.
- L2/R2: Modify Z rotation.
- Start (in controller 1): Toggle frame advance mode.
- R2 (in controller 1): Advance frame.
- R2 + Start (in controller 1): The only way to bring up the pause menu ever again.
- Select: Snap back to trail.
- Any controller 2 button: Detach and freeze from trail (if attached). Certain levels, such as the game over screen, will freeze the game if this is enabled. Note that this freezes the camera trail, which is used by the game to control what to load, what to display, player movement, etc. If you want to progress in a level, press Select to snap the camera back to its trail and continue.
Level Stats
Holding R2 and opening a level portal lets you see time trial leaderboards without the level's crystal, but also shows a fourth value set in the bottom right corner. It applies to all levels, including bosses. This fourth set flashes between two categories:
- The first set displays the number of deaths and the playtime of the level before the level's crystal is retrieved.
- The second set displays two time trial values referred to as B and G. The B value stands for "bronze" and counts how many times you entered the mode before obtaining any relic, while the G value stands for "gold" and counts how many times you entered the mode after obtaining a Bronze relic. Once you have obtained a Gold or Platinum relic, the game will stop tracking the level.
General Differences
Startup
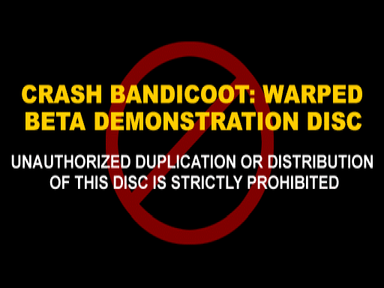
- The game starts with a warning screen labeling this preview as a Beta Demonstration Disc and explicitly prohibiting any duplication or distribution of the disc content.
- A music track not used in the final version of the game plays here and as the main theme for the warp room. It can be heard on the game's official website, as well as in the demo featured as a hidden unlockable in Spyro the Dragon upon booting it up.
- Composer Josh Mancell posted the "pre-console" version of this track on his SoundCloud in 2013, labeling it as a demo for the underwater levels.
- There is no announcer presenting the company entities and the game's title.
- The Sony Computer Entertainment screen is similar to Crash 1, being a static text on a plain background.
- Universal's screen looks mostly identical to the Crash 2's one, just with the copyright info updated.
- There is no Naughty Dog box animation - it simply shows the company's logo with "Developed by" text above on a plain background.
| Aug 26 | Final |
|---|---|
 |
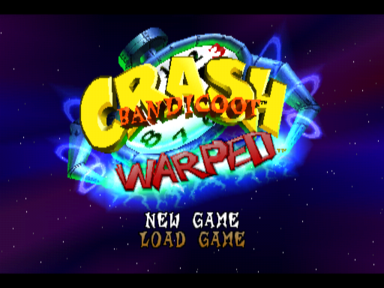 |
- The title screen also features a plain background and no sound effects at all.
- Attempting to skip the logo animation will instead freeze it in its current frame.
- There are no idle demo modes.
Gameplay
| Crash 2 | Aug 26 | Final | Japanese |
|---|---|---|---|
- Character icons are in a rather primitive state, seemingly styled after Crash 2 in terms of size and shading:
- Crash's icon is a higher-res variant of his life icon - a re-drawn version of which is in fact used in the Japanese version.
- Coco's icon is closest in pose to her pause screen icon, only with a green flower in her hair as opposed to blue, and rather rough shading.
- Tiny, N. Gin, and Cortex re-use their boss portraits from the previous game as placeholders, albeit with minor differences, such as N. Gin and Tiny's lack of shading and Cortex's eyes and head shape being a bit larger.
- Dingodile and N. Tropy are mostly similar to their final icons with minimal changes, such as Dingodile's ears and snout being redrawn and N. Tropy's clock being changed from grey to green.
- Interestingly, their icons in Crash Team Racing bear a closer resemblence to the icons in this build than in the final game.
| Aug 26 | Final |
|---|---|
 |
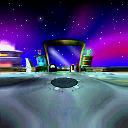 |
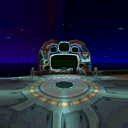
- The Time Twister's portal graphic features a totally different design for the load/save screen. The fifth chamber also seems to be missing.
- Sapphire relics are known as Bronze relics instead. Logically, they are bronze-colored.
- A white screen is used for loading transitions, rather than a distorting vortex effect.
- The music does not fade out when entering a portal either.
- The intermission vortex cutscenes, opening cutscene and ending cutscenes are all missing throughout the game.
- All music tracks are in mono, regardless of the output option.
- The bonus round and alternate route music tracks don't loop properly and they just start over.
- Music volume is defaulted to 100% as opposed to 75%.
- Crystals, gems, and relics don't play the choir sound effect, nor do they drop firework particles when collected.
- Checkpoint crates lack the chime sound when opened.
- When all crates are destroyed, the clear gem will show up as soon as the box counter appears onscreen, regardless of where the player is. In the final game, the gem will only spawn when the player gets closer to the box counter.
- Masks are lost upon returning to the warp room, so they can't be taken into other levels.
- Extra lives will change into a x20-Wumpa fruit once the player collects it. In the final game, it changes into a single Wumpa fruit instead.
- The yellow aura visual effect is missing when Aku Aku is summoned or lost.
- During Aku Aku invincibility, Crash's speed will always be locked to his default running speed, meaning that every move he performs will retain the same speed, whether he is sliding, crawling, or running with the Speed Shoes.
- As a result, his crawling speed will be faster.
- Breaking another Aku Aku crate while invincible won't reset the invincibility timer.
- The shockwave caused by the super body slam cannot pick up Wumpa fruits and extra lives nearby.
- Double jumps can be only chained once with enemy and object bounces.
- Crash's spin range is smaller while hanging on meshes, like in Crash 2.
- Death routes always return to outline form if you die in bonus rounds or time trials.
- Crash can display idle animations while invincible or standing on any surface, such as buttons, lifting and moving platforms.
- The angel death animation re-uses the wing flapping sound from Crash 2.
- The disintegrating and balloon deflating death animations lack sound effects.
- Descriptions for the Super Powers do not exist yet, and the life sound effect plays when grabbed.
- They will also go offscreen after a second just like all other collectibles, whereas in the final it stays onscreen until the screen fades out.
- The Fruit Bazooka has some differences:
- Crash does not pull the bazooka in the direction he is currently facing, and tends to pull it forward in most areas.
- Crash can pull the bazooka while invincible, although the invincibility will immediately be cancelled.
- You have to wait until the animation of Crash putting the bazooka away ends before you can actually start moving after using it.
- Wumpa shots will despawn as soon as Crash puts the bazooka away.
- The Wumpa explosion visual effect shares the same one as the TNT explosion.
- A number of textures across the game have different lighting or UV mapping.
- Many objects can be seen through scenery, objects, or walls. For example, Crash's body can be seen through lifting platforms.
- Counting down TNT crates will instantly explode upon stepping on a gem platform.
- Jumping from a certain height and then performing a tornado spin while standing over reflective surfaces will make Crash's reflection incorrectly appear below him in mid-air.
- In the game over screen, Uka Uka doesn't move his head while announcing the game over, and his face is placed further down, overlapping the "Continue?" text.
- It features the blue background from Crash 2.
- Uka Uka's idle animation is different.
- Cortex's mouth is untextured and his pupils are brighter.
- Quitting the game will return to the startup intros instead of the title screen.
- Music and FX volumes also retain their current values, rather than resetting to default.
- The "Calibrate" option from Crash 2 is still available in the pause menu options.
- The controller vibration option is called "Shock" instead.
- Vibration and calibration options are available at all times, regardless of the controller used.
- Eggipus Rex is completely absent and Hot Coco is present within the files, but it cannot be accessed through normal means.
- The highest percentage you can normally achieve is 99%. A clear gem from Rings of Power cannot be normally collected due to an oversight.
- By retrieving the remaining collectibles, the final percentage goes to 102%, with 43 gems and 29 relics.
- The total amount of gems and relics doesn't increase when getting the extra collectibles of Hot Coco.
- Fake Crash's cameos after completing the game didn't exist at this point.
- There is a dongle protection in this version which can stop the game from running on real hardware and emulators.
Time Trial
The biggest change is how the time crates work here, where instead of freezing the clock for said time, it will subtract the amount of time from the box. Despite this, they still cannot get the chronometer to go below 0 seconds.
- There is no "Entering Time Trial" onscreen notice the first time you start the time trial.
- No ticking sound effect plays when touching the stopwatch.
- Crash will leap up when becoming invincible. The animation was disabled for this mode in the final game.
- Time crates don't count when destroyed by nearby explosions.
- There are no extra Aku Aku crates.
- Locked crates can still provide Wumpa fruits.
- When a relic is received, the relic will go offscreen after a second just like all other collectibles, whereas in the final it stays onscreen until the screen fades out.
- On the Enter Name screen, there are no sound effects when navigating or selecting an option.
- Inserting the last initial won't bring the player to the "Done" button automatically.
- The music volume will decrease during the Enter Name screen just like in the final game, but it will not reset to normal when restarting a level. This effect is cumulative and one can make the volume go down to 0% by repeating the time trial multiple times.
| Level | Aug 26 | Final |
|---|---|---|
| Toad Village* | 1:12:00 0:57:50 0:50:00 |
1:03:00 0:57:50 0:44:03 |
| Under Pressure | 2:05:00 1:29:70 1:15:00 |
1:46:00 1:17:90 1:10:50 |
| Orient Express | 0:58:00 0:50:00 0:40:00 |
0:41:00 0:27:80 0:18:10 |
| Bone Yard | 1:58:00 1:49:20 1:15:00 |
1:45:00 1:40:20 1:21:00 |
| Makin' Waves | 1:18:00 1:02:83 0:50:00 |
1:08:00 0:58:23 0:53:23 |
| Gee Wiz | 1:44:00 1:25:20 1:15:00 |
1:35:00 1:22:73 1:05:90 |
| Hang'em High | 1:30:00 1:11:30 1:00:00 |
1:24:00 0:52:63 0:43:80 |
| Hog Ride | 1:00:00 0:46:40 0:40:00 |
0:45:00 0:41:46 0:35:03 |
| Tomb Time | 1:49:00 1:29:00 1:15:00 |
1:42:00 1:10:00 0:53:90 |
| Midnight Run | 1:05:00 1:00:00 0:55:00 |
0:51:00 0:38:23 0:18:20 |
| Dino Might! | 1:34:00 1:27:60 1:15:00 |
1:34:00 1:25:76 1:03:00 |
| Deep Trouble | 2:37:03 1:44:43 1:15:00 |
1:47:00 1:25:13 1:18:33 |
| High Time | 2:27:70 1:25:30 1:15:00 |
2:12:00 1:04:10 0:56:93 |
| Road Crash | 1:42:30 1:25:90 1:15:00 |
1:25:00 1:20:73 1:17:10 |
| Double Header | 1:36:00 1:29:73 1:15:00 |
1:27:00 1:21:13 0:59:40 |
| Sphynxinator | 1:58:00 1:47:73 1:15:00 |
1:42:00 1:22:63 0:56:70 |
| Bye Bye Blimps* | 1:42:53 0:58:40 0:50:00 |
1:09:00 0:58:40 0:51:50 |
| Tell No Tales | 2:25:00 1:21:30 1:15:00 |
1:42:00 1:25:63 1:05:23 |
| Future Frenzy | 2:35:80 1:44:03 1:15:00 |
2:01:00 1:34:00 1:19:63 |
| Tomb Wader | 3:05:00 2:20:13 2:00:00 |
2:44:00 1:45:03 1:24:00 |
| Gone Tomorrow | 2:23:10 1:42:83 1:15:00 |
2:05:00 1:25:60 1:02:10 |
| Orange Asphalt | 1:48:90 1:34:93 1:15:00 |
1:36:00 1:31:30 1:21:80 |
| Flaming Passion | 2:00:00 1:30:00 1:15:00 |
1:43:00 1:13:10 0:59:40 |
| Mad Bombers | 1:48:00 1:23:43 1:15:00 |
2:08:00 1:55:23 1:38:13 |
| Bug Lite | 2:08:03 1:37:60 1:15:00 |
1:49:00 1:34:86 1:14:90 |
| Ski Crazed | 1:53:80 0:40:23 0:30:00 |
1:16:00 0:50:50 0:33:30 |
| Area 51? | 2:21:70 2:09:40 1:50:00 |
1:53:00 1:49:80 1:44:50 |
| Rings of Power | 1:21:53 0:57:43 0:50:00 |
1:20:00 1:01:43 0:51:73 |
| Hot Coco | 1:10:00 0:42:43 0:35:20 |
1:00:00 0:30:10 0:19:93 |
- Relic times have not been updated for Platinum relics in Toad Village and Bye Bye Blimps, resulting in a Platinum relic being awarded automatically if you beat the level under 1:15:00 - this is a leftover of an older relic requirement that was used as a placeholder for all levels in earlier builds.
- Exceeding the target time will not give you a relic in Toad Village due to the higher Bronze requirement, making Platinum the only possible relic in this level. On the other hand, you can still obtain a Bronze relic in Bye Bye Blimps due to the lower requirement.
Levels
Medieval Levels
- There are no swallows or butterflies at all.
- Chickens don't scream or drop feathers when shot by the Fruit Bazooka.
- There are no invisible barriers on top of the stone bridge fences.
- Spinning the magic orbs from the wizards will simply make them go through Crash and leave him unharmed, whereas in the final game they also get destroyed.
- Lily pads are arranged differently in the moat background at the start of the bonus rounds.
- The water lacks transparency and the reflection of the castle wall is missing.
- In Time Trial, stepping on empty bonus platforms will make Crash clip through the floor.
Atlantis Levels
- Respawning at the starting point will cause Crash to spawn facing towards the camera.
- In Time Trial, the chronometer visually freezes for a few seconds when Crash loses a mask while being electrocuted.
China Levels
- You cannot sprint by holding R2.
- Hanging life crates are ? crates but with extra lives. They also do not automatically give you the contents within.
- In Time Trial, these time crates will not freeze the clock either.
- The tick made when breaking crates while you are sprinting gets higher and higher, as if you were racking up combos.
- Invincibility frames won't protect you against enemies and hazards.
Prehistoric Levels
- Some minor differences can be seen in the scenery of the levels:
- Dinosaur skulls in the scenery have an extra hole in front of the eye sockets.
- Ground textures are different, featuring a different grass shape, with small rings inside.
- They also lack a proper transition to the swamp floor around chase sections.
- If Crash gets caught by the triceratops while in mid-air, his flattened body will remain floating.
- Pulling out the Fruit Bazooka while the triceratops is chasing you will make it instantly despawn.
- Time crates won't count if broken by triceratops.
- Baby T won't run away if he gets hit by an enemy or hazard while Crash is mounted on him. Instead, Crash will just hop off his back, but he will still be able to mount him again.
- However, that doesn't apply if you take a hit after landing from a jump, as that will still make Crash lose him.
- Baby T slides forward a little when he stops moving, instead of halting abruptly.
- Due to a bug, performing the super body slam close enough to Baby T will make him disappear.
- Performing it on his back also won't destroy vegetation, crates or enemies around Baby T.
- Body slamming on the egg will not hatch it either.
- Most of crates placed individually on swamp floors have different rotations.
- The reflection of Crash's torso when pulling out the bazooka erroneously appears on certain parts of the normal ground.
Jet Ski Levels
- When entering the exit portal, the wake of the jet ski will not disappear.
Arabian Levels
- You can pass through the bouncy tarps if jumping underneath them.
- You can walk over the bouncy tarps when spinning or sliding on them or changing from a normal surface to them. In the final game, you will automatically bounce instead.
- Bouncy tarps aren't programmed to bounce Crash during invincibility.
- The death animation of Crash being knocked off the meshes by a scorpion was sped up in the final game.
- The death animation of Crash bumping into a pot-carrying monkey was sped up in the final game.
- Pot-carrying monkeys will not be defeated in one hit when Crash loses a mask or while he is invincible.
- No sound effect plays when the blades thrown by sword-throwing lab assistants hit the wall.
- The low-poly model of the towers and domes in the scenery features way less polygons.
- Due to an oversight with the sword-throwing lab assistants, you automatically receive the Speed Shoes once the blade projectile hits the wall. This means that you will always receive this Super Power prematurely in High Time.
- Furthermore, a visual bug will cause the Death Tornado Spin to also be incorrectly displayed in the menu tab as if the player already had it. Once you legitimately receive it, then the Fruit Bazooka will show up prematurely instead.
Highway Levels
- There are no swallows at all.
| Aug 26 | Final |
|---|---|
 |
 |
- The traffic lights increases the pitch for each light sound effect.
- The light textures received subtle tweaks in the final game.
- Winding signs cannot be taken down.
- You can drive backwards with no restraints, though the camera won't follow you.
- The roadblocks behind the start line are missing, so the player can fall off the map and go out of bounds (aside from Road Crash). This is not normally noticeable in the final game unless you enable debug mode to drive backwards.
- Some of the sound effects are different or missing:
- The boost sound effect when running into a turbo pad lacks one of the sound effects.
- One of the engine noises when accelerating is missing.
- The back of the hot rod lab assistants' car is untextured when jumping off a ramp.
- The license plate on this model is also part of the car texture, rather than a separate graphic.
- The position number in the HUD will flash to 316th in a split second when switching between specific positions - 6th and 5th place in Hog Ride, 9th, 8th and 7th place in Road Crash and Orange Asphalt, and 7th, 6th and 5th place in Area 51?.
- Opponents will continue racing endlessly around the map of every level, always respawning on top of the start line after finishing the race. In the final game, they will only continue racing in Road Crash as the map is a complete circuit, and they will only repeat it once.
- In Time Trial, the chronometer visually freezes for a few seconds when Crash goes out of bounds.
Egyptian Levels
| Aug 26 | Final |
|---|---|
- Switches make a different sound effect.
- The sound often stops playing at certain moments when stepping on the button.
- There are no invisible barriers in the column gaps of the pyramid walls.
- The sliding blocks dropped by the lever pulling lab assistants don't lose the collision for Crash when he gets crushed by them, meaning he can be carried over by the blocks while in the squashed state.
- Crash still blinks his eyes after being covered in dust by the jar monkeys. In the final game, his eyes are always static.
- There is no explosion sound effect when Crash is hit by such projectiles.
- You cannot bounce on the pull levers in succession.
- There is no sound effect when Crash is shaking on the roof after being poked by the spear floors.
- Moving platforms only make a sound when moving from right to left.
- In Time Trial, the chronometer visually freezes for a few seconds when Crash loses a mask while being crushed by doors or falling blocks.
Baron Levels
- During the cinematic entrance, the plane moves at the same speed during the gameplay and you also have full control of the plane.
- The ability to pause is disabled while the sunlight is shining through the screen.
- The blimp/airplane/ring counter uses a darker text color.
- The balloon holding the stopwatch is yellow instead of red.
- When the stopwatch falls from the sky after shooting the blimps or flying through a ring, it will "break" as if it were a regular crate when it hits the ground.
Future Levels
| Aug 26 | Final |
|---|---|
 |
 |
- The camera angle in the portal graphic is placed further back.
- Laser fences in the 3D sections play the same sound effect as the orange ones in the side-scrolling sections.
- The invisible wall on the sides is more enclosed, making it more difficult to pass through the fences while the laser is active.
- The spherical robots make no sound when activating/deactivating the force field.
- Running into them while the force field is off will burn Crash's backside, rather than disintegrating him.
- Spiked shells have slightly different sound effects.
- Checkpoint crates feature a proper reflection in the mirrors.
- Crash's torso is not reflected in the mirror when he pulls the Fruit Bazooka.
Warp Room
- The early underwater theme is used as a placeholder. The warp room theme is not present in this version.
| Aug 26 | Final |
|---|---|
 |
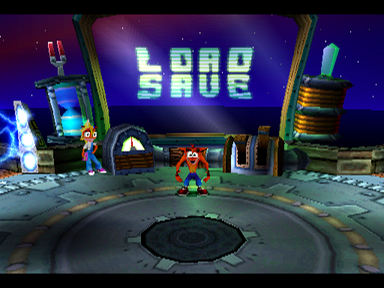 |
- The load/save screen has a much more minimalist design, lacking the ornamental assets around it, as well as the "LOAD/SAVE" text imprinted on it. The monitor itself is also colored blue instead of yellow and turquoise.
- Coco stands on the right side of the screen, looking to the left, rather than standing on the left side, looking towards the center of the room.
- Coco also has no collision and can be walked straight through.
- Coco stands on the right side of the screen, looking to the left, rather than standing on the left side, looking towards the center of the room.
| Aug 26 | Final |
|---|---|
- The default save file icon when starting a new game features Crash sighing in Gee Wiz.
- Empty save slots still use the Crash 2 icon.
- Save slots display a life counter instead of the relic one, identically to Crash 2.
- Placeholder save file icons from Crash 2 levels were in the process of being replaced by the actual level icons, so a number of them are still used on certain levels, such as Makin' Waves, Deep Trouble, High Time, Road Crash, Double Header, Sphynxinator, Future Frenzy, Gone Tomorrow, Orange Asphalt, Flaming Passion, Ski Crazed, Rings of Power, and Hot Coco.
- When entering the game via the "Load Game" option, the memory card menu will not open in the slot selection screen by default.
- When Crash enters a portal in the warp room, his warp sucking animation always points forward instead of toward the center of the portal sphere, causing the animation to point away from it when entering from the edges.
- The animation for Coco exiting a level has not yet been implemented, as Crash exits her levels in exactly the same way he does with his own stages.
- Boss icons aren't displayed on the right when the boss level's button is pressed down.
- Platinum relic times are never displayed on the Time Trial leaderboards, possibly due to the lack of Cortex's rematch after collecting all gems and relics.
- Electric gates feature blue textures and lack a proper sound effect when Crash is pushed back.
- There are more stars in the sky.
- Some of the textures have different lighting, such as the bricks.
- In the first chamber, there is a misplaced wall brick texture on the floor next to the portal pad.
- One of the gears in the scenery is missing its shaft.
- There is some collision on the floor completely surrounding the portal pad, forcing the player to jump in order to enter the portal.
- The camera angle in the second chamber is much higher up and can even partially hide Crash.
- There are less invisible walls covering the fifth chamber.
| Aug 26 | Final |
|---|---|
 |
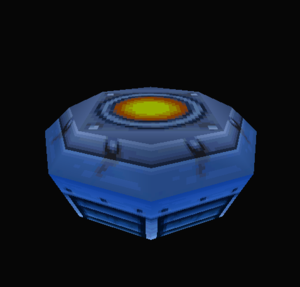 |
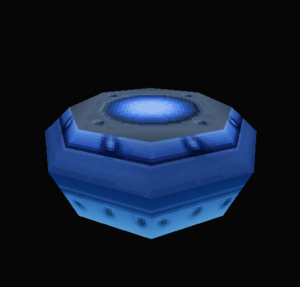
- The middle platform has an earlier set of textures with minor differences, most notably being colored blue in the center rather than yellow.
- When the middle platform lands on the central area after leaving the secret chamber, the textures of each chamber (aside from the first one) will break for a brief moment before they get rendered properly. This is due to the game taking longer to replace the textures for the secret chamber, which occupies the same space in VRAM as the aforementioned chambers, causing the game to load them.
Secret Chamber
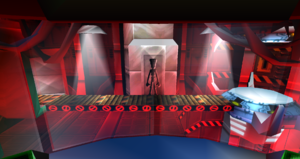
- The room sign reads "Neodyne Systems" in this version, a pun on "Cyberdyne Systems" from the Terminator series.
- There are no sound effects at all.
- Coco does not show up to enter the Ski Crazed's portal.
- The camera angle when leaving a level is more zoomed in.
- There is a hidden texture behind the tissue generator that depicts the silhouette of a lab assistant android.
Level Differences
Toad Village
- When standing behind the wooden logs, a minor glitch can cause the scenery textures to partially overlap Crash and Aku Aku's models.
Main Level
- The pit on the left in the final uphill section at the end of the level does not have a death trigger, so the player will get stuck after falling into it.
Time Trial
- The first Aku Aku crate is a 1-second time crate instead.
Under Pressure
Main Level
- The rock formation in the upper right corner of the level outside the first electric tunnel was altered a bit.
- At the first downstream with two eels, there is a giant rock formation with rendering issues in the scenery that was replaced by a small formation.
- A rock formation is missing under the small tunnel afterwards.
- The two sharks above the trio of coral reefs covering crates are placed slightly to the right, which was likely changed due to the second one overlapping with the mine ahead.
- There are rock formations above and under the exit portal tunnel that were removed in the final game.
Orient Express
- There are no swallows at all.
Main Level
- Unlike earlier builds, there is no invisible barrier behind the starting point, meaning you can just walk backwards and fall into the void and die.
- The first pit has a misplaced ground geometry on the left side.
- There are two scaffoldings holding hanging baskets on the left side after the first barrel wagon that were removed in the final game. The background when passing through them also displays some flickering.
- You are more likely to slam into the wall while attempting to reach the upper floor of the second tower when taking the ramp due to the middle floor's geometry having a rough collision. This seems to be related to the
obj_slap_cocoplaced in the tower walls, which is missing from this build.- The columns on the upper floor of the second tower have incorrectly assigned or oriented textures.
| Aug 26 | Final |
|---|---|
 |
 |
- After the final checkpoint, two oriental lab assistants were replaced by a barrel wagon in the final game.
Bone Yard
- There are no butterflies at all.
- The majority of the vines on tree trunks that creep along the ground, in particular those on the right side of the scenery, are absent in the final game.
Main Level
- The skybox color is light-blue in the volcanic crater area instead of pitch black.
- The camera may break at the end of the volcanic crater area and not follow the player when attempting to backtrack while walking on the edge.
Gem Path
- The red gem path camera transition has a slightly different angle.
- There are invisible steps behind the start area of each chase sequence.
- In the second chase, the second mini-volcano is placed further to the right.
Tiny Tiger
| Aug 26 | Final |
|---|---|
 |
 |
- The portal graphic lacks Tiny Tiger in the picture.
Main Level
- The skybox is blue, while the bottom half is black.
- The pre-fight cutscene features a higher camera pan that shows off the embroidered cover above Cortex's throne, rather than focusing on Cortex himself.
| Aug 26 | Final |
|---|---|
 |
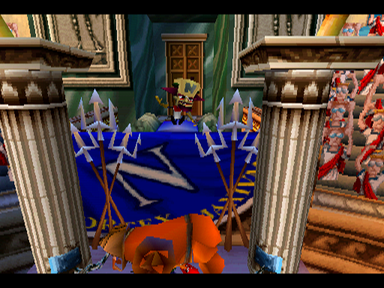 |
- The podium has only a single trident on each side of Tiny's platform, and the blue teal texture behind Tiny is of lower quality.
- The wall behind Cortex is completely missing and there is no floor or seat under him, leaving an empty void where they would've appeared.
- Cortex wears a red cape and is standing, always looking around and waving to the crowd instead of being idle and focusing on Crash's movements when the battle begins.
| Aug 26 | Final |
|---|---|
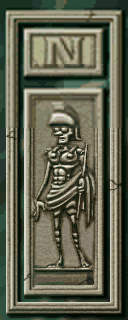 |
- The pillar paintings on either side of the Colosseum walls were replaced by a portrait of a lab assistant in Roman armor.
- Texture tiles also have a higher resolution in the final game.
- You cannot spin on Tiny right away as he performs his final trident attack.
- If you hit Tiny with a super body slam, he will lose his collision and will not be able to physically hurt Crash. You won't be able to attack him either, with the sole exception of body slams.
- Staying close to Tiny as he gets up after being hit will harm Crash.
- Lions cannot be defeated by jumping on them.
- Some sound effects are missing.
- Tiny doesn't roar after killing Crash.
- The crowd doesn't boo, nor is a sound effect made when Tiny takes a hit.
- There is no squash sound effect when Crash is flattened by Tiny.
- Defeating too many lions consecutively can freeze the game.
- The game is not programmed to give free Aku Aku masks in this level if the player dies too many times.
Hang'em High
| Aug 26 | Final |
|---|---|
 |
 |
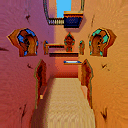
- The camera angle in the portal graphic is further up.
- Some elements of the scenery are missing.
Main Level
- The two buildings on each side at the beginning lack a ceiling, as seen in the cinematic entrance.
- There is only one iron arrow crate at the beginning instead of two.
- After the first checkpoint, the stack of crates is spaced further behind.
- There are two more rows of Wumpa fruits at the end of the second hanging mesh section.
- The scenery around is more enclosed.
- The second hanging mesh extends further forward, while the wooden floor is shorter.
- The box arrangement after the final checkpoint is different. Rather than the Nitro on top, there is a slot crate with a TNT below.
- The suspended basic crate on the bouncy tarp ahead is placed further to the left.
- There are two extra TNTs right before the box counter.
Bonus Round
- The bonus entrance transition clips through one of the buildings.
- The exit platform is placed lower down.
- The scenery has flickering issues when the platform is carrying in and out of the bonus round.
Secret Path
- The path doesn't have any Nitro crates, bringing total number of crates to 81 instead of 96.
- The camera angle in the starting point is further to the left.
- A building in the scenery at the middle of the straight 3D hallway features an open area.
- A row of Wumpa fruits is missing at the end of the straight 3D hallway.
- A genie lab assistant is present in the bouncy tarps section.
- At the end of the path, the building holding the yellow gem features a small parapet on the bottom edges.
- The final platform leading to the main path moves very quickly.
Hog Ride
- Driving at low speeds on the edges of the asphalt can cause the player to clip through the terrain and fall off the map, as there is no floor collision in certain spots.
Main Level
- There is a cactus placed next to the road on the right side of the starting area.
- The second curve sign erroneously points to the left.
- There is a cactus placed next to the road after the second police car, while a second one is present next to the gas station.
- Another cactus placed next to the road after the fifth police car.
Tomb Time
- When Crash is killed by the jar monkeys in the first section, the death animation of him being covered in dust always plays, whereas in the final game an oversight causes the angel animation to be used interchangeably.
- Sometimes an audio bug can happen when breaking crates around the final oil floor section, causing a specific sound effect to loop indefinitely.
Main Level
- There are no extra lives on each side of the Cortex sphinx head at the start of the level.
| Aug 26 | Final |
|---|---|
 |
 |
- The corridor with the first set of jar monkeys is narrower.
Gem Path
- The collision for the walls is extremely rough, making it easy to fall off through the walls.
Midnight Run
Main Level
- The columns on the upper floor of the towers have incorrectly assigned or oriented textures.
Time Trial
- There is a 2-second time crate after the second flying dragon that was replaced by a basic one in the final game.
- There is a 1-second time crate in the second upper section that was replaced by a basic one in the final game.
- The last hanging 3-second time crate was replaced by a 1-second one in the final game.
Dingodile
| Aug 26 | Final |
|---|---|
 |
 |
- The portal graphic lacks Dingodile in the picture.
Main Level
- The pre-fight cutscene has some flickering in the scenery and lacks sound effects.
- Since there is no voice acting, Dingodile's mouth also does not move during the sequence.
- Normal footsteps sound effects are used rather than the snow ones.
- The only sound effect to play is the landing of the fireball attack, which re-uses the generic explosion sound effect as opposed to a unique sound.
Dino Might!
- The scenery is more enclosed around the mini-volcanoes, not allowing the player to pass through them from the sides or between them.
- The collision for the scenery is a bit rough at some parts, causing Crash to be able to go out of bounds in certain areas.
- The scenery textures around the start of chase sequences are the same as Bone Yard. In the final game, it was changed to a greenish tone.
- When the Crash-fish spins, it re-uses Crash's spin sound effect.
- It also doesn't make splash particles and sounds.
- Mini-volcanoes will be detected as a target when you aim the Fruit Bazooka at them.
- You can crawl under the yellow gem platforms.
- In Time Trial, Baby T doesn't appear out of the egg already.
- Through glitches, if you ride Baby T past where Crash is normally dismounted, the triceratops will not come out of the cave if Crash is mounted on him.
- This causes the game to lag when approaching the last puddle of lava towards the end of the chase sequence, launching Crash very high into the sky as soon as the lag starts.
- Attempting to start the chase while dismounted from Baby T will freeze the game.
Main Level
- There is no invisible barrier behind the starting point, allowing the player to walk out of bounds.
- The first mini-volcano is placed further to the right.
- The tree trunks in the scenery around the nest where Baby T's egg is located are greyish.
- There is a step around the nest, forcing the player to jump to proceed.
- At the end of the Baby T section, the first mini-volcano is placed further behind, while the second one is further to the right.
- There is extra vegetation at the very end of the final chase.
- There is no invisible barrier at the end of the level, meaning you can just walk backwards and go out of bounds.
Gem Path
- There is an invisible current at the beginning.
- There is a fallen log placed between the first and second pterodactyls.
- Due to the absence of Eggipus Rex, the second pterodactyl behaves like a regular enemy.
- The swamp floor at the end of the path lacks reflection.
- Some of the trees placements in the scenery at the end were removed in the final game.
Deep Trouble
- The background lacks the city details, and is more of a navy-blue color.
- Pufferfish in the tunnels will not die when Crash loses a mask.
- A black polygon will appear on the background in the upper right corner of the screen when Crash goes further down the level.
- Sometimes an audio bug can occur that causes a particular sound effect to loop indefinitely.
Main Level
- The blocked path of iron crates containing TNTs features four more TNTs.
- There is an extra Nitro crate covering the path afterwards, with a path of Wumpa fruits going over it, bringing the total number of crates to 88 instead of 83. The other Nitro above is also placed further up.
- The coral reef holding a ? crate before the first tunnel section is placed slightly to the right.
- The scenery on the right outside the first electric blades tunnel has a small rock structure not present in the final game.
- There is more vegetation in the scenery in the first downstream section after the first eel.
- Activating the ! switch at the end of the level will not cause Crash to drop the submergible once he approaches the tunnel to go back to the death route split-path. You have to manually lose the submergible by taking damage instead.
- Crash does not drop the submergible when approaching the exit portal.
- Speed boosting next to the portal will get past it and won't suck Crash in.
Alternate Path
- The two basic crates inside the iron crates covering the death route are TNTs instead.
- The rocky scenery is unfinished on the right side of the level in the downstream tunnel section.
- The geometry for the exit tunnel is mostly missing.
High Time
- It shares the same portal graphic as Hang'em High.
- Overall, there are less elements in the scenery, such as oriel windows, decorative tents and buildings.
- The music doesn't change in the death route.
Main Level
- The music doesn't change in the bonus round.
- There is a pair of bounce crates right next to the bonus platform.
- A building is missing on the right side of the scenery.
- The death route platform is placed further behind.
- In the second upwards section, there is only one iron arrow crate instead of two at the bottom and top.
- There are two extra basic crates making a line of three next to the TNTs at the end, bringing the total number of crates to 89 instead of 85.
Bonus Round
- The last building is placed lower.
Death Route
The death route is located next to the main path, and part of it can also be seen from a distance during regular gameplay. In the final game, the entire section was moved away from the main level.
- There are no Wumpa fruits throughout the path.
- There is a parapet wall extending to the middle in the left bottom edge of the upwards floor.
- There is no scorch mark near the end.
Road Crash
- Cactuses have a darker palette.
Main Level
- The alien sign that leads to Hot Coco in the final game is absent.
- A gas station is present on the right side of the road next to where the alien sign would be placed in the final game.
- There is a line of three basic crates before the third ramp. It was changed to a single one in the final game.
- The ? crate after the second boost pad is slightly detached from the ground.
- In the fourth ramp, there is an extra basic crate in mid-air.
- In the fifth ramp, there is an extra life crate in mid-air, bringing the total number of crates to 29 instead of 25.
Time Trial
- The suspended 1-second time crate in the first ramp was replaced by a 2-second one.
- The 1-second time crate in the first set of roadblocks was replaced by a 2-second one.
- The two extra crates before the third ramp are also a 1-second one.
- The extra crate in the fourth ramp is a 1-second one.
- The 1-second time crate between the police cars afterwards was replaced by a 2-second one.
- The extra crate in the fifth ramp is a 1-second one, followed by another 1-second time crate that was replaced by a 2-second one.
Double Header
- The rain is strong and always constant, unlike the final game, where the rain gets heavier as Crash progresses through the level.
- There is also no rain ambience sound effect.
- No water droplets are released from certain elements, such as wooden logs, pennant banners, the bonus round scenery, or castle gateways.
- There are no lightning visuals.
- Castle structures are not drawn throughout the level's chunks, so they only become visible as you get closer.
- The decorative bushes are overall misplaced in the scenery.
- A unique sound is made when the giant lab assistants swing their clubs and when you bounce on their bellies, whereas in the final game both actions re-use generic sound effects (jump and bounce).
Main Level
- The camera angle in the cinematic entrance pans over the background, which has some flickering.
- There is no invisible barrier behind the starting point, meaning you can just walk backwards and fall into the void and die.
- The puddle of water after the bonus is more greyish in color.
Bonus Round
- The bonus transitions feature serious rendering issues when entering/exiting the bonus round area.
- Raindrops don't fall diagonally.
N. Tropy
| Aug 26 | Final |
|---|---|
 |
 |
- The portal graphic lacks N. Tropy in the picture.
Main Level
- Due to the absence of N. Tropy's dialogues, the pre-fight cutscene is shorter.
- The cutscene also lacks sound effects.
- Some sound effects are missing.
- The clockworks in the scenery don't make ticking sounds.
- No "boing" sound effect is made when N. Tropy takes hit.
- There is no teleporting sound effect when N. Tropy is changing to the other side.
- Death animations are silent.
- The laser sound effect is shorter.
- N. Tropy won't attack Crash if he is on the same platform as him.
- There are no particle sparkles when Crash gets desintegrated by N. Tropy's orb and laser attacks.
- In the oriental scenery, the dragon texture behind N. Tropy contains incorrectly assigned textures.
- In the arabian scenery, the window pattern behind N. Tropy is more blue.
- The game is programmed to give free Aku Aku masks in this level if the player dies too many times.
Sphynxinator
Main Level
- The floor on either side of the first pit at the start of the level is missing a collision. As a result, the player can clip through the scenery fall off the stage.
- The camera transition in the platform at the end of the left split-path has a slightly different angle.
- The moving platform after the first checkpoint clips through the level's geometry.
- In the corridor before the second closing door, the scenery on the right is missing.
- The ? crate right before the bonus entrance is missing, bringing the total number of crates to 104 instead of 105.
- The bonus platform is slightly clipped into the level's geometry on both sides.
Time Trial
- There is no 3-second time crate behind the start of the level.
- The 1-second time crate placed before the moving columns is a ? one instead.
- The 1-second time crate after the bonus entrance was replaced by a basic one.
- The final 2-second time crates are placed in the sides of TNT crates.
Bye Bye Blimps
- Due to a glitch, the number of pilot lab assistants flying around the player can be reduced by shooting down a blimp before they start spawning onscreen - you can get no pilots to spawn at all if you shoot down the nearest blimp quickly enough.
- The ability to pause or shoot gets temporarily disabled when a blimp is falling down.
- If you pause the game while there are too many bullets onscreen, a visual glitch will cause the text and 3D models on the menus to stop drawing.
Main Level
- The spawn point is placed slightly lower.
Tell No Tales
- The color of the buoys are inverted. The yellow ones are on the left side, while the red ones are on the right side.
Time Trial
- The two 3-second time crates in the small island were replaced by basic ones.
- The 2-second time crate in the opposite ramp was replaced by a basic one in the final game.
- A 1-second time crate was replaced by the second Aku Aku crate.
Future Frenzy
- The second entrance shares the same portal graphic as Bone Yard and Dino Might!.
- Some elements of the scenery are either slightly misplaced or missing.
Main Level
- You cannot fall off the edge of the first conveyor belt in the side-scrolling segment.
- After the second checkpoint, the glass background starts two floors sooner.
- The skyscraper in the second launcher fan with TNT crates is lower, and almost reaches the rooftop level around the final checkpoint.
- The pit gap in the third launcher fan is larger due to the edge of the other side floor being shorter.
- The skyscraper wall around the second checkpoint is all made of glass.
Bonus Round
- The last two suspended crates at the end are placed lower.
Secret Path
- The conveyor belts are darker.
- The scenery has flickering issues at some parts.
- All flipping platform sections are conveyor belts instead.
- There are no laser fences.
| Aug 26 | Final |
|---|---|
 |
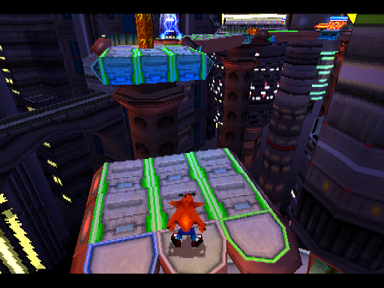 |
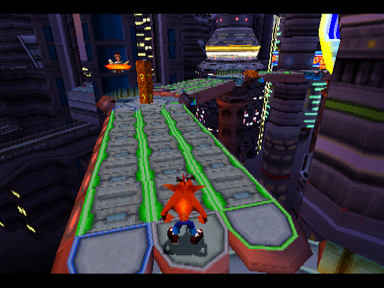
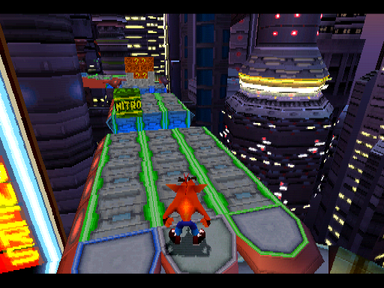
- The beginning has the same height of the rest of the path and with no gap in between.
- There is an extra basic crate next to the first pair of Nitro crates, bringing the total number of crates to 134 instead of 133.
- A tower is missing on the right side of the scenery next to the checkpoint area.
| Aug 26 | Final |
|---|---|
 |
 |
- There are two conveyor belts - one after the stack of crates and other before the wall of crates. Both were replaced by a normal floor in the final game.
| Aug 26 | Final |
|---|---|
 |
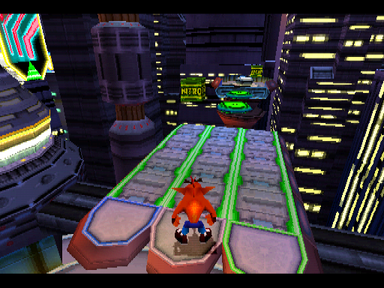 |
- There is a gap between the platform and the last conveyor belt.
- The scenery at the end of the path features a trio of giant pillars.
Tomb Wader
- It shares the same portal graphic as Tomb Time and Sphynxinator.
| Aug 26 | Final |
|---|---|
 |
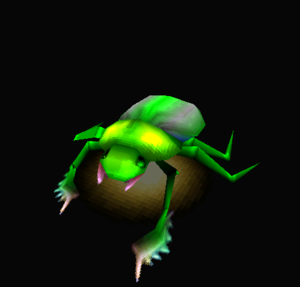 |
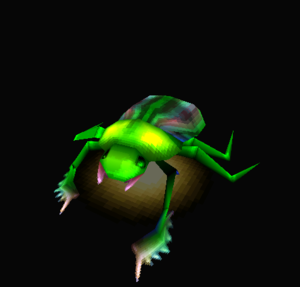
- Scarabs have different elytra textures.
- Crash will automatically crouch jump if he is deep enough into the water.
- You can actually survive the flooded water by crouch-jumping repeatedly in quick succession.
- Crash will not drown if he falls into the water once it starts receding.
- Getting blown up by TNT crates will play the default explosion animation instead of the generic angel one.
- Bouncing over the shields of the shield lab assistants shares the same properties as a bounce crate - the bounce is higher and the sound pitch gets higher with each successive jump.
- They cannot be defeated with the spin attack when their shield is up or if you are bouncing over the shield.
- Performing the super body slam on the shield or spinning on top of it can cause Crash to get stuck inside the lab assistant.
- Timed doors don't make any sound when they come down.
- The water won't stop rising during the Aku Aku invincibility.
- The wading animation contains an oversight which doesn't result in a death when spinning next to a TNT crate or getting crushed by a timed door while touching the water on its rising or flooded state, as Crash will instantly revive.
Main Level
- The camera angle in the cinematic entrance comes from the right side of the level, flying over to the left and then zigzagging to the right again. In the final game, the camera simply approaches from the back.
- The camera angles in the second and third checkpoint corridors are higher up.
- The bonus platform is slightly clipped into the level's geometry on both sides.
- The crates behind the shield lab assistant after the final checkpoint are TNT crates instead of Nitro crates.
N. Gin
| Aug 26 | Final |
|---|---|
 |
 |
- The portal graphic lacks N. Gin in the picture.
Main Level
- N. Gin dialogues are absent.
- Although Pura's backup will not normally appear at the start of the phase two, you can make him connect onto Coco's spaceship at any time by pressing Triangle.
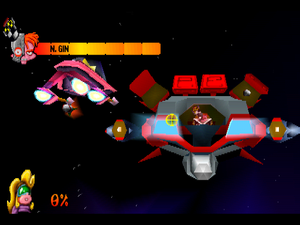
- Pura's ship is completely untextured, with the exterior using vertex coloring instead of textures.
- The glass dome has a geodesic shape and lacks green coloration.
- Pura's ship is completely untextured, with the exterior using vertex coloring instead of textures.
- Coco's aiming reticle is smaller.
- Coco's spaceship re-uses the biplane's engine and gunshot sound effects.
- Missiles deal 5% damage instead of 10%.
- Purple energy balls deal 3% damage instead of 6%.
- Mines feature a larger explosion range.
- Dying wasn't programmed yet, as reaching 0% health won't kill Coco.
- N. Gin's mech parts require less hits to destroy them.
- You can damage the flaps and cannons even when they are closed.
- Missiles can be destroyed with a single shoot, rather than four.
- Missiles re-use the TNT explosion visual effect when destroyed by the laser.
- A lot of sound effects are missing.
- N. Gin's mech is silent when charging and shooting the machine laser gun.
- Coco's spaceship doesn't buzz when hit by the projectiles.
- No sound effect is made when the projectiles are fired.
- N. Gin's mech is silent when flying off the screen to become his second form and during his transformation.
- The ricochet sound effect is different.
- There are no explosion sparkles when destroying N. Gin's mech parts.
- The mech flaps have a different texture.
- The arms of N. Gin's mech in the first form are untextured.
- A small explosion occurs while the mech is merging into the second form.
- N. Gin's mech will remain stationary in phase two.
- The mech textures in the second form are less detailed and lack many details.
- The background behind N. Gin is completely green.
- The mech fires missiles much more quickly during phase two.
- Once defeated, the mech will just slowly fall apart, rather than blowing up sending N. Gin (with fire coming out the missile on his head) offscreen yelling "Aagh! Not again!".
- There is no invisible barrier preventing Coco's spaceship from going to the very top and bottom of the screen.
Gone Tomorrow
- There is no cinematic entrance.
- Crash spawns further behind.
| Aug 26 | Final |
|---|---|
 |
 |
- Missile robots are much darker. This dark version of the robot can be seen in the save file icon for this level in the final game.
- Their draw distance is smaller.
- No sound effect plays when destroyed or when returning to the idle position.
- They are invulnerable against Aku Aku invincibility while launching missiles. Rather, Crash will be knocked back when attempting to defeat them.
- The wrecking animation doesn't play when defeated by invincibility.
Main Level
- The scenery has some flickering around where the four outline crates are located.
- The first and second skycrapers in the side-scrolling section are lower.
| Aug 26 | Final |
|---|---|
 |
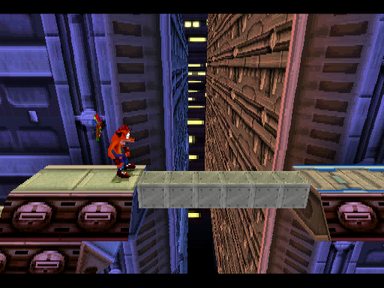 |
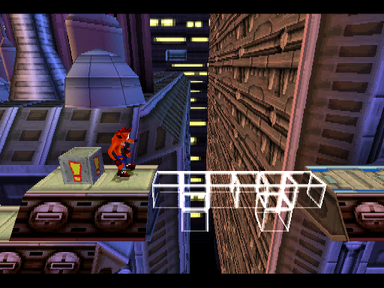
- The first crate bridge consists of two sets of outline crates. Hitting the ! crate will fill in the top row, which is supposed to make the bottom row inaccessible. The bottom row is triggered by a ! crate in the gem path.
- The fifth skyscraper is also lower.
- After the final checkpoint, the background afterwards in the upper floor is filled of glass.
- At the beginning of the final section, a ? crate is missing here, bringing the total number of crates to 88 instead of 87.
Bonus Round
- The second platform at the beginning is placed higher.
- Some parts of the wall have greenish patches.
- The camera angle is higher.
Gem Path
- The gem transition has rendering issues in the level's scenery.
- The green gem path still has purple shading on the floor instead of green.
- The skyscraper holding the "CORTEX TOWERS" billboard at the start of the path is placed almost offscreen.
- At the end of the gem path, the skyscraper holding the "NGIN ROCKETS" billboard is placed too close to the platform.
- A skyscraper is missing in the scenery at the end.
Time Trial
- The first Aku Aku crate is a 1-second time crate instead.
- There is a 2-second time crate at the beginning of the final section that was replaced by a basic one.
Orange Asphalt
- It shares the same portal graphic as Road Crash.
Main Level
- The second pair of ramps are closer to each other.
- The right roadblock on the seventh ramp is placed straight. In the final game, it's tilted.
- The suspended crate on this ramp is easy to miss, due to Crash jumping too high by landing on the edge of it after jumping off the previous ramp.
| Aug 26 | Final |
|---|---|
 |
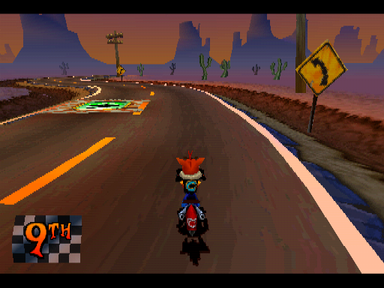 |
- There is a pit on the right side of the fifth boost pad, which was removed in the final game.
- The curve sign is also erroneously pointing to the right.
Flaming Passion
- It shares the same portal graphic as Hang'em High.
- Some elements in the scenery are either missing or removed, such as towers, tower domes, decorative tents and buildings.
- The death route platform can reappear even after losing a life.
Main Level
- There are four fire traps after the first checkpoint, instead of three.
- There is a misplaced oriel window on the building on the left with the two arsonists.
- The crystal is placed higher up between the vertical flying carpets, making it easy to miss when jumping between them. It was moved further back in the final game.
- In the second checkpoint area, there are parapet walls on the bottom edge.
- There are no scorch marks in neither of the following three arsonists in the upwards section.
- An extra arsonist is present after the death route platform. There is also a misplaced oriel window over their balcony.
- There are misplaced oriel windows over the balcony of the last two arsonists.
- The building on the left containing an arsonist after the bonus entrance is wider, while the one on the right is lower.
Bonus Round
- There is an extra basic crate under the ? one before the stack of two Nitros, bringing the total number of crates to 76 instead of 75.
Death Route
- The death route is located further away from the main level path.
- Some scenery details are either missing or removed, such as buildings and decorative objects.
- There is a misplaced oriel window over the balcony of the first arsonist.
- The iron checkpoint crate is missing.
- A Wumpa fruit is misplaced in mid-air in the second sword-throwing lab assistant section.
- A building is missing on the left scenery afterwards.
- A pointed window texture at the end of the straight hallway was replaced by small cracks instead.
- A scimitar lab assistant was removed before the third sword-throwing lab assistant section.
- The second to last building on the final section is placed further down.
- At the end of the path, the platform holding the purple gem features a small parapet on the bottom edges.
Mad Bombers
- Pilot lab assistants deal 1% damage instead of 2% in the final game.
- The stopwatch will not disappear when shooting the airplanes, meaning you can destroy four of them first, then start the time trial and destroy the last one for an easy Platinum relic.
Main Level
- The spawn point is placed slightly lower.
Bug Lite
- It shares the same portal graphic as Tomb Time and Sphynxinator.
- Pulling the Fruit Bazooka in the outside sections will cause the Wumpa fruit shots to turn black.
- The explosion visual effect will also not appear.
- The inside of the pyramid goes completely dark when the firefly flies away. In the final game, the walls emit some lighting.
- Spotlights always emit the same intensity of light, regardless of the ambience lighting.
- Pits in the outside sections have a different texture around the corners.
Main Level
- There is no cinematic entrance.
- The second pit containing a crocodile is smaller.
- The crocodile also cannot be seen before it gets out and after it jumps into the pit.
- There are two extra red scarab platforms after the final checkpoint.
- The exit portal doesn't light up the surrounding scenery.
Bonus Round
| Aug 26 | Final |
|---|---|
 |
 |
- The bonus design uses iron crates for its solid platforms like all other Egyptian bonuses, whereas in the final game Bug Lite is the only bonus to use Egyptian scenery.
Gem Path
- The gem path color order is inverted: red, purple, yellow, green, and blue.
- Due to the different gem order, consequently the gem path has different shading on the floor for each gem section.
- Aside from the first one, an iron checkpoint crate is present at the beginning of every gem section.
- The purple gem platform (green in final) contains a small gap, causing the player to fall off.
- There is a firefly next to the yellow gem (purple in final) and green gem (yellow in final) platforms. Since there are no dark segments in the gem route, it has no real use.
- The green gem platform is sunken into the ground.
- The scenery on the right at the beginning of the final indoor section is completely missing.
- The skybox inside the pyramid will turn dark blue when stepping on the blue gem platform.
- The final outside section of the gem path doesn't have the gem color shading on the floor and the scenery lacks the dark blue shading.
- The anubis statue pillar shares the same texture used in Tomb Time, featuring more stripes and cracks.
N. Cortex
| Aug 26 | Final |
|---|---|
 |
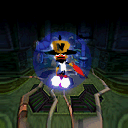 |
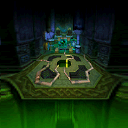
- The camera angle in the portal graphic is further away and lacks Cortex in the picture.
- There is no credits, so after defeating Cortex the game will return straight to the warp room.
Main Level
| Aug 26 | Final |
|---|---|
 |
 |
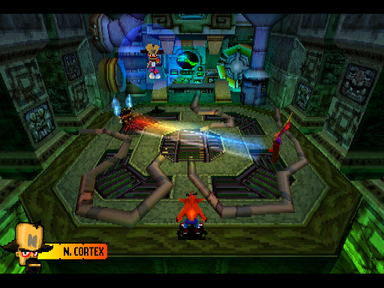
- There are no pre-fight cutscenes.
- The control room background is static.
- The textures of the floor edge have a lower quality.
- The default footsteps surface sound effect is used.
- Uka Uka's model is smaller and features two blue flames above his head, matching his appearance during the intermission vortex cutscenes.
- A lot of sound effects are missing.
- There is no sound when Cortex fires his red energy bolts.
- The mask lasers make no sound effect.
- Cortex's force-field is silent when touching/activating it or when it shuts down.
- Mines lack the "beep" sound effect when Cortex is about to throw it.
- No sound effect is made when Crash spins Cortex off when he's on the ground.
- The black hole that opens in the middle of the room is silent.
- There is no sound when Cortex hits the bottom and loses a health point.
- No explosion sound effect plays when Uka Uka brings Cortex back from the hole.
- The mask tornado attacks don't make any sound effect.
- There is no white clashing sparkle between the mask lasers.
- Cortex's red energy bolts don't explode upon hitting Crash or the ground.
- Throwing Cortex on the mines won't explode them.
- Dying by a red energy bolt or mine will play the default angel death animation instead.
- The tornado spin of the masks in the second phase is white.
- The final spin attack of the masks lacks Aku Aku during the spin animation. The explosion effect is also unfinished.
- Uka Uka stays in the corner when the battle is over.
Ski Crazed
- It shares the same portal graphic as Makin' Waves.
Main Level
- The bomb circling around the island next to the ramp after the first checkpoint moves faster.
- The bomb afterwards surrounded by a piece of land and buoys also moves faster.
- The two bombs circling right before the final checkpoint change direction at a fixed spot next to the buoys, rather than completing a full circle.
Time Trial
- The second Aku Aku crate is a 3-second time crate instead.
- The third Aku Aku crate is a 2-second time crate instead.
Area 51?
- It shares the same portal graphic as Hog Ride.
| Aug 26 | Final |
|---|---|
 |
 |
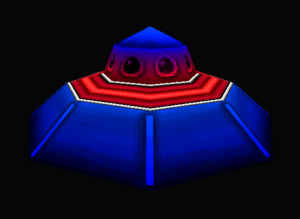
- The UFO model is dark blue with red blinking stripes around it, and it uses hot rod lab assistant car's sound effects. The final model doesn't feature blinking stripes, and the lamps will blink green instead. This model matches the one seen in the save file icon in the final game.
- They do not fly away after crossing the finish line.
- Traffic cones are missing from the sides of the road. Instead, there are power poles in the scenery, which were removed in the final game.
Main Level
- There are 32 extra crates in the level, which are distributed along with the original ones but in more inconvenient paths, bringing the total number of crates to 56 instead of 24.
| Aug 26 | Final |
|---|---|
 |
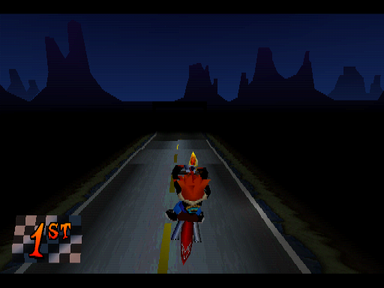 |
- The final ramp in the level has Crash to jump over untextured trucks, which were removed in the final game.
- The checkered line texture and finish line structure are missing.
Rings of Power
- It shares the same portal graphic as Mad Bombers.
- This level uses Bye Bye Blimps' theme as a placeholder.
- It's impossible to get the race gem, as winning in first place will erroneously give you the Future Frenzy's secret gem.
Main Level
- The spawn point is further upwards.
- There is no Death Tornado Spin icon on the first ring to hint the player on how to gain extra speed.
Hot Coco
Previously, the level was originally accessible through the level 26 button and called Ski Crazed, a name that was eventually given to a different level. The Ski Crazed we know replaced Hot Coco as level 26, making it inaccessible through normal means, despite it still being within the files.
Interestingly, by restoring the secret exit portal found at the end of the yellow gem path of Dino Might! in earlier builds, it turns out to be programmed to activate the level 31 button when you exit the level through that secret portal, which unlocks the level.
- The level is called "Hidden Treasure".
- The directional arrow is present in this level. Since there is no path to follow as you are free to explore a large open area, it points towards out of bounds direction.
- The sky coloration has an intense shade of red, which is the same one used in Ski Crazed.
- Sharks don't move around.
Main Level
- There are three bombs instead of two on each side behind the ramp close to the starting point.
- There are two extra bombs surrounding two ? crates in the eastern corner of the map.
- In the ramp next to a checkpoint crate near the volcano, the bombs behind it form a U-shape, whereas in the final game it's only the two parallel lines.
Soundtrack Differences
Most of the tracks are early variants of their respective themes, featuring different melodies or rhythm.
| Level | Aug 26 | Final | Notes |
|---|---|---|---|
| Medieval | The differences are the lowered octave strings at the beginning and repeated harp samples. | ||
| Medieval (Bonus) | |||
| Atlantis | It has different mixing and glitches out at the beginning. | ||
| China | File:Crash3-Aug26 OrientalTheme.ogg | ||
| Prehistoric (Bonus) | |||
| Prehistoric (Hard) | |||
| Jet Ski | It has an unused supposed woodblock sample that isn't present in the final, then later replace by a different instrument with slight changes in the melody too. | ||
| Arabian (Bonus) | |||
| Arabian (Hard) | |||
| Highway | It has a different instrumentation, such as the trumpets. | ||
| Egyptian | It lacks snare drums and the samples are more quieter. | ||
| Egyptian (Bonus) | |||
| Egyptian (Hard) | |||
| Bye Bye Blimps | |||
| Future | |||
| Future (Bonus) | |||
| Future (Hard) | |||
| Mad Bombers | |||
| Tiny Tiger | There is different instrumentation at the beginning that was removed from the final. The mixing and sampling for some of the instruments is different, making one instrument much louder. | ||
| Dingodile | The beginning notes are much louder and it includes a completely different melody over the progression of the track due to different mixing. Several notes are slightly shorter. | ||
| N. Tropy | Some instruments (especially the breaks) are much louder. | ||
| N. Gin | Most of the leading instruments were changed to sound sharper in the final. | ||
| N. Cortex |
Unused Content
Unused Graphics
Mutato Muzika
The title screen level data contains an unused splash screen (bmutD) of Mutato Muzika - the game's composers - which would be displayed after the Universal logo. Interestingly, the exact same screen originally appeared in the June 15th, 1997 prototype of Crash 2.
Early Medieval Textures
In the Medieval levels, there is a set of leftover textures, including a question mark that implies it is from an earlier version of the bonus round that was originally located underground.
Alien Sign
In the Highway levels, an early version of the alien sign is already present in the texture pages, despite not being in the level yet. It has smaller eyes and the coloring is reversed, featuring a black outline filled with yellow instead of a black face with yellow eyes and mouth.
This texture can been seen in the September 26th, 1998 prototype.
Crash 2 Startup Logo Leftover
The Universal logo screen with Crash 2 copyright info can be found in the title screen data.
