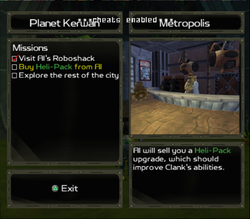
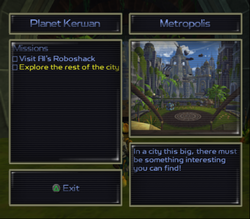
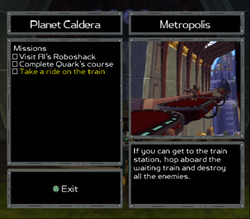
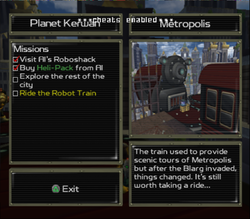
User:ParadoxEpoch/Research Notes/Ratchet & Clank (2002)
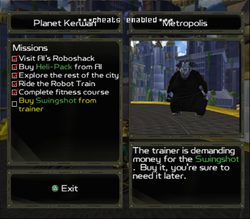
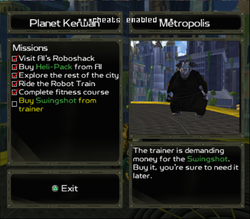
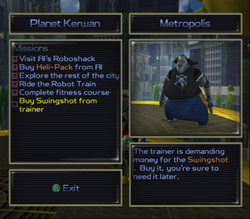
This is a sub-page of User:ParadoxEpoch/Research Notes.
Contents
- 1 Ratchet & Clank (2002) [OPS2M Build Matrix]
- 2 Ratchet & Clank (2002) [E3 Demo]
- 3 Ratchet & Clank (2002) [EB Games Demo]
- 4 Ratchet & Clank (2002) [June 23 Alpha]
- 5 Ratchet & Clank (2002) [June 23/25 Alpha]
- 6 Ratchet & Clank (2002) [June 23/25 Alpha Comparison]
- 7 Ratchet & Clank (2002) [August 2nd Beta]
- 8 Ratchet & Clank (2002) [Final]
- 9 Ratchet & Clank (2002) [Debug Menu]
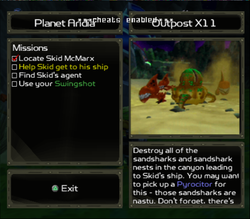
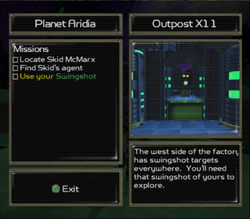
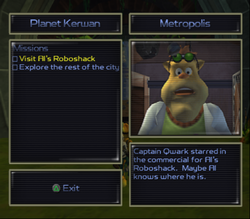
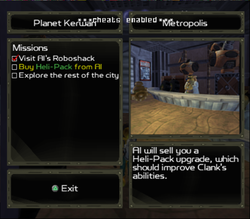
- 10 RaC 1 Mission Preview Screenshots
Ratchet & Clank (2002) [OPS2M Build Matrix]
| Title ID | Issue Names | Demo Build |
|---|---|---|
| SCED-50748 OPS2M Demo 26/eur |
Officieel Nederlandstalig Magazine #17 PlayStation 2 Official Magazine-UK Demo Disc 26 |
Ratchet & Clank ??? Demo |
| SCED-51533 OPS2M Demo 35 |
Officieel Nederlandstalig Magazine #25 PlayStation 2 Officielt Dansk Magasin Demo Disc 8 PlayStation 2 Official Magazine-UK Demo Disc 35 PlayStation 2 Official Magazine-Australia Demo Disc 17 |
Ratchet & Clank ??? Demo |
| PLACEHOLDER | PLACEHOLDER | PLACEHOLDER |
Ratchet & Clank (2002) [E3 Demo]
General Differences
- Ratchet is fixed in place and can't move or use weapons while on a taxi.
- Al's glasses are fully opaque.
- Al has an additional animation where he looks left and right.
- Al and Helga both have an extra cutscene that plays when you attempt to buy from them without having enough bolts.
- The fog effect is different (?? elaborate, check specific fog values in debug menu).
- The "Bolt" option in the debug menu actually controls the Blaster ammo count, likely a leftover from when the Blaster used bolts as ammo.
- The win condition for the "Ride the train" sequence is to destroy all the enemies instead of getting to the front of the train like in the final game.
- The infobot cutscene at the end of the train sequence is for Rilgar instead of Eudora like in the final game.
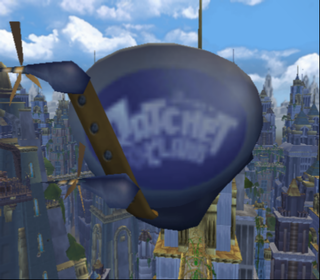
- Blimps have the old "The Adventures of Ratchet & Clank" logo on them.
| Proto | Final |
|---|---|
|
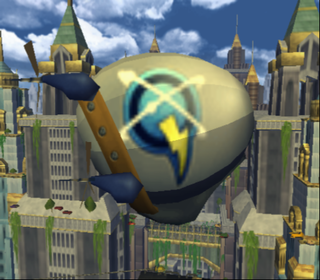
|
Copied from August 2nd Beta:
- There are wanted posters around the city. According to developer Mike Stout, these were removed due to localization difficulties as it was not possible to alter text within an image when translating the game to different languages.
- There is a Blarg Chopper at the end of the "Ride the train" path.
- The Qwark robot cannot be blown up.
- Helga is wearing different clothes.
Weapon Differences
Wrench
- The wrench makes a "whoosh" sound when performing a Comet-Strike.
Bomb Glove
- The bomb glove bombs use a different model.
Blaster
- The Blaster does not have a reticule.
- The bullets from the Blaster are small bolts (?? verify this since it might also exist in the final game).
Gadget Differences
- The Metal Detector does not have any working effects.
Menu Differences
Menu IDs
Main Menu: 1675872

Weapons: 1677240
Gadgets: 1676480
Quick Select: 1678000

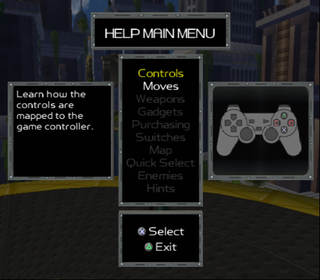
Help Main Menu: 1679248
Help > Controls: 1679872
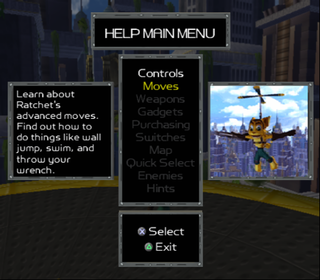
Help > Moves: 1680072

Options Main Menu: 1680664
Options > Help Desk: 1681128

Quit Game Confirmation: 1681344
Help Menu
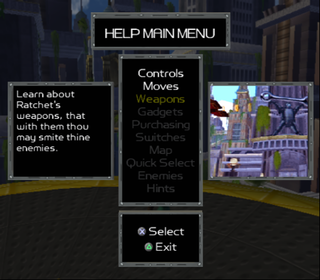
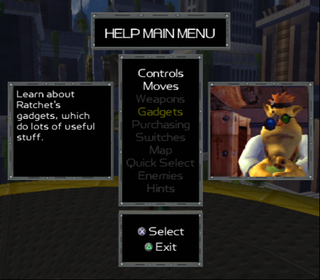
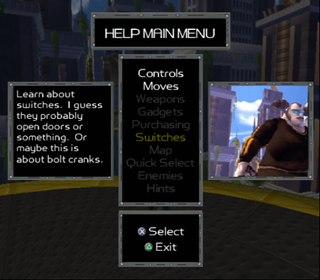
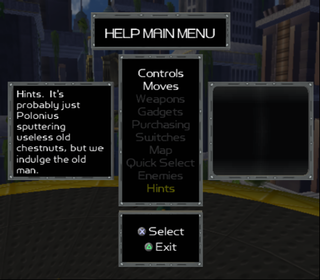
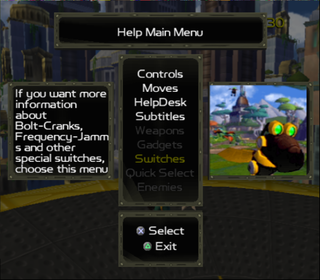
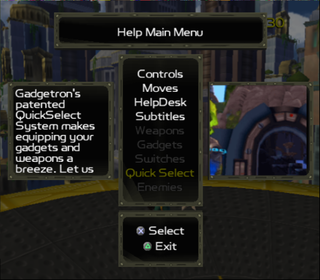
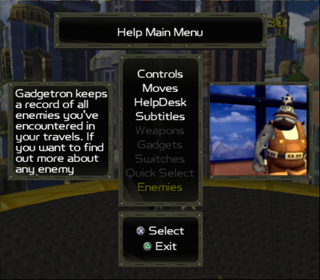
Only the first two menu items are selectable, however all of them have text descriptions that are normally inaccessible. The inaccessible menu items can be highlighted by manually changing the selected index with a memory editor such as Cheat Engine.
Change 2019A190 to the index of the menu item you want to select. Indexes start from 0 (Controls) with the final menu item (Hints) being at index 9.
Index 9 (Hints) will crash the game with a Trap Exception at 0x001cf520 due to the game presumably attempting to read arbitrary memory as the preview image.
String Dump
Race Time: %d:%2d:%2d
A help system is in place to offer tips about the game for this demo. It can be disabled from the 'options' menu on the pause screen.
The blue box on this platform is a weapons vendor.  You can use it to restock on ammo and to purchace new gadgets and weapons.
You own other weapons besides your wrench. You can switch between them in the quick-select menu by pressing and holding    .
Press the 'select' button to bring up a mapscreen of the city of Metropolis.
You'll need to do a high jump with your heli-pack upgrade to climb these boxes.  Just crouch using either the R1 or R2 button, then jump with    .
Your heli-pack upgrade also lets you perform along jump.  While running, crouch with either the R1 or R2 button, then jump with    .
Now you can also glide, thanks to your heli-pack upgrade.  Simply press and hold the     button while you are in the air.
You can use this jump slot to reach the ledge above.Jump against a wall then jump again when you touch the wall to kick off in the other direction.
To use a zipline, simply stand underneath the wire and jump.
You can look around by pressing and holding either the L1 or L2 button.  You can use this to aim your long-range weapons.
You can use the right analog stick to control the camera.
To use the Swingshot, fire it at one of the green or yellow hovering targets and hold on!
Inflato-Ratchet Glove

Hud: WARNING! re-linking hud art bank %d without a prior unlink (Jason error)
Hud: WARNING! Sending a bank to Zbuffer in GS and palettes will be left behind.
Hud: heap alloc failed.  probably fatal.
cdrom0:\USR\LOCAL\SCE\IOP\MODULES\IOPRP243.IMG;1
cdrom0:\USR\LOCAL\SCE\IOP\MODULES\SIO2MAN.IRX
Can't load module sio2man
cdrom0:\USR\LOCAL\SCE\IOP\MODULES\PADMAN.IRX
Can't load module padman
cdrom0:\USR\LOCAL\SCE\IOP\MODULES\IOPSTASH.IRX;1
Can't load module stash
loaded irx modules
initialised pads
screwed up point light on tie
screwed up point light on tfrag
screwed up point light on shrub
!!!! Too many directional lights !!!! - Lighting will look bogus as a penalty.
Loading level wad 2...
internal level sound mismatch
internal moby sound mismatch on moby %d
***
occlusion out of date on mobys (%d / %d)
***
***
occlusion out of date on tfrag
***
***
occlusion out of date on ties (%d / %d)
***
***
no occlusion
***

*** MEMORY MAP ***

os:             %.1fK
code mem:       %.1fK
dead space:     %.1fK
vu chain bufs:  %.1fK
hud:            %.1fK
gadget buffer:  %.1fK
tfrag geom:     %.1fK
collision:      %.1fK
collision:      unknown
occlusion:      %.1fK
sky:            %.1fK
shared vram:    %.1fK
particle vram:  %.1fK
effects vram:   %.1fK
mobys:          %.1fK
ties:           %.1fK
shrubs:         %.1fK
ratchett seqs:  %.1fK
tie insts:      %.1fK
shrub insts:    %.1fK
moby insts:     %.1fK
moby pvars:     %.1fK
paths:          %.1fK
part insts:     %.1fK
end of mem:     %.1fM
estimated mem:  %.1fM
host0:z:/i5/levels/level%d/npcs/scene_%d/chunk_0.dat
host0:z:/i5/levels/level%d/npcs/scene_%d/chunkp_0.dat

Infobot for sale: %b bolts
Eliminate sandsharks for Hoverboard
Trade Zoomerator for Sonic Summoner
Buy helipack for %b boltsBuy swingshot for %b bolts
Race for Zoomerator
RYNO for sale: %b bolts
Bribe Bouncer: %b bolts
Grind boots for sale: %b bolts
Infobot for sale: 1000 bolts
No Map Available

Talk to the mechanic
Find the mechanic and talk to him.
Buy infobot from mechanic
The mechanic is selling an infobot that will let you travel to another planet.
Rescue Skid McMarx
Famous hoverboarder Skid McMarx needs your help.  Find him and rescue him.
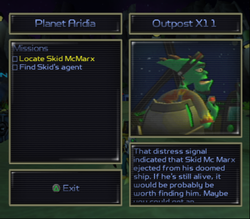
Find Skid's agent
Go Find Skid's agent.
Bring Zoomerator to Skid's agent
If you bring the Zoomerator to Skid's agent, you'll get a Sonic Summoner as a reward.
Swingshot through the factory
Use a Swingshot to traverse the factory.
Visit Al's Roboshack
Find Al's Roboshack.  He might be able to help you find Captain Quark.
Buy Helipack at Al's Roboshack
Al is offering a Helipack upgrade for Clank.  With it you can long jump, high jump, and glide.  It'll cost you 1,000 bolts.
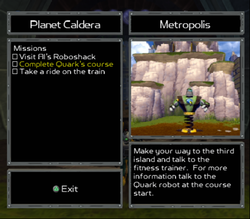
Complete Quark's fitness course
Complete Quark's course
Make your way to the third island and talk to the fitness trainer.  For more information talk to the Quark robot at the course start.
Buy swingshot from fitness trainer
Now that you've completed the fitness course, buy the swingshot for 1,000 bolts.
Take a ride on the train
If you can get to the train station, hop aboard the waiting train and destroy all the enemies.
Grab the rogue infobot
There's an Infobot that you can reach now that you know how to use the train.  Go get it.  Infobots are useful but not in this demo.
Confront the robot lieutenant
Defeat the giant mechs
Win the hoverboard race
Talk to Captain Quark
Rescue the gadget engineer
Buy grindboots from gadget engineer
Buy Gridboots from the gadget engineer that you rescued.  That's right, you rescued him and now he wants to be paid.  Go figure.
Destroy the ghost ship
Find the hidden cargo
Survive Quark's gauntlet
Get through Quark's gauntlet.
Exterminate the Snagglebeast
Destroy the Blarg bombers
Make it to the walled city
Take a ride on the grind rail
Take a ride on the grind rail.
Buy the infobot from the deserter
The deserter is selling an infobot.  Find him and buy it.

You've arrived at
All Missions Complete

Tried to create moby and couldn't.
WorldUpdateTime: %d
moby texture overflow
vu chain overflow - mobys dropped

MB_CheckCollPill: No collision data for this moby... aborting
MB_CheckCollPill - Strange collision type %d
*** frame %d ***
class: %d	count: %d	cycles: %d
****Load file failed to start!****
Audience with Quark
WARNING: Moby %d (class %d) thinks it's an IMoby and it's not.
WARNING: Moby %d (class %d) is an NPC with no script.
You need %d bolts for %s
^ Pay %d bolts for %s
^ Trade %s for %s
^ Do mysterious trade

frame %d ***
class: %d	count: %d	cycles: %d
tried to draw path -1
Press R1 for help
Learn how the controls are mapped to the game controller.
Learn about Ratchet's advanced moves.  Find out how to do things like wall jump, swim, and throw your wrench.
Learn about Ratchet's weapons, that with them thou may smite thine enemies.
Learn about Ratchet's gadgets, which do lots of useful stuff.
Learn how to use the vendor to buy gadgets and ammo.
Learn about switches.  I guess they probably open doors or something.  Or maybe this is about bolt cranks.
Learn about all the amazing features in our really cool map.
Learn how to configure and use the gadget quick-select system.
Learn about the various enemies.  Their strengths, weaknesses, and minor-league batting averages.
Hints.  It's probably just Polonius sputtering useless old chestnuts, but we indulge the old man.
Press # + # + #.  Ratchet will swing his wrench three times in a row for a combo attack.
Jump with % and then hit # for an overhead smash.  This does more damage than a regular wrench attack.
Crouch by holding R1 or R2 and hit # to throw your wrench.
Look for 'jump slots' with textures like the picture above.  Jump toward one wall using % and then hit % again just as you hit the wall.  Jump back and forth between the walls to get to the top of the slot.
Simply crouch by holding R1 or R2 and use the analog stick to turn in place.  You can turn and fire weapons in place using this method.
When in water, press % to dive and # to rise.  Push harder to rise more quickly.  Watch your air gauge.  If the bubbles run out you'll drown.  Eventually you can find a gadget that will allow you to breathe underwater.
Hold down R1 or R2 to crouch and snap the analog stick left or right while pressing %.  You can fire your weapons while performing this move.
Hold down R1 or R2 to crouch and snap the analog stick back while pressing %.  You can fire your weapons while performing this move.
Ratchet will automatically grab ledges if you jump up to them.  To pull yourself up, hit %.  To drop down hit R1 or R2.
When hanging from a ledge you can traverse it by pressing the analog stick left or right.
To glide, jump using %  then hit % again and hold it down. You can glide with the helipack or rocketpack.
To long jump get a running start,  then press and hold R1 and % together. For maximum distance when jumping across gaps, jump from the very edge of the gap. You can long jump with the helipack or rocketpack.
To high jump, crouch using R1 or R2 and press % to jump. You can glide out of a high jump by hitting % again. This will give you maximum jump distance. You can long jump with the helipack or rocketpack.
To glide you first have to acquire a special upgrade for Clank.
To long jump you first have to acquire a special upgrade for Clank.
To high jump you first have to acquire a special upgrade for Clank.

OPTIONS MAIN MENU
Toggle help desk messages on and off.
HELP DESK OPTIONS
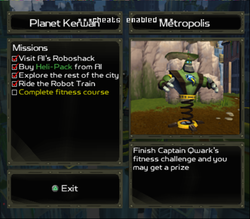
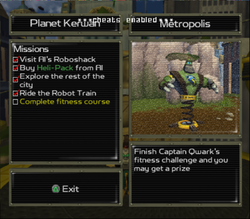
***cheats enabled***
Right stick zooms   Left stick tracks%
to view missions
L�"˜�"¼�"˜�",�"˜�"´�"%s -- not available
shrub texture overflow

cdrom0:\USR\LOCAL\SCE\IOP\MODULES\LIBSD.IRX
loading libsd.irx failed
loading 989snd.irx...
cdrom0:\USR\LOCAL\989SND\IOP\2_4_3\989SND.IRX
loading 989snd.irx failed
Moby class %d has no sounds!
Tried to play sound %d out of %d for moby class %d
Level has no sounds!
Tried to play sound %d out of %d for core
Tried to play sound %d out of %d for level

Planet Beladonis
Deforestation Site
Blarg Tactical Station

BOMB GLOVE!   THROW BOMBS AT YOUR ENEMIES!  bBbObObMb!
BOMB GLOVE: This is information about the weapon
BOMB: This is information about the ammo for the weapon
DEVASTATOR!  LAUNCH GUIDED bMbIbSbSbIbLbEbS AT THE BAD GUYS.
PX6 DEVASTATOR: This is information about the weapon
ROCKET: This is information about the ammo for the weapon
VISIBOMB!  STEER YOUR MISSILES WITH DEADLY ACCURACY USING THE ON-BOARD VIDEO RELAY!
VISIBOMB: This is information about the weapon
MISSILE: This is information about the ammo for the weapon
TAUNTER!  ANNOY YOUR ENEMIES AND LURE THEM INTO TRAPS AND AMBUSHES WITH THIS OBNOXIOUS NOISE-MAKER!
TAUNTER: This is information about the weapon
This is information about the ammo for the weapon
BLASTER!  POINT IT MORE OR LESS AT THE BAD GUYS AND MOW 'EM DOWN!
BOLT BLASTER: This is information about the weapon
BOLT: This is information about the ammo for the weapon
PYROCITOR!  THIS FEARSOME WEAPON REALLY SHINES AT CLOSE RANGE.  GREAT FOR TAKING OUT THOSE PESKY SMALL ENEMIES.
PYROCITOR: This is information about the weapon
UNIT: This is information about the ammo for the weapon
MINE GLOVE!   BE SNEAKY AND SET bEbXbPbLbObDbIbNbG TRAPS FOR YOUR ENEMIES!
MINE GLOVE: This is information about the weapon
MINE: This is information about the ammo for the weapon
WALLOPER!  PUNCH PEOPLE HARD.
WALLOPER: This is information about the weapon
TESLA CLAW!  BLAST THE BAD GUYS WITH BOLTS OF ELECTRICITY!
TESLA CLAW: This is information about the weapon
GLOVE OF DOOM!  LAUNCH A HORDE OF EXPLODING bBbUbDbDbIbEbS TO CHASE DOWN YOUR FOES!
GLOVE OF DOOM: This is information about the weapon
EGG: This is information about the ammo for the weapon
R.Y.N.O!  DESTROYS EVERYTHING YOU CAN SEE AND PROBABLY A FAIR BIT THAT YOU CANT.
R.Y.N.O: This is information about the weapon
CARTRIDGE: This is information about the ammo for the weapon
DEFENSE DROID GLOVE!  SURROUND YOURSELF WITH A SCREEN OF POINT DEFENSE BOTS.
DEFENSE DROID GLOVE: This is information about the weapon
Defense Driod Glove
INFLATO RATCHET!  FOOL YOUR ENEMIES WITH THIS EERILY LIFELIKE bDbEbCbObYb.
INFLATO RATCHET: This is information about the weapon
DECOY: This is information about the ammo for the weapon
Iinflato Ratchett
frag texture overflow
tie texture overflow

YOU CAN'T bAbFbFbObRbD THAT!
bCbObMbIbNbG bSbObObNb!b!b!
HEY YOU!  YEAH, YOU WITH THE ROBOT STRAPPED TO YOUR BACK!  COME OVER HERE AND LOOK AT ALL THIS COOL STUFF I'VE GOT FOR SALE.
VISIT GADGETRON!  VIEW THE LATEST IN ENEMY-SMITING TECHNOLOGY!
STOP BY ONE OF OUR SHOWROOMS TODAY FOR A TEST-DRIVE!
EAT AT JOE'S
GADGETRON IS YOUR ONE-STOP SHOP FOR ALL YOUR GADGET AND AMMUNITION NEEDS.
GADGETRON HAS SHOWROOMS CONVENIENTLY LOCATED ON ALL INHABITED WORLDS, AND ALSO IN THE ENTIRELY UNINHABITED BOGS OF TRACHEA FIVE.  WE DON'T REALLY KNOW HOW THAT ONE GOT THERE.  ENGINEERING BLAMES MARKETING, MARKETING BLAMES LEGAL, AND LEGAL HAS BEEN AT A ''CONFERENCE'' ON THE TROPICAL PLANET OF BAHAMIA FOR THE LAST SIX MONTHS AND THEY DON'T RETURN OUR CALLS.
VISIT OUR HEADQUARTERS ON BOBONIA III!  MARVEL AT THE EFFICIENCY OF OUR SECURITY BOTS!  ADMIRE THE LUSH SCENERY!  EVADE THE MOBS OF RAMPAGING CLEANERBOTS!
CHECK OUT OUR ALL-NEW LINE OF MEDIUM- AND LONG-RANGE GADGETS!
HELP!  I'M STUCK IN THIS BOX!
GADGETRON IS THE QUADRANT'S LEADING RETAILER OF STATE-OF-THE-ART GADGET TECHNOLOGY!
ASK ABOUT OUR SELECTION OF HIGH-QUALITY AMMUNITION!
GADGETRON!  WHERE YOU bAbLbWbAbYbS SAVE MORE!

vu1 chain overflow
vu1 syncChain sit-and-spin timeout.
DMAC(15) - Bus Error
D1_CHCR=%X
D1_TADR=%XWhy doesn't this work?

Invalid anim detected on pLD->anims[%d]->anim in walk_init2LegAnim.
See walk.h and check your initialization function for moby class %d
sizeof(w_2legData) = %d bytes
Can't Open file %s
Cannot allocate IOP memory
-------- audio information --------------------
[%c%c%c%c]
header size:                            %d
type(0:PCM big, 1:PCM little, 2:ADPCM): %d
sampling rate:                          %dHz
channels:                               %d
interleave size:                        %d
interleave start block address:         %d
interleave end block address:           %d
[%c%c%c%c]
data size:                              %d
pts buffer overflow
Cannot open '%s'(sceCdSearchFile)
DMA ADD not active
decode thread: aborted
sceMpegGetPicture() decode errortrain engine has no cars!  Deleting moby instance %d
train has no master! Deleting moby instance %d
train end path has no STOP NODE!!!
  Bailing out of the end cutscene before the train goes out of control and kills us all
  WARNING moby class %d instance %d has no path!
^ activate vendor
WARNING moby class %d instance %d has no path!
M177_QuadCount overflow %d
M177_GlowQuadCount overflow %d
Hey, M186 init should be earlier!
main loop squirm! should never get here!
Unknown type of item moby: %d
Dam HP:%f damageroClass:%d
reaction type:%d damagetype:%d

cutscene moby class %d maya instance %d: cutsceneCameraInitPos INVALID
Deleting Cutscene!
Got Infobot for level %d
^ Return to the start?
^ Go to some unknown location??
Sucking: Tried to suck unsuckable moby type %d
Sucking: Tried to suck a NULL pointer!
Sucked: Tried to suck unsuckable moby type %d
Sucked: Tried to suck a NULL pointer!
Blown: Tried to blow unsuckable moby type %d
Blown: Tried to blow a NULL pointer!
AbortSuck: Tried to abort sucking an unsuckable moby type %d
AbortSuck: Tried to abort sucking a NULL pointer!
MB_GetSuckVars: Null/Dead Moby Error!
MB_GetSuckVars: Error! No pVars on moby at %8x
MB_GetSuckVars: Error! No suckVars in moby at %8x
MB_Sucking: Tried to suck a NULL pointer!
MB_Sucked: Tried to suck a NULL pointer!
MB_Blown: Tried to blow a NULL pointer!
SUCKSTATE_DEATH: should not be called any more!
Bad path data on moby class 899, maya instance %d
^ Return to the vendor?
^ Visit Big Al's Robot Shack?
^ Go to the beginning of the fitness course?
^ Return to the end of the fitness course?
^ Go to some unknown location??
Golden Bolt Acquired

cdrom0:\SCUS_972.09;1

I-5
-------------
UPDATE
------
Ratchett
Mobys
Parts
Camera
Step
*
MODE
----
Control
Profile
Occl
Magnetic
Invinc
Drawdist
Coll
Tv Mode
Screen
Scene
%d
none
Segment
%d = %d
DRAW
Darken
Env Coll
Moby Coll
Hero Coll
Bspheres
Cameras
Samples
Text
AMMO
Bomb
Devastator
Visibomb
Agents
Pyrocitor
Tesla Claw
Mine Glove
Bolt
FOG
---
NearDst
%.02f
NearInt
FarDst
FarInt
Color_R
Color_G
Color_B
MISC
BattleCam
    sfx
  music
 dialog
ambient

render setup
sky draw
pre effects
vu effects
moby effects
misc effects
part draw
post effects
aa blur
hud
screen overlays

Place: %dst
Place: %dnd
Place: %drd
Place: %dth
Lap: %d/3

Quit race?
  Quit
  Continue
Save?
  Save
  Don't Save

Helipack
Rocketpack
Hydropack
Sonic Summoner
Wrench
Suck Cannon
Bomb Glove
Devastator
Swingshot
Visibomb
Taunter
Blaster
Pyrocitor
Mackerel 1000
Mine Glove
Walloper
Tesla Claw
Glove of Doom
Morpha Ray
Hydro-Displacer
R.Y.N.O.
Defense Droids
Trespasser
Metal Detector
Magne-boots
Grind-boots
Hoverboard
Holo-Guise

hud.cpp

wait
follow
attack
enter

Rebooted IOP

loaders.cpp
hud bank 0
hud bank 2
hud bank 3
completed

\DEMOLOGO.PSS;1
debug text
map.cpp

error

Find a new ship
Buy Helipack
Buy Swingshot
Buy Grindboots

Missions:
 - %s
to continue
moby texs
moby draw
moby skin

cdrom0:
\LVL3.VAG;1
Zoomerator

Infobot 2
Sonic Summoner
Helipack
Swingshot
Race
R.Y.N.O.
Grind Boots
You need the %s
You need XXXXX
^ Talk
^ %s

€>% Toggle
^ Exit
Weapons
Gadgets
Quick Select
Help
Options
Quit Game
GADGETS
Hand Items
Back Packs
Head Items
Foot Items
Packs
Helmets
Shoes

WEAPONS
% Equip
QUICK SELECT
View Missions
Play Infobot
Galactic Map
HELP MAIN MENU
Controls
Moves
Purchasing
Switches
Map
Enemies
Hints
% Select
CONTROLS
MOVES
Wrench combo
Wrench smash
Wrench throw
Wall jump
Crouch turn
Swim
Side flip
Back flip
Ledge grab
Ledge traversal
Glide
Long jump
High jump
Help Desk
Save
Load
Subtitles
Sound
Vibration
Video Options
Special

Quit game?
^ No
% Yes

Uses no Ammo
(no ammo)
%d of %d,%03d of %d
%d,%03d
default
?????
(null)
^  to exit

Missions
L1
R1
ON
OFF

Level 1
Level 2
Level 3
Level 4
Level 5
Level 6
Level 7
Level 8
SELECT
CANCEL
shrub texs
shrub draw
sky texs
%s on %s
City 0
Planet 0
Crater City
Outpost X11
Planet Aridia
Metropolis
Planet Caldera
the %s on %s
Planet Ferwon
Blackwater City
Planet Talos
the %s in %s
Nebula G34
Quark's Base
Planet Destron
Fort Krontos
Planet Alactra
City 9
Planet 9
City 10
Planet 10
City 11
Planet 11
City 12
Planet 12
City 13
Planet 13
City 14
Planet 14
City 15
Planet 15
City 16
Planet 16
City 17
Planet 17
City 18
Planet 18
no text
no name

BOMB
Bomb Glove
ROCKET
Devastator
MISSILE
Visibomb
Taunter
BOLT
Blaster
UNIT
Pyrocitor
MINE
Mine Glove
Walloper
Tesla Claw
EGG
Glove Of Doom
CARTRIDGE
R.Y.N.O
DECOY

off
on

normal
camera
cam+chr
volume
bars
render
mobys
ties
shrubs
occl
cpu/gpu
sphere

near

hotspt
sound

ntsc
pal

small

freeze
active

 occ
*occ*

render setup
sky texs
sky draw
tfrag texs
tfrag draw
tie texs
tie draw
shrub texs
shrub draw
moby texs
moby draw
effects texs
vu effects
moby effects
misc effects
part draw
post effects
hud
screen overlays
aa blur
debug text
blue
black
grey
white

high
low

tfrag texs
tfrag draw

tie texs
tie draw

moby update
hero update
part update
camera update

Speech Ready

Play Speech

Queue Speech

THANK YOU
moby update
hero update
part update
%d,%03d
%d
Ammo
BACK
BUY
YES
EXIT
NO

You're
maxed
out!

How
many?

You can't
afford it!

Purchase

jumpdist = %f

[ Error ] %s

Got %d %s ammo

HP:%f

\REPORTER.PSS;1

Helga
Got %s
Got %s
Ratchet & Clank (2002) [EB Games Demo]
Menu Differences
Menu IDs
Main Menu: 1745952

Weapons: 1747256
Gadgets: 1746512
Quick Select: 1747992
Items: 1751944

Help Main Menu: 1749400
Help > Controls: 1750008
Help > Moves: 1750216
Help > HelpDesk: 1751304
Help > Subtitles: 1751536

Options Main Menu: ?? This menu probably still exists event though the menu option is missing. Strings are still present in executable.

Quit Game Confirmation: 1751768

Local Map Screen: 1748392
Missions Screen: 1749024
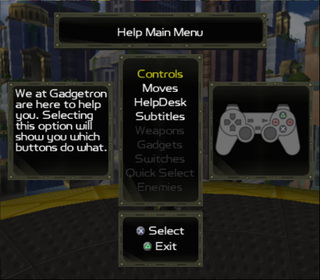
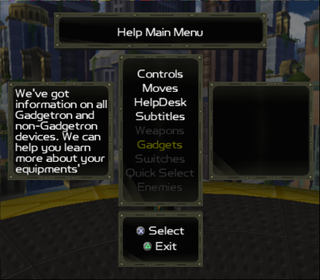
Help Menu
Only the first four menu items are selectable, however all of them have text descriptions that are normally inaccessible. The inaccessible menu items can be highlighted by manually changing the selected index with a memory editor such as Cheat Engine.
From Metropolis, change 201AB394 to the index of the menu item you want to select. Indexes start from 0 (Controls) with the final menu item (Enemies) being at index 8.
Index 5 (Gadgets) will crash the game due to a seemingly referencing a missing or broken preview image.
Local Map
Address 201787A4 stores the index of the current local map page. Changing this value will show different planets in the local map.
Planet Matrix
- 1: Tobruk Crater, Planet Novalis
- 2: Outpost X11, Planet Aridia
- 3: Metropolis, Planet Kerwan
- 4: Deforestation Site, Planet Eudora
- 5: Blackwater City, Planet Rilgar
- 6: Blarg Tactical Station, Nebula G34
- 7: Qwark's Headquarters, Planet Umbris
- 8: Fort Krontos, Planet Batalia
- 9: Blarg Refueling Depot, Planet Gaspar
- 10: Kogor Refinery, Planet Orxon
- 11: Jowai Resort, Planet Pokitaru
- 12: Planetbuster Factory, Planet Hoven
- 13: Gemlik Moonbase, Oltanis Orbit
- 14: Gorda City Remains, Planet Oltanis
- 15: Robot Plant Z332, Planet Quartu
- 16: Gadgetron Test Facility, Planet Kalebo III
- 17: Drek's Flagship, Veldin Orbit
- 18: Kyzil Plateau, Planet Veldin
Ratchet & Clank (2002) [June 23 Alpha]
- An NTSC-U magazine review build dated over three months before the final build
- Includes a dongle check which can be patched out
- Includes a gameplay video trailer and a playable demo
- Seems to be almost identical to the June 25th Alpha aside from debug mode being disabled. It can be reactivated with a few hex changes to the eboot.
Ratchet & Clank (2002) [June 23/25 Alpha]
- Both alpha builds contain the same 8 levels on the disc, but the June 25 build includes empty directories for level9 to level13 which are missing entirely in the June 23 build.
- These directories are date-stamped in the ISO with the last-modified date, which reveals when each level in the game was most recently worked on.
The table below shows the date that a level's directory was last modified. This can be assumed to be the date the level was last modified or level cutscenes edited.
| Level Path | Last Modification Date |
|---|---|
| /data/levels/level1 Novalis |
19/04/2002 12:58PM |
| /data/levels/level2 Aridia |
19/04/2002 12:59PM |
| /data/levels/level3 Metropolis, Kerwan |
14/05/2002 07:11PM |
| /data/levels/level4 Eudora |
19/04/2002 12:59PM |
| /data/levels/level5 Blackwater City, Rilgar |
14/05/2002 03:43PM |
| /data/levels/level6 Nebula G34 |
19/04/2002 12:59PM |
| /data/levels/level7 Umbris |
19/04/2002 12:59PM |
| /data/levels/level8 Batalia |
14/05/2002 03:46PM |
| /data/levels/level9 Gaspar |
03/05/2002 08:18PM |
| /data/levels/level10 Orxon |
25/04/2002 10:03AM |
| /data/levels/level11 Pokitaru |
25/04/2002 10:03AM |
| /data/levels/level12 Hoven |
13/06/2002 10:51AM |
| /data/levels/level13 Gemlik Base, Oltanis Orbit |
13/06/2002 09:45AM |
Interesting Message IDs / Strings
On Eudora, address 201AE12C stores the currently displayed Message ID on the Mission Screen. Its value can be changed to display any message in the game. If you try to set a message that's out of range, you'll get a "Paradox: This message does not exist" error instead.
Also on Eurdora, address 201AE044 stores the currently displayed Mission Image ID. Change it to see different mission preview images.
Message IDs seem to range from 20000-20452
Below are some interesting message IDs:
- 20158: "Style Points"
- 20226: "Restart level?"
- 20270: "You will lose all bolts and gadgets earned if you quit now. To blast off to the other world in this demo, go to your ship."
- 20284: "Demo Objectives:"
- 20293: "Play Metropolis"
- 20294: "Play Blackwater City"
- 20295: "Watch Movie"
- 20323: "Play Tobruk Crater"
- 20324: "Play Outpost X11"
- 20451: "△ Blast off to Tobruk Crater"
- 20452: "△ Blast off to Outpost X11"
Below are some message ID ranges and the type of messages contained within:
- 20000-20007: Gameplay tips
- eg: "You're loaded with bolts. How about going to the Gadgetron Vendor and spending some?"
- 20008-20019: Controller button descriptions
- eg: "the triangle button"
- 20021-20036: Weapon Names
- 20037-20051: Gadget Names
- 20052-20058: Item Names
- 20099-20118: Planet Location Names
- eg: "Tobruk Crater"
- 20120-20137: Planet Names
- eg: "Novalis"
- 20138-20155: Planet arrival messages
- eg: "You've arrived at Kyzil Plateau on Planet Veldin"
- 20181-20188: Help Menu Item Descriptions
- 20258-20269: Gadgetron Vendor Marquee Messages
- eg: "ASK ABOUT OUR SELECTION OF HIGH-QUALITY AMMUNITION!"
- 20229-20237: Item Descriptions
- eg: "Developed by the Blarg scientists, Premium Nanotech increases your maximum health by one nanotech sphere."
- 20310-20322: Weapon Descriptions
- These are the weapon descriptions that display in the Gadgetron vendor marquee when highlighting a weapon. They use a formatting syntax by prepending a lowercase b to each letter to indicate a letter that will flash/blink in the marquee.
- 20325-20434: Mission names and descriptions.
- Everything from Novalis to Gemlik Base seems to be here in the June 25 Alpha.
Ratchet & Clank (2002) [June 23/25 Alpha Comparison]
The only functional difference between the June 23 and June 25 builds is the lack of the debug menu in the former.
File Date Differences
- /SCPS_000.00
- June 23 Alpha - 23/06/2002 5:44PM
- June 25 Alpha - 25/06/2002 4:04PM
Executable Byte Comparison
There are only 4 bytes of differences between original copies of the June 23 and June 25 alpha executable binaries (SCPS_000.00). These are in the form of 2x 2 byte values.
| Offset | June 23 Alpha | June 25 Alpha |
|---|---|---|
| 0x00097160 | 6B 97 | E1 9D |
| 0x00097164 | 85 09 | FC 0F |
Ratchet & Clank (2002) [August 2nd Beta]
| To do: Most of the content that was here has now been submitted to the build's dedicated page on TCRF. All that remains here is the stuff that isn't ready to publish yet. These entries need to either be investigated further, are internal notes or are missing substantial information. |
Memory Addresses
| To do: Upload CE cheat table for this build |
- Bolts: 20156D10
- Gold Bolts: 20156D14
- Debug Code Button Presses: 20157E94
- This address stores a single byte integer that represents the number of consecutive correct button inputs to trigger debug mode. Each button press increases the value by 1 until reaching 8, at which point pressing the final button in the sequence (square) resets the value to 0 and toggles debug mode
- This address is only valid on Kerwan(??) and changes depending on the currently loaded planet
The following addresses store the index of the currently selected menu item. Changing this value will highlight a different menu option, which can be useful for selecting otherwise hidden or unavailable menu items.
These addresses are only valid when on Kerwan(??) and change depending on the currently loaded planet.
- Highlighted Main Menu Index: 201AE154
- Highlighted Help Main Menu Index: 201AEE58
- Highlighted Weapons Help Menu Index: 201AF65C
- Highlighted Gadgets Help Menu Index: 201AF85C
- Highlighted Moves Help Menu Index: 201AF1C0
- Highlighted Options Menu Index: 201AF418
Debug Mode ("Cheats Enabled") Functionality
- Debug Mode can be enabled from the pause menu with the button combo Up, Down, Up, Down, Left, Right, Left, Right, Square
- Enabling debug mode will automatically unlock all planets
- Hold L1 + L2 to show position coordinates for Ratchet and the game camera
- When in free-cam mode, the camera can be tilted up and down by holding L2 + R2 and pressing Up or Down on the D-Pad
General Differences
- The HelpDesk girl has a different voice (?? confirm if this is present in game or just as unused audio files)
- There is a lot of unused HelpDesk audio
| To do: Rip unused HelpDesk audio |
- Level transitions are unfinished and use a basic animation of Ratchet's ship
- The O2 Mask is black instead of red like in the final game
- The items on Ratchet's belt look different (?? elaborate)
- The Swingshot animation in the Gadgets menu is slightly different
- Ratchet turns bolt cranks slower (?? MAYBE, confirm this. Might just be an emulation thing)
Weapon Differences
Ammo Differences
| Weapon | August 2 Beta | Final |
|---|---|---|
| Bomb Glove | ???/??? | ???/??? |
| Pyrocitor | ???/??? | ???/??? |
| Blaster | 100/200 | ???/??? |
| Glove of Doom | 3/10 | 3/10 |
| Mine Glove | 25/50 | 25/50 |
| Devestator | 10/20 | 10/20 |
| WEAPONNAME | ???/??? | ???/??? |
| WEAPONNAME | ???/??? | ???/??? |
Level Differences
Aridia Differences
- The sandsharks make a different sound when hit (?? confirm this)
| To do: Rip audio data for this. |
Eudora Differences
- The cutscene with the Lieutenant is somewhat unfinished (?? elaborate)
- There are only three crates on the pad in the mini-secret area near the start of the suck cannon path instead of four like in the final game
| Proto | Final |
|---|---|

|

|
Rilgar Differences
- The enemies, crates and collision mesh from the removed gold bolt area (that was moved to Novalis) are still present (?? confirm this is not also in the final game)
| Proto | Final |
|---|---|

|

|
- Qwark's model in the TV screen at the hoverboard tournament is larger (?? confirm this)
| Proto | Final |
|---|---|

|

|
Umbris Differences
- The cutscene with Qwark before the boss fight has several minor differences (?? elaborate)
| Proto | Final |
|---|---|

|

|
- There is a green atmospheric fog when approaching the large circular shark pool with the three buttons pads in the middle. This fog is not present in the final game.
| Proto | Final |
|---|---|

|

|
Gaspar Differences
- The gold bolt on the ship destruction path is a solid black texture (?? confirm this is not an emulation issue)
| Proto | Final |
|---|---|

|

|
Orxon Differences
- Some enemies are missing or placed differently. Most notably, the on-foot Blarg enemies appear to be missing from this planet entirely and there is only one Blarg Saucer (?? confirm this)
Pokitaru Differences
- The resort owner has a much higher jump when following Ratchet than he does in the final game (?? confirm this)
- The pufferfish (?? these have a name) don't have a bouncing idle animation
- The Blarg ships fall away towards the ground when destroyed instead of exploding (?? confirm this is actually different to retail)
- There is no cutscene after the ship dogfight (?? confirm this is not due to sequence breaking, i.e already having the O2 Mask)
Ratchet & Clank (2002) [Final]
Memory Addresses
Game Mode
The game mode is a 4 byte value that determines whether the player is in-game, in a menu, level transition etc..
PAL
2015F6A8
NTSC
2015F5C4
The mode value can be set to some of the following hexadecimal values to trigger the corresponding game state
In-Game
00000000
Main Menu
00000003
Debug Menu
FFFFFFFF
Debug Cheat Codes
| To do: Replace button input strings with icons. |
Several debug codes exist in the game which can be used on the main menu to unlock various weapons, gadgets, planets and skill points.
While in game, bring up the pause menu and hold L1 + R2 while entering any of the codes below to unlock the corresponding item.
Skill Points
| Skill Point | Menu Code |
|---|---|
| Take Aim | DOWN SQUARE CIRCLE LEFT UP LEFT RIGHT RIGHT LEFT LEFT RIGHT CIRCLE UP CIRCLE UP LEFT RIGHT SQUARE RIGHT LEFT |
| Swing It! | DOWN RIGHT LEFT RIGHT DOWN RIGHT LEFT RIGHT DOWN RIGHT LEFT RIGHT DOWN RIGHT LEFT RIGHT DOWN RIGHT LEFT RIGHT |
| Transported | UP DOWN LEFT CIRCLE SQUARE UP RIGHT LEFT LEFT RIGHT UP RIGHT RIGHT SQUARE LEFT SQUARE DOWN UP RIGHT SQUARE |
| Strike a Pose | RIGHT DOWN LEFT LEFT CIRCLE DOWN CIRCLE SQUARE UP UP RIGHT UP UP UP DOWN RIGHT UP SQUARE RIGHT UP |
| Blimpy | SQUARE UP UP RIGHT DOWN UP CIRCLE UP DOWN RIGHT UP UP SQUARE UP RIGHT DOWN CIRCLE CIRCLE SQUARE LEFT |
| Qwarktastic | CIRCLE SQUARE LEFT SQUARE UP RIGHT CIRCLE RIGHT SQUARE LEFT LEFT DOWN CIRCLE SQUARE LEFT DOWN DOWN RIGHT RIGHT LEFT |
| Any Ten | SQUARE RIGHT LEFT SQUARE DOWN RIGHT DOWN UP CIRCLE SQUARE DOWN LEFT RIGHT LEFT LEFT LEFT SQUARE DOWN CIRCLE SQUARE |
| Tricky | UP DOWN SQUARE UP LEFT SQUARE RIGHT DOWN LEFT LEFT SQUARE UP SQUARE UP DOWN DOWN SQUARE LEFT CIRCLE DOWN |
| Cluck, Cluck | DOWN SQUARE CIRCLE LEFT LEFT UP RIGHT RIGHT RIGHT LEFT DOWN UP UP RIGHT LEFT RIGHT UP CIRCLE SQUARE DOWN |
| Speedy | UP SQUARE UP RIGHT LEFT CIRCLE RIGHT DOWN SQUARE DOWN UP DOWN LEFT LEFT RIGHT RIGHT RIGHT SQUARE LEFT CIRCLE |
| Girl Trouble | LEFT UP LEFT UP CIRCLE CIRCLE RIGHT UP DOWN DOWN SQUARE DOWN RIGHT CIRCLE DOWN SQUARE RIGHT CIRCLE LEFT DOWN |
| Jumper | CIRCLE UP DOWN UP CIRCLE LEFT LEFT LEFT CIRCLE DOWN SQUARE DOWN UP RIGHT LEFT CIRCLE RIGHT DOWN SQUARE RIGHT |
| Accuracy Counts | CIRCLE UP UP UP LEFT UP DOWN LEFT SQUARE DOWN LEFT DOWN LEFT DOWN CIRCLE CIRCLE UP UP DOWN CIRCLE |
| Eat Lead | RIGHT RIGHT DOWN DOWN SQUARE RIGHT SQUARE DOWN DOWN RIGHT CIRCLE SQUARE CIRCLE UP CIRCLE LEFT RIGHT LEFT SQUARE LEFT |
| Destroyed | RIGHT CIRCLE CIRCLE DOWN RIGHT CIRCLE UP LEFT RIGHT SQUARE DOWN UP SQUARE SQUARE DOWN DOWN CIRCLE UP UP CIRCLE |
| Gunner | RIGHT UP RIGHT RIGHT UP UP CIRCLE RIGHT SQUARE RIGHT UP LEFT SQUARE CIRCLE UP RIGHT SQUARE SQUARE CIRCLE UP |
| Sniper | DOWN RIGHT RIGHT LEFT UP DOWN LEFT DOWN RIGHT UP CIRCLE DOWN DOWN UP UP LEFT DOWN SQUARE LEFT UP |
| Hey, Over Here! | LEFT CIRCLE LEFT DOWN SQUARE RIGHT DOWN RIGHT DOWN RIGHT RIGHT LEFT SQUARE DOWN CIRCLE RIGHT LEFT CIRCLE LEFT DOWN |
| Alien Invasion | DOWN CIRCLE LEFT CIRCLE SQUARE RIGHT LEFT SQUARE RIGHT UP RIGHT LEFT CIRCLE SQUARE RIGHT SQUARE DOWN SQUARE DOWN UP |
| Buried Treasure | UP SQUARE SQUARE UP CIRCLE LEFT DOWN SQUARE RIGHT DOWN UP UP UP SQUARE CIRCLE RIGHT CIRCLE DOWN UP LEFT |
| Pest Control | DOWN SQUARE SQUARE RIGHT DOWN RIGHT SQUARE RIGHT SQUARE DOWN DOWN DOWN LEFT RIGHT LEFT DOWN DOWN RIGHT LEFT SQUARE |
| Whirlybirds | UP LEFT LEFT LEFT SQUARE RIGHT RIGHT CIRCLE CIRCLE UP UP LEFT CIRCLE RIGHT LEFT DOWN UP RIGHT LEFT SQUARE |
| Sitting Ducks | RIGHT UP RIGHT UP CIRCLE CIRCLE DOWN LEFT CIRCLE UP CIRCLE LEFT DOWN SQUARE UP LEFT SQUARE SQUARE DOWN SQUARE |
| Shattered Glass | LEFT DOWN SQUARE LEFT DOWN CIRCLE UP CIRCLE LEFT UP SQUARE LEFT LEFT DOWN RIGHT DOWN CIRCLE RIGHT UP SQUARE |
| Blast 'Em! | RIGHT DOWN SQUARE UP SQUARE RIGHT DOWN SQUARE LEFT UP CIRCLE SQUARE LEFT UP SQUARE RIGHT RIGHT RIGHT CIRCLE LEFT |
| Heavy Traffic | LEFT CIRCLE LEFT DOWN SQUARE SQUARE LEFT LEFT UP RIGHT RIGHT RIGHT DOWN DOWN UP RIGHT UP DOWN SQUARE RIGHT |
| Magician | DOWN SQUARE LEFT SQUARE CIRCLE UP LEFT RIGHT SQUARE LEFT RIGHT UP SQUARE DOWN LEFT SQUARE SQUARE RIGHT UP CIRCLE |
| Sneaky | UP DOWN RIGHT LEFT UP LEFT LEFT DOWN UP DOWN DOWN RIGHT UP LEFT UP CIRCLE SQUARE UP DOWN LEFT |
| Careful Cruise | DOWN CIRCLE RIGHT DOWN RIGHT CIRCLE SQUARE UP UP SQUARE SQUARE CIRCLE DOWN SQUARE RIGHT CIRCLE LEFT UP UP LEFT |
| Going Commando | UP SQUARE SQUARE RIGHT LEFT UP DOWN RIGHT LEFT RIGHT CIRCLE LEFT DOWN LEFT SQUARE LEFT LEFT DOWN UP DOWN |
Weapons
| Weapon | Menu Code |
|---|---|
| Wrench | RIGHT SQUARE RIGHT UP CIRCLE LEFT UP LEFT UP SQUARE SQUARE DOWN DOWN DOWN UP CIRCLE UP DOWN SQUARE RIGHT |
| Bomb Glove | RIGHT UP UP DOWN LEFT UP UP DOWN DOWN DOWN DOWN SQUARE UP LEFT DOWN LEFT LEFT UP DOWN LEFT |
| Pyrocitor | DOWN UP SQUARE UP UP DOWN SQUARE SQUARE CIRCLE DOWN LEFT UP RIGHT LEFT RIGHT RIGHT CIRCLE CIRCLE LEFT LEFT |
| Blaster | RIGHT CIRCLE UP CIRCLE RIGHT UP LEFT SQUARE RIGHT UP UP LEFT LEFT DOWN RIGHT SQUARE SQUARE CIRCLE SQUARE UP |
| Glove of Doom | UP UP RIGHT LEFT SQUARE DOWN CIRCLE CIRCLE LEFT CIRCLE RIGHT LEFT RIGHT DOWN CIRCLE DOWN LEFT DOWN CIRCLE SQUARE |
| Mine Glove | RIGHT CIRCLE LEFT RIGHT RIGHT CIRCLE SQUARE RIGHT UP SQUARE LEFT DOWN DOWN RIGHT CIRCLE DOWN SQUARE LEFT RIGHT SQUARE |
| Taunter | SQUARE RIGHT DOWN DOWN LEFT DOWN RIGHT RIGHT SQUARE CIRCLE CIRCLE LEFT DOWN RIGHT LEFT RIGHT SQUARE RIGHT DOWN DOWN |
| Suck Cannon | LEFT UP SQUARE UP LEFT RIGHT RIGHT LEFT LEFT SQUARE UP DOWN LEFT CIRCLE SQUARE CIRCLE UP LEFT LEFT CIRCLE |
| Devastator | DOWN DOWN SQUARE DOWN UP RIGHT DOWN LEFT CIRCLE DOWN LEFT UP CIRCLE CIRCLE LEFT DOWN LEFT RIGHT DOWN CIRCLE |
| Walloper | SQUARE UP LEFT LEFT SQUARE DOWN DOWN CIRCLE DOWN RIGHT CIRCLE LEFT CIRCLE UP UP DOWN UP LEFT SQUARE SQUARE |
| Visibomb Gun | LEFT RIGHT CIRCLE LEFT CIRCLE UP RIGHT DOWN DOWN UP SQUARE DOWN LEFT SQUARE UP LEFT RIGHT RIGHT CIRCLE UP |
| Decoy Glove | UP SQUARE DOWN DOWN DOWN CIRCLE CIRCLE UP LEFT RIGHT LEFT CIRCLE RIGHT LEFT SQUARE CIRCLE UP RIGHT DOWN LEFT |
| Drone Device | DOWN DOWN RIGHT LEFT DOWN UP CIRCLE DOWN RIGHT CIRCLE RIGHT RIGHT UP DOWN UP CIRCLE RIGHT UP DOWN LEFT |
| Tesla Claw | DOWN UP DOWN UP RIGHT SQUARE LEFT LEFT CIRCLE SQUARE CIRCLE LEFT RIGHT CIRCLE UP LEFT CIRCLE LEFT LEFT SQUARE |
| Morph-o-ray | DOWN SQUARE SQUARE UP CIRCLE RIGHT UP SQUARE LEFT RIGHT CIRCLE SQUARE DOWN RIGHT DOWN RIGHT DOWN RIGHT RIGHT LEFT |
| R.Y.N.O | SQUARE CIRCLE CIRCLE SQUARE SQUARE UP SQUARE RIGHT UP SQUARE RIGHT UP SQUARE LEFT LEFT SQUARE CIRCLE UP LEFT CIRCLE |
Gadgets
| Gadget | Menu Code |
|---|---|
| Trespasser | LEFT RIGHT UP RIGHT DOWN LEFT DOWN RIGHT LEFT UP DOWN LEFT DOWN SQUARE SQUARE LEFT CIRCLE RIGHT SQUARE DOWN |
| Hydrodisplacer | UP DOWN UP DOWN DOWN SQUARE LEFT LEFT UP LEFT LEFT RIGHT RIGHT LEFT LEFT RIGHT RIGHT CIRCLE RIGHT RIGHT |
| Swingshot | RIGHT LEFT UP RIGHT UP UP UP RIGHT SQUARE DOWN CIRCLE LEFT CIRCLE DOWN SQUARE RIGHT DOWN LEFT RIGHT UP |
| Gadgetron PDA | CIRCLE CIRCLE UP SQUARE UP LEFT DOWN SQUARE CIRCLE UP LEFT RIGHT RIGHT CIRCLE CIRCLE RIGHT RIGHT SQUARE UP LEFT |
| Metal Detector | CIRCLE RIGHT RIGHT CIRCLE DOWN DOWN UP RIGHT SQUARE CIRCLE DOWN UP UP UP SQUARE DOWN RIGHT RIGHT SQUARE CIRCLE |
| Hologuise | SQUARE RIGHT LEFT DOWN SQUARE LEFT CIRCLE LEFT LEFT CIRCLE LEFT DOWN RIGHT CIRCLE RIGHT SQUARE RIGHT UP CIRCLE UP |
| Heli-Pack | CIRCLE LEFT RIGHT SQUARE SQUARE UP LEFT RIGHT UP UP UP DOWN DOWN RIGHT LEFT DOWN CIRCLE UP RIGHT LEFT |
| Thruster-Pack | SQUARE RIGHT LEFT SQUARE SQUARE RIGHT SQUARE UP CIRCLE CIRCLE LEFT LEFT UP UP CIRCLE LEFT RIGHT UP RIGHT SQUARE |
| Hydro-Pack | LEFT RIGHT DOWN UP RIGHT UP UP DOWN SQUARE LEFT RIGHT UP RIGHT UP UP DOWN UP DOWN CIRCLE DOWN |
| O2 Mask | LEFT SQUARE UP RIGHT UP DOWN RIGHT DOWN UP LEFT LEFT DOWN LEFT RIGHT DOWN RIGHT SQUARE SQUARE RIGHT CIRCLE |
| Sonic Summoner | DOWN RIGHT DOWN LEFT SQUARE UP RIGHT RIGHT DOWN UP RIGHT UP DOWN UP RIGHT RIGHT LEFT SQUARE SQUARE DOWN |
| Pilot's Helmet | DOWN DOWN UP UP CIRCLE SQUARE DOWN UP DOWN UP LEFT DOWN CIRCLE SQUARE DOWN SQUARE RIGHT CIRCLE UP DOWN |
| Grindboots | CIRCLE DOWN RIGHT SQUARE UP RIGHT RIGHT RIGHT DOWN SQUARE RIGHT CIRCLE LEFT SQUARE LEFT LEFT LEFT SQUARE RIGHT DOWN |
| Magneboots | RIGHT LEFT UP DOWN UP DOWN SQUARE LEFT RIGHT UP CIRCLE LEFT UP SQUARE UP RIGHT CIRCLE LEFT RIGHT LEFT |
Items
| Item | Menu Code |
|---|---|
| Hoverboard | RIGHT DOWN DOWN RIGHT CIRCLE LEFT RIGHT RIGHT RIGHT DOWN DOWN RIGHT CIRCLE LEFT RIGHT RIGHT RIGHT DOWN DOWN RIGHT |
| Persuader | SQUARE CIRCLE LEFT UP RIGHT DOWN DOWN UP RIGHT CIRCLE DOWN LEFT UP LEFT DOWN LEFT CIRCLE CIRCLE RIGHT DOWN |
| Bolt Grabber | UP UP DOWN SQUARE DOWN UP LEFT RIGHT CIRCLE LEFT DOWN CIRCLE UP RIGHT LEFT DOWN SQUARE SQUARE DOWN DOWN |
| Premium Nanotech | RIGHT LEFT UP CIRCLE RIGHT SQUARE UP RIGHT SQUARE UP DOWN CIRCLE SQUARE LEFT LEFT DOWN DOWN CIRCLE DOWN DOWN |
| Ultra Nanotech | DOWN SQUARE RIGHT RIGHT SQUARE CIRCLE SQUARE LEFT SQUARE DOWN UP RIGHT CIRCLE SQUARE CIRCLE RIGHT RIGHT UP CIRCLE UP |
| Map-o-matic | SQUARE UP RIGHT DOWN SQUARE SQUARE SQUARE UP UP LEFT RIGHT SQUARE RIGHT RIGHT DOWN DOWN DOWN LEFT RIGHT LEFT |
| Zoomerator | LEFT CIRCLE UP DOWN CIRCLE LEFT LEFT RIGHT DOWN RIGHT CIRCLE DOWN SQUARE RIGHT RIGHT SQUARE UP SQUARE UP CIRCLE |
| Raritanium | RIGHT CIRCLE DOWN RIGHT CIRCLE UP UP DOWN RIGHT CIRCLE SQUARE SQUARE RIGHT UP UP CIRCLE DOWN SQUARE RIGHT SQUARE |
| CodeBot | UP LEFT UP LEFT SQUARE UP CIRCLE UP RIGHT RIGHT CIRCLE DOWN RIGHT RIGHT CIRCLE CIRCLE SQUARE CIRCLE DOWN UP |
Planets
| Planet | Menu Code |
|---|---|
| Tobruk Crater, Novalis | SQUARE RIGHT CIRCLE UP LEFT RIGHT RIGHT RIGHT RIGHT UP RIGHT UP UP CIRCLE LEFT RIGHT DOWN SQUARE SQUARE RIGHT |
| Metropolis, Kerwan | LEFT UP RIGHT SQUARE DOWN SQUARE CIRCLE UP UP CIRCLE LEFT LEFT DOWN DOWN SQUARE SQUARE RIGHT RIGHT LEFT DOWN |
| Outpost X11, Aridia | UP LEFT DOWN CIRCLE RIGHT LEFT UP DOWN LEFT SQUARE SQUARE RIGHT LEFT DOWN LEFT RIGHT LEFT DOWN RIGHT RIGHT |
| Logging Site, Eudora | UP UP SQUARE LEFT SQUARE LEFT CIRCLE LEFT LEFT SQUARE CIRCLE RIGHT CIRCLE RIGHT LEFT CIRCLE CIRCLE CIRCLE RIGHT UP |
| Blarg Station, Nebula G34 | UP LEFT DOWN CIRCLE CIRCLE LEFT DOWN DOWN DOWN SQUARE DOWN SQUARE LEFT LEFT UP LEFT LEFT UP CIRCLE RIGHT |
| Blackwater City, Rilgar | DOWN LEFT RIGHT DOWN LEFT SQUARE CIRCLE LEFT DOWN DOWN RIGHT CIRCLE RIGHT UP SQUARE CIRCLE LEFT LEFT RIGHT UP |
| Qwark's HQ, Umbris | CIRCLE UP DOWN DOWN UP RIGHT UP LEFT SQUARE UP RIGHT LEFT LEFT LEFT SQUARE DOWN CIRCLE UP RIGHT DOWN |
| Fort Krontos, Batalia | SQUARE UP RIGHT SQUARE RIGHT SQUARE RIGHT RIGHT RIGHT LEFT SQUARE UP LEFT DOWN SQUARE RIGHT RIGHT LEFT UP RIGHT |
| Blarg Depot, Gaspar | RIGHT LEFT SQUARE LEFT SQUARE DOWN LEFT DOWN CIRCLE RIGHT SQUARE DOWN LEFT UP UP LEFT CIRCLE RIGHT SQUARE DOWN |
| Kogor Refinery, Orxon | DOWN DOWN SQUARE LEFT LEFT RIGHT LEFT RIGHT CIRCLE RIGHT SQUARE DOWN RIGHT CIRCLE DOWN RIGHT DOWN DOWN SQUARE LEFT |
| Jowai Resort, Pokitaru | RIGHT UP LEFT DOWN SQUARE CIRCLE RIGHT SQUARE RIGHT RIGHT UP RIGHT SQUARE DOWN DOWN SQUARE UP CIRCLE SQUARE UP |
| Bomb Factory, Hoven | CIRCLE SQUARE UP RIGHT SQUARE UP LEFT SQUARE UP CIRCLE CIRCLE LEFT RIGHT LEFT DOWN RIGHT UP DOWN CIRCLE RIGHT |
| Gemlik Base, Oltanis Orbit | UP UP RIGHT LEFT RIGHT CIRCLE CIRCLE RIGHT UP CIRCLE RIGHT SQUARE DOWN CIRCLE CIRCLE DOWN LEFT UP UP LEFT |
| Gorda City Ruins, Oltanis | DOWN LEFT UP DOWN CIRCLE RIGHT DOWN CIRCLE UP LEFT LEFT RIGHT SQUARE UP RIGHT DOWN CIRCLE LEFT CIRCLE SQUARE |
| Robot Plant, Quartu | CIRCLE UP DOWN UP DOWN DOWN CIRCLE LEFT LEFT DOWN DOWN SQUARE UP RIGHT UP LEFT SQUARE RIGHT RIGHT UP |
| Gadgetron Site, Kalebo III | SQUARE DOWN CIRCLE UP RIGHT CIRCLE LEFT CIRCLE RIGHT LEFT UP SQUARE SQUARE CIRCLE UP DOWN UP LEFT SQUARE RIGHT |
| Drek's Fleet, Veldin Orbit | LEFT SQUARE SQUARE CIRCLE RIGHT CIRCLE RIGHT SQUARE RIGHT CIRCLE RIGHT UP UP SQUARE LEFT RIGHT CIRCLE DOWN DOWN RIGHT |
| Kyzil Plateau, Veldin | RIGHT RIGHT LEFT RIGHT UP LEFT SQUARE LEFT RIGHT DOWN LEFT CIRCLE UP SQUARE UP RIGHT SQUARE LEFT UP DOWN |
Ratchet & Clank (2002) [Debug Menu]
Update
Ratchett
Determines whether Ratchet's state is updated or not. Toggle by pressing X.
Mobys
Determines whether Mobys (mobile objects) are being updated or not. Toggle by pressing X.
Parts
Determines whether particle effects are being updated or not. Toggle by pressing X.
Camera
Determines whether the camera is being updated. Toggle by pressing X.
Step
Automatically turns off all other "UPDATE" options and allows the user to advance any of the disabled "UPDATE" options by one frame when pressing L3 in-game.
After enabling Step, you can turn on other "UPDATE" options to return them to a normal state, with any remaining disabled options being frozen in their "off" state until pressing L3 at which point they'll advance one frame. For instance, turning on all other "UPDATE" options except Mobys will allow you to play through the level relatively normally while testing Moby animations one frame at a time.
Mode
For all the options in this category, press X to select the next option and Triangle to select the previous option.
Control
All of these values will automatically change the values in the "UPDATE" category, however you can manually enable/disable any of those "UPDATE" options after setting the Control mode.
- Normal: Standard game control
- Camera: Free-cam mode
- L1 and R1 to lower and raise the camera
- L2 and R2 to move the camera left and right
- D-Pad Up and Down to move the camera forwards and backwards
- D-Pad Left and Right to pivot the camera left and right
- Hold L2 + R2 and press D-Pad Up or Down to pivot the camera up and down
- Cam+Chr: Same as free-cam mode but attaches Ratchet to the camera so that he can be moved around the level
- Volume: Appears to be the same as free-cam mode but leaves Mobys and Parts enabled so that the level can be explored without objects and particles being frozen in place
Profile
| To do: Document specifically what each of these profile values outputs to the resource usage overlay |
Shows system resource usage. There are several profiles to show how various parts of the game are impacting performance.
- Off: Disables the usage overlay
- Bars: (??)
- Render: (??)
- Mobys: (??)
- Ties: (??)
- Shrubs: (??)
- Occl: (??)
- CPU / GPU: (??)
Occl
Sets the state of occlusion culling. This determines which objects should be drawn into the scene or culled out based on what the player camera can see.
- Active: Enables pre-computed occlusion. This is the default value.
- Off: Disables occlusion. This will essentially draw the entire map every frame, including objects the player can't currently see. This could cause the game to crash on real hardware, but is more likely to just impact framerate in an emulator.
- Freeze: Freezes occlusion. Any objects not currently being drawn will remain culled out until this setting is changed to Off or Active. This is useful for testing what's being occluded at any given moment.
Magnetic
⚠️ This option was removed sometime prior to the August 2nd prototype.
It's unknown exactly what this does, and the option was removed sometime prior to the August 2nd Prototype build. It appears to be related to magnetic surfaces and possibly the cut spherical worlds. Given one of the values is "sphere" and the fact that the option was removed in the later prototypes this may be partially related to the planned spherical worlds which according to developer Mike Stout were planned but later cut and implemented in R&C 2 instead.
| This needs some investigation. Discuss ideas and findings on the talk page. Specifically: Figure out why the "sphere" value causes Ratchet to fall off magnetic surfaces only under certain conditions and why the value does not impact the ability to attach to a magnetic surface in the first place. Perhaps this option was superseded by the Magneboots gadget? |
Setting this option to "off" while Ratchet is standing on a magnetic surface will cause him to fall off. However, if the player tries to walk on the surface again it'll work fine despite the option still being set to "off". Also, setting the option to "sphere" while walking in certain orientations has the same effect as setting it to "off" where Ratchet falls off or clips to the other side of the magnetic surface, but in other orientations it has no effect. Regardless of what this option is set to, if Ratchet does not have the Magneboots he will be unable to walk on magnetic surfaces and vice versa.
- Off: Unknown (??)
- On: Unknown (??)
- Sphere: Unknown (??). Selecting this option and closing the debug menu causes the Ratchet and camera to momentarily jolt in a tilting/leaning motion before correcting itself. If Ratchet is in the middle of a jump when selecting the option the camera jolt is far more pronounced.
Bookmark
| This needs some investigation. Discuss ideas and findings on the talk page. Specifically: How are these bookmarks supposed to be set and used? If they're triggered with a keyboard or via console input on a PS2 TOOL, perhaps they can also be triggered in an emulator? |
Intended to allow programmers and testers to set "bookmark" locations that could they could later skip/teleport back to, however this option apparently requires a PS2 Devkit to function.
Invinc
| This needs some investigation. Discuss ideas and findings on the talk page. Specifically: Why doesn't this work? Does it work in in future R&C games with a debug menu? |
This is supposed to make Ratchet invincible, but it doesn't appear to work in all builds. When working correctly, Ratchet's damage animation should still play when taking damage but his health should not go down.
This option only seem to work on the June 25th Prototype, but does not appear to be working on any other prototypes nor the NTSC retail game.
Drawdist
Determines the game's draw distance. According to developer Mike Stout this was apparently used during development to test levels that did not yet have occlusion data computed to prevent the game from crashing.
- Normal: Normal draw distance. This is the default option.
- Near: Reduced draw distance. Not everything is affected by this option, as certain effects such as fire, smoke, contrails and water still draw at a regular distance.
Coll
Presumably related to collision, but doesn't appear to actually do anything. It's possible this option works on a PS2 Devkit.
- Hotspt: Unknown (??)
- Camera: Unknown (??)
- Sound: Unknown (??)
Tv Mode
| This needs some investigation. Discuss ideas and findings on the talk page. Specifically: Maybe this option works on real PS2 hardware or on a PS2 TOOL? |
Presumably sets the game to output in NTSC or PAL mode. However, this option doesn't appear to do anything and doesn't change the output framerate or resolution when tested in an emulator.
Screen
When set to "small", this option pulls the camera way back to show the programmer or tester what's currently being drawn into the scene. This would have been useful to determine if anything is being drawn in at any given moment that doesn't need to be.
- Normal: Standard screen mode. This is the default option.
- Small: Moves the camera behind the scene that's currently being rendered.
Scene
| This needs some investigation. Discuss ideas and findings on the talk page. Specifically: How exactly this option is supposed to work. Why do some scenes not trigger, why do some trigger once and then not again. Why does dying after selecting a scene that won't play like the one on Veldin 1 cause graphical corruption and scene related Mobys to go haywire? |
Selecting a scene number and closing the debug menu seems to trigger the corresponding in-game cutscene to play, however it seems to behave strangely. It doesn't work on all levels or with all cutscenes. It also doesn't take control of the player character, meaning that scenes involving Ratchet will have Ratchet missing from them while other Mobys such as his wrench will still be moved into the scene. Many cutscenes also crash the game and after selecting and playing a scene it doesn't seem to be playable again.
Segment
Allows the user to mark segments of a level as complete (255) or incomplete (0). Level segments are normally triggered by reaching a certain area of a level, at which point the corresponding segment will be set to 255 (complete). This is most likely used for the game's mining system that prevents players from farming for bolts by revisiting completed level segments.
You can use X and Triangle to select the next/previous segment and Circle to toggle it as completed (= 255) or not completed (= 0).
Ship
| This needs some investigation. Discuss ideas and findings on the talk page. Specifically: Maybe there's something else that needs to be done to trigger the active ship to be changed... Look into this |
Presumably used to set the current ship that Ratchet owns since he switches between three different ships throughout the game. However, this option doesn't seem to actually do anything as changing the value doesn't change Ratchet's ship and reloading or changing planets resets the value.
Draw
On most builds of R&C 1, none of these options work. In the June 25th Prototype, only the "text" option works. These options are likely intended for use with a PS2 Devkit.
Darken
This was most likely meant to darken the background to make debugging text easier to see, but it doesn't appear to work in an emulator. This option may work on a Devkit.
Env coll: Doesn't appear to function; likely would have shown the collision meshes for environment objects in the world.
Moby coll: Doesn't appear to function; likely would have shown the collision meshes for active mobys.
Hero coll: Doesn't appear to function; likely would have shown the collision meshes for the player character.
B spheres: Doesn't appear to function; likely would have shown the bounding spheres for objects in the world.
Cameras: Unknown.
Cuboids: Doesn't appear to work in this version, but would most likely have shown the cuboids for triggering enemy alert radii.
Sample pts: Unknown.
UIDs
Displays the Unique Identifiers for object instances in the world, prefixed with 'u' (salmon colour). Many objects (such as Ratchet and his ship) are marked as "UX", purpose unknown.
Moby Num
Displays another set of identifier numbers over any mobys, prefixed with 'o' (blue colour).
Groups
Displays yet another set of identifier numbers over objects which indicate their "grouping", with the prefix 'g' (green colour). Ratchet, his ship, vendors and other objects are often marked as 'g255'.
Interp
May have been intended to display splines that objects use to interpolate between positions, but it doesn't seem to do anything in this build.
Tuning [off | black | white | blue]
Adds tuning debugging info in the specified colour. See the "Tuning" section for more info.
Sky
Unknown.
Sound
Unknown.
Misc
- BattleCam: Unknown
- Actuator: Unknown
- AddSample: Unknown
- When selecting AddSample with any of the face buttons (X, Circle, Triangle, Square) the line "open fail name ¥DATA¥LEVELS¥LEVELx¥occ_sample_deltas.dat;1" (where x represents the loaded level) is printed to the PCSX2 console
- AddStart: Unknown
- When selecting AddStart with any of the face buttons (X, Circle, Triangle, Square) the previous line for AddSample and the following line are printed to the PCSX2 console: "open fail name ¥DATA¥LEVELS¥LEVELx¥occ_samp.dat;1" (where x represents the loaded level)
RaC 1 Mission Preview Screenshots
Tobruk Crater, Planet Novalis
| June 25th Alpha | August 2nd Beta | Final | |
|---|---|---|---|
| Mission 1 "Visit Al's Roboshack" |
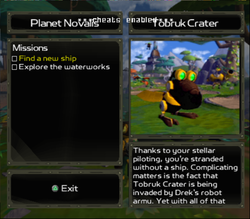 |
 |
 |
| Mission 2 "Buy Heli-Pack from Al" |
 |
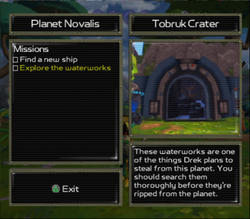 |
 |
| Mission 3 "Explore the rest of the city" |
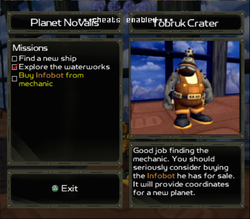 |
 |
 |
Outpost X11, Planet Aridia
Metropolis, Planet Kerwan
Deforestation Site, Planet Eudora
| June 25th Alpha | August 2nd Beta | Final | |
|---|---|---|---|
| Mission 1 "Confront robot lieutenant" |
 |
 |
 |
| Mission 2 "Explore the mills" |
 |
 |
 |
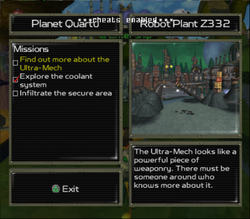
Robot Plant Z332, Planet Quartu
| August 2nd Beta | Final | |
|---|---|---|
| Mission 1 "Find out more about the Ultra-Mech" |
 |
250px |
| Mission 2 "Destroy the Ultra-Mechs" |
Currently Inaccessible | 250px |
| Mission 3 "Explore the coolant system" |
 |
250px |
| Mission 4 "Infiltrate the secure area" |
 |
250px |
