Final Fantasy IV: The After Years
| Final Fantasy IV: The After Years |
|---|
|
Also known as: Final Fantasy IV the After: Tsuki no Kikan (JP)
|
Originally designed for Japanese cell phones, Final Fantasy IV: The After Years is a sequel to Final Fantasy IV that retreads every single plot point from that game, except worse.
It was ported to WiiWare in painfully-expensive episodic form, then given a high-res upgrade for the PSP as Final Fantasy IV Complete, featuring the original game and a brief, pointless bonus chapter linking the two called Final Fantasy IV -Interlude-. Finally, the game was given a 3D remake treatment in the style of the DS remake of the original, released exclusively for smartphones and PC.
| To do: More leftovers from Final Fantasy IV Advance, new unused abilities, and text strings from the DS remake of the original. |
| To do: I did some extensive hacking of both the Wii and PSP versions. There is a *LOT* of unused material that I've never seen documented elsewhere. I tried to put up screenshots and maps, but this is incomplete. I also didn't list any of the dialogue for the unused scenes, although, unfortunately, most of the dialogue was deleted and/or is now mispointed. So add more screenshots of maps and text and/or descriptions of the cutscenes especially the original ending of Golbeza's scenario (which actually makes sense). |
| To do: Check mobile version, to see if any of the omitted text from unused cutscenes is present in that version. |
Contents
Dummied-Out Items
All of the items in Final Fantasy IV Advance are implemented to some extent in this game, even if they aren't actually used in The After Years. This includes all the bonus dungeon items, key items, equipment, and so on. There are also a few dummied-out items that were originally intended for this game.
Removed Items
- Amulet of Memories - "A necklace packed with memories"
- Bloody Spear - "A spear smeared with blood"
- Crystal - "A crystal that gives off a holy light"
- Dark Matter - N/A
- Dirty Water - "Black and dirty water"
- Doll - "A cute doll"
- Earth Crystal - "A crystal that brings the blessing of the land"
- Firewood - "Wood that can be used to start a fire"
- Honey - "Loved by bees"
- Iron Lump - "Used with Throw"
- Key - "A small door key"
- Luca's Necklace - "A necklace belonging to Luca."
- Lugae's Key - "A key belonging to Dr. Lugae"
- Magma Stone - "A stone filled with the power of magma"
- Old Man Doll - "A not so cute doll"
- Pure Water - "Clear, cool, pure water"
- Ramuh Staff - "A lightning staff handed down by Ramuh"
- Rat Tail - "A rat tail, the proof of a hero". Mentioned in the start of Ceodore's Tale as being the Knight's Emblem, but never added to the inventory.
- Ring of Memories - "A ring packed with memories"
- Shiva Crystal - "An ice crystal handed down by Shiva."
- Siren - "Automatically sends player into a battle."
- Small Fail - "A small fail?" Presumably supposed to be similar to the Small Tale, in that it'd suck and have a similar name to the Small Tail.
- Smell Tail - "A smell tail". See above.
- Summon Book - "Randomly calls an Eidolon"
- Sylph Feather - "A translucent feather from a Sylph"
- Torch - "A burning torch"
- Whisperweed - "A mysterious weed that carries distant sounds". This is a key element in Edward's Tale, but never as an actual inventory item.
Unused Weapons
| To do: There's more. |
- Pig's Bamboo Sword - "Removed from this title". 158 attack, +99% accuracy, inflicts Pig status, equippable by Cecil, Ceodore, Kain, and Golbez. If the Developer's Room is any indication, pigs were kind of an in-joke among the developers. This is the Piggy's Stick from Final Fantasy IV Advance.
- Tokita Sword - "*DEBUG ITEM* Can slice through any protection". 255 attack, +15 to all stats, equippable by everybody. Named after producer Takashi Tokita.
Unused Equipment
| To do: There's more. |
- Akiyama Armor - "*DEBUG ITEM* Blocks any kind of attack". 255 defense, +15 to all stats, equippable by everybody. Named after director Toshio Akiyama.
- Debug Ring - "*DEBUG ITEM* A very convenient ring". 205 defense, max stats, double EXP, disables damage limit on equipper, equippable by everybody.
Unused & Deleted Areas
List of deleted areas. Map list varies by each character's scenario, so all maps may not be present in all scenarios. You will have to hack the saved state of the appropriate scenario to get the map to work. Map backgrounds are present in almost all Wii version maps, but most PSP maps display an entirely black screen for deleted locations. Also many NPCs graphics are obviously mispointed, and dialogue for cutscenes is usually mispointed or entirely deleted.
Hexidecimal code is followed by the scenario that must be activated for the map to be reached. Then I included both English and Japanese titles of the room name.
- 0063 (Yang) - Untitled (名称) - a strange small room - I don't think this is used...
- 0064 (Gil) - Red Wings (赤き翼) - seems to be a forest scene with the Red Wings to world map east of Mist Cliff (placeholder? dialogue is mispointed? dummy scene with Cain?)
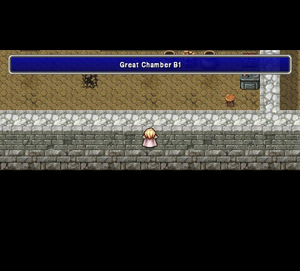
- 0073 (Ceo) - Challenge Dungeon B3 (チャレンジダン;ジョンB3F) - the map for this one still exists in the PSP version. Inside the chest is a "Silver Apple".
- 00C8 (EndB) - Subterrane B3 (地下渓谷;B3F) - black screen, no movement (must have been deleted entirely from data?)
- 00C8 (EndC) - Lunar Depths B5 (真月;深層部B5F) - black screen, no movement (must have been deleted entirely from data?)
- 00C9 (EndB) - Lunar Subterrean B9 (月の地下渓谷;B9F) - black screen, no movement (must have been deleted entirely from data?)
- 00C9 (EndC) - Lunar Depths B9 (真月深層部B9F) - black screen, no movement (must have been deleted entirely from data?)
- 00CA (EndB) - Subterrean B5 (月の地下渓谷;B5F) - ??????
- 00CA (EndC) - Subterrean B5 (真月;深層部B12F) - ??????
- 00CB (EndB) - Lunar Subterrean B6 (月の地下渓谷;B6F) - black screen, no movement (must have been deleted entirely from data?)
- 00CC (EndB) - Lunar Subterrean B10 (月の地下渓谷;B10F) - black screen, no movement (must have been deleted entirely from data?)
- 00CC (EndC) - Depths B14 (深層部B14F) - black screen, no movement (must have been deleted entirely from data?)
- 00CD (EndB) - Subterrean B7 (月の地下渓谷;B7F) - black screen, no movement (must have been deleted entirely from data?)
- 00CE (EndB) - Subterrean B4 (月の地下渓谷;B4F) - black screen, no movement (must have been deleted entirely from data?)
- 00CF (EndB) - Lunar Subterrean B8 (月の地下渓谷;B8F) - black screen, no movement (must have been deleted entirely from data?)
- 00D0 (EndB) - Subterrean B11 (月の地下渓谷;B11F) - black screen, no movement (must have been deleted entirely from data?)
- 0207 (Gil) - Untitled (名称未設定) - some scene outside Baron (Yang and a man? - may be placeholders or mispointings), text is mispointed
- 0398 (Edge) - Underground Cave (地下洞窟) - expansive underground area, would have linked with the "Dwarven Mine Path", all random encounters are 2x Floating Eye. Map is very strange. It reuses the exact same room multiple times, but the exits are mapped differently. I tried to discover all the rooms, but there may actually be a few more. It should be investigated to find out what flag controls this behavior.
This image shows how the rooms are connected and the specific connection points where the PC would have emerged at the "Dwarven Mine Path".

- 03E7 (EndD) - Untitled (名称未設定) - unused scene at Mysidia Exterior (main in front, corrupted dialogue?)
- 057A (Ceo) - Untitled (名称未設定) - alternate unused scene with Ceodore and Cain leaving Baron
- 06AB (Rydia) - Agart Well (アガルトの村 井戸) - very strange unused well shaft area
- 06AC (Rydia) - Agart Well (アガルトの村 井戸) - very strange unused well shaft area
- 06AD (Rydia) - Agart Well (アガルトの村 井戸) - very strange unused well shaft area with pig (placeholder?) and magma stone
- 0836 (Gil) - Flashback (回想) - unused scene with whirlpool in ocean (need to walk around a bit and click to get it to work)
- 0960 (Golbeza) Tower of Babil (Flashback) (回想バブイルの塔) - unused flashback scene
- 09C4 (Golbeza) Damcyan (Flashback) (回想ダムシアン) - unused flashback scene
- 0EDC (Gil) - Mist Cliff (ミストの断崖 ) This is used in Cain's scenario. It still exists in Gilbert's, but is unused, resulting in a black screen.
- 0EDD (Gil) - Mist Cliff (ミストの断崖 ) This is used in Cain's scenario. It still exists in Gilbert's, but is unused, resulting in a black screen.
- 0EDE (Gil) - Mist Cliff (ミストの断崖 ) This is used in Cain's scenario. It still exists in Gilbert's, but is unused, resulting in a black screen.
- 0F3C (Golbeza) - Mist (Flashback) (ミストの村回想) - unused flashback scene
- 1130 (Golbeza) - Tower of Zot (Flashback) (ゾットの塔回想) - unused flashback scene - the map is not actually loaded it seems, and there's only a battle (there's also a battle at the Dwarven Castle Crystal Room, but there's no corresponding map at all)
- 120F (EndC, EndD, Golbeza) - it is unused only in scenario EndD, although it appears in others
- 138C (Golbeza) - Plains (平原) - UNUSED - cutscene with Rosa and Cecil and Man (Man is dummied for Golbez, and Rosa and Cecil are probably supposed to be Rydia and Luca) -- seems like this scene was originally intended to happen at the end of Golbeza's scenario when he arrives at the Plains at Agart
- 138D (Rydia) - Untitled (名称未設定) - some black screen with Luca
- 14B4 (Golbeza) - Forest (Flashback) (回想森) - unused flashback (note: probably was same scene in DS version of Final Fantasy IV)
- 14B5 (Golbeza) - Forest 2 (Flashback) (回想森2) - unused flashback (note: probably was same scene in DS version of Final Fantasy IV)
- 151E (Pal) - Troia Castle B1 (トロイア城;B1F) - unused floor
- 16A8 (Golbeza) - Impact Crater Eastern Rim (月の隕石跡地;東の入り口) - black screen
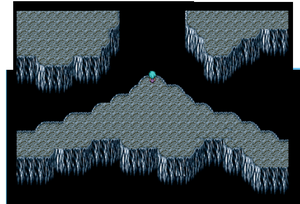
- 16B2 (Golbeza) - Impact Crater Floor (月の隕石跡地;最深部) - beta floor
- 16DA (Golbeza) - Impact Crater Western Rim (月の隕石跡地;西の入り口) - black screen
- 1B5C (Golbeza) - Lunar Hidden Passage 4 (月の隠し通路;その4) - unused map
- 1B5D (Golbeza) - Lunar Hidden Passage 4 (月の隠し通路;その4) - unused map
- 1B5E (Golbeza) - Lunar Hidden Passage 5 (月の隠し通路;その5) - unused map
- 1B5F (Golbeza) - Lunar Hidden Passage 6 (月の隠し通路;その6) - unused map
- 1B60 (Golbeza) - Lunar Hidden Passage 7 (月の隠し通路;その7) - unused map
- 1B61 (Golbeza) - Lunar Hidden Passage 8 (月の隠し通路;その8) - unused map
- 1B63 (Golbeza) - Lunar Hidden Passage 9 (月の隠し通路;その9) - unused map
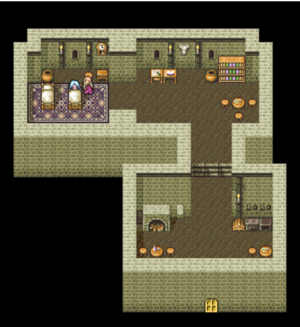
- 1BBD (Golbeza) - Desolate Shack (Flashback) (寂れた小屋(回想) - second scene at the shack - unused - placeholder/mispointed NPC graphics (the first scene, which is used in the game, is 1BBC)
- 1BBE (Golbeza) - Kluya's Home (Flashback) (クルーヤ宅(回想) - birth scene (note: probably was same scene in DS version of Final Fantasy IV)
| Wii version | PSP version |
|---|---|
 |
 |
- 1C2F (Yang) - Passage (通路) - unused Yang Challenge Dungeon passage
- 1C33 (Yang) - Passage (通路) - unused Yang Challenge Dungeon passage
- 1C34 (Yang) - Passage (通路) - unused Yang Challenge Dungeon passage
- 1C3A (Yang) - Passage (通路) - unused Yang Challenge Dungeon passage
- 1C3B (Yang) - Passage (通路) - unused Yang Challenge Dungeon passage
- 1C3C (Yang) - Passage (通路) - unused Yang Challenge Dungeon passage
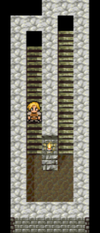
- 1DBC (Gil) - Stairway (階段通路) - unused Gilbert's Challenge Dungeon room - originally linked "Passage Link 2F" and "Passage Link B1" (see below)
| Wii version | PSP version |
|---|---|
 |
 |
- 1E7A (Golbeza) - Lunar Hidden Passage 1 (月の隠し通路;その1) - unused - exit emerges at bottom of Impact Crater Rim in chasm
- 1E7C (Golbeza) - Challenge Dungeon (チャレンジ;ダンジョン) - unused - should have come between 1E7B and 1E7D (Note: Has appropriate random encounters.)
- 1EAA (Golbeza) - Control Map (制御マップ) - Exit the Challenge Dungeon?
- 1F45 (Golbeza) - Challenge Dungeon 2 (チャレンジ;ダンジョン2) - unused, black background only - one chest that does not work
- 1F4A (Golbeza) - Lunar Hidden Passage 9 (月の隠し通路;その9) - unused (exit to Challenge Dungeon 2)
- 1F4B (Golbeza) - Lunar Hidden Passage 9 (月の隠し通路;その9) - unused (exit to Challenge Dungeon 2)
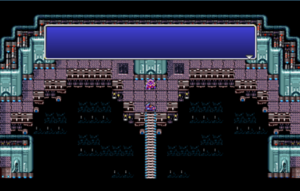
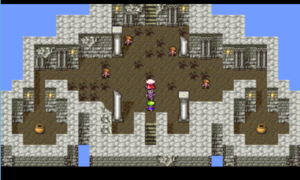
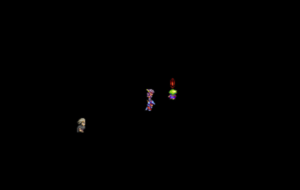
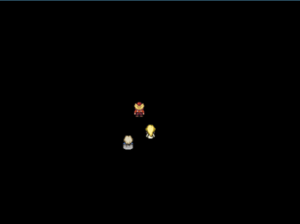
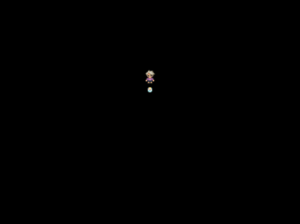
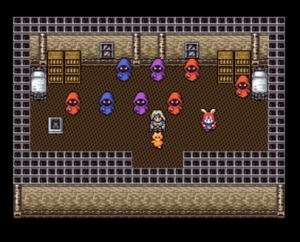
- 1F72 (Golbeza) - Launch Port 1 (発着ポート1) - unused location -- map still exists in PSP version. This is the launch port for the Lunar Whale. After Golbeza and FuSoYa would fight the Mysterious Girl, the Lunar Whale would be summoned to the port. Then just before boarding the Lunar Whale, Golbeza and FuSoYa would battle Zeromus' Malice here (rather than back at the Moon's core), Following the fight, Golbeza would board the Lunar Whale, resulting in the series of flashbacks on his way to earth. Although several of these flashback scenes are omitted in the final game. The Lunar Port scene still exists in its entirety, but the dialogue has been entirely deleted from the game data, resulting in blank text boxes. (Note: The man in red is a placeholder/mispointed graphic for Golbeza.)
| Wii version | PSP version |
|---|---|
 |
 |
- 2328 (EndB) - Lunar Subterrean B1 (月の地下渓谷;B1F)
- 2328 (EndC) - Sample_01 (サンプル_01)
- 2329 (EndB) - Lunar Subterrean B2 (月の地下渓谷;B2F)
- 2329 (EndC) - Sample_02 (サンプル_02)
- 232A (EndB) - <BLANK> (<BLANK>)
- 232A (EndC) - Sample_03 (サンプル_03)
- 232B (EndC) - Sample_04 (サンプル_04)
- 232C (EndC) - Sample_05 (サンプル_05)
- 232D (EndC) - Sample_06 - Twisted Space (サンプル_06;歪みの空間)
- 238E (EndC) - Sample2_03 (サンプル2_03)
- 238F (EndC) - Sample2_04 - Plant (サンプル2_04;プラント)
- 270F (Ceo, Cain, Edge, EndA, Gil, Gol, Pal, Por, Ryd, Yang) - unused in PSP version, but present in Wii (Gil, Gol, Por, Rydia, Yang versions have mispointed text)
- 270F (EndB) - Battle Test Room (戦闘テスト;ルーム)
Unused & Deleted Areas ("Lunar Hidden Passage" / "Challenge Dungeons" room lists)
The following gives an idea of what locations were overwritten from Golbeza's scenario. "Lunar Hidden Passage" is what the final location was originally called before being repurposed into the two "Challenge Dungeons". This passage lead from the surface of the moon to "Launch Port 1" where Golbeza and FuSoYa would fight Zeromus before boarding the Lunar Whale.
The following lists show the original placement of "Lunar Hidden Passage". After being unused or repurposed, some maps were, unfortunately, overwritten by the programmers with data from the "Crater". Those maps where then copied with entirely new pointers and then repurposed for the two "Challenge Dungeons." However, not all rooms were used. Probably researching all three lists, some sort of idea can be made as to what the missing "Lunar Hidden Passages" were to be.
ROOM SET #1 (original "Lunar Hidden Passage" maps)
- 1B59 - Impact Crater Upper Wall - used, but likely overwrote "Lunar Hidden Passage 1"
- 1B5A - Impact Crater Middle Wall - used, but likely overwrote "Lunar Hidden Passage 2"
- 1B5B - Impact Crater Lower Wall - used, but likely overwrote "Lunar Hidden Passage 3"
- 1B5C - Lunar Hidden Passage 4 - unused map
- 1B5D - Lunar Hidden Passage 4 - unused map
- 1B5E - Lunar Hidden Passage 5 - unused map
- 1B5F - Lunar Hidden Passage 6 - unused map
- 1B60 - Lunar Hidden Passage 7 - unused map
- 1B61 - Lunar Hidden Passage 8 - unused map
- 1B62 - Impact Crater Floor - used, but likely overwrote "Lunar Hidden Passage" 8 or 9.
- 1B63 - Lunar Hidden Passage 9 - unused map
ROOM SET #2 (repurposed for "Challenge Dungeon 1")
- 1E78 - Entrance Floor - used
- 1E79 - Challenge Dungeon - used
- 1E7A - Lunar Hidden Passage 1 - UNUSED
- 1E7B - Challenge Dungeon - used
- 1E7C - Challenge Dungeon - UNUSED
- 1E7D - Challenge Dungeon - used
- 1E7E - Challenge Dungeon - used
- 1E7F - Challenge Dungeon - used
- 1E80 - Challenge Dungeon - used
ROOM SET #3 (repurposed for "Challenge Dungeon 2")
- 1F40 - Lunar Face Interior - used
- 1F41 - Challenge Dungeon 2 - used
- 1F42 - Challenge Dungeon 2 - used
- 1F43 - Challenge Dungeon 2 - used
- 1F44 - Challenge Dungeon 2 - used
- 1F45 - Challenge Dungeon 2 - UNUSED
- 1F46 - Challenge Dungeon 2 - used
- 1F47 - Challenge Dungeon 2 - used
- 1F48 - Challenge Dungeon 2 - used
- 1F49 - Challenge Dungeon 2 - used
- 1F4A - Lunar Hidden Passage 9 - UNUSED
- 1F4B - Lunar Hidden Passage 9 - UNUSED
- 1F4C - Launch Port 1 - UNUSED
- Pages missing developer references
- Games developed by Matrix Software
- Pages missing publisher references
- Games published by Square Enix
- WiiWare games
- IOS games
- Android games
- Pages missing date references
- Games released in 2009
- Games released in July
- Games released on July 21
- Games released in June
- Games released on June 1
- Games released on June 5
- Games with unused areas
- Games with unused enemies
- Games with unused items
- To do
- Final Fantasy series
Cleanup > Pages missing date references
Cleanup > Pages missing developer references
Cleanup > Pages missing publisher references
Cleanup > To do
Games > Games by content > Games with unused areas
Games > Games by content > Games with unused enemies
Games > Games by content > Games with unused items
Games > Games by developer > Games developed by Matrix Software
Games > Games by platform > Android games
Games > Games by platform > IOS games
Games > Games by platform > Wii games > WiiWare games
Games > Games by publisher > Games published by Square Enix
Games > Games by release date > Games released in 2009
Games > Games by release date > Games released in July
Games > Games by release date > Games released in July > Games released on July 21
Games > Games by release date > Games released in June
Games > Games by release date > Games released in June > Games released on June 1
Games > Games by release date > Games released in June > Games released on June 5
Games > Games by series > Final Fantasy series
