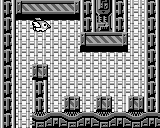
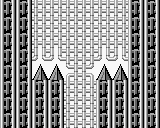
Proto:Mega Man: Dr. Wily's Revenge
This page details one or more prototype versions of Mega Man: Dr. Wily's Revenge.
This prototype of Mega Man: Dr. Wily's Revenge (aka Rockman World) was known about for several years before it was made public, when the cart was found on an unnamed Japanese auction site. It was finally dumped and released by an anonymous donor on September 29, 2014.
| To do: The Chris Covell article mentions a few apparent differences (silent icicles, being able to revisit stages, weapon energy not refilling between stages) that seem to be missing here. |
Contents
Gameplay Differences
- There's no cursor on the title screen, so the player can't access the password screen. Just as well, since that screen doesn't exist yet.
- Mega Man's teleport animation has yet to be programmed or drawn, so he'll just fall into each stage.
- The player can pause the game after defeating a Robot Master in the prototype.
- The second "weapon acquired" variable, DFA1, isn't reset after getting a Game Over. As a result, the Quick Boomerang, Bubble Lead, and Mirror Buster can be carried over to a new game.
Stage Select
| Proto | Final |
|---|---|
The prototype uses a different piece of music on the stage select screen, which sounds strikingly similar to Squid Adler/Volt Kraken's theme from Mega Man X5. The final track is a remix of the title screen theme.
| Proto | Final |
|---|---|
The boss intro music is a (basic) rendition of the NES track in the prototype, which was replaced by a wholly original work in the final.
| Proto | Final |
|---|---|
 |
 |
Dr. Wily's hair and skin color were swapped in the final.
Cutscenes
| Proto | Final |
|---|---|
 |
 |
- Dr. Wily uses a darker color palette, inconsistent with his stage select color palette, in the prototype.
- Again, Mega Man has no teleport animation in the Wily Castle cutscene. He falls down and rises up using his standing graphic.
- The Wily Station intro cutscene is very simple in the prototype, fading from the Wily Castle background to the Wily Station background. The Wily UFO hasn't been coded yet.
To access this scene in the prototype, set RAM address DF95 to 0F and DF96 to 8F, then defeat any Robot Master.
| Proto | Final |
|---|---|
 |
 |
- The Wily Station has no fading animation at this point. The background has no twinkling starfield, either.
- Neither cutscene ends automatically. The player must push a button once a cutscene ends to enter the next stage.
Weapons
Note that some weapons aren't available in the prototype through normal gameplay. Set RAM address DFA0 to FF and DFA1 to 07 to get the full arsenal.
- The Rolling Cutter's damage delay was halved in the final, turning it from merely a good weapon to the best one in the game.
- If the Rolling Cutter is fired before entering a new screen, the weapon's sound effect will continue until a new sound (such as Thunder Beam, Ice Slasher, or another Rolling Cutter) plays on that channel.
- The Thunder Beam only does 1 HP of damage per hit in the prototype, increased to 2 HP in the final.
- The Ice Slasher works slightly differently at this point: The enemy's unfreezing timer starts counting down immediately after the initial hit. The final version changed this so that the unfreezing timer starts after the Ice Slasher exits the enemy's hitbox, which ends up slightly extending the amount of time the Ice Slasher freezes enemies.
- Bubble Lead does a whopping 8 HP of damage in the prototype! This was nerfed to 4 HP for the final.
| Proto | Final |
|---|---|
- The Time Stopper sparkles changed from white to black, making them more easily visible against the typically light backgrounds.
- All versions of Atomic Fire do more damage at this point.
- Proto: 2 HP (uncharged), 4 HP (charged), 8 HP (fully charged).
- Final: 1 HP (uncharged), 2 HP (charged), 5 HP (fully charged).
- To make up for the damage nerfs, the amount of energy required for the charged shots was dropped from 4 and 8 (for charged and fully charged, respectively) in the prototype to 2 and 4 in the final.
- The Carry item works, but it stays at the same X position relative to the camera – for instance, if it spawns on the far left edge of the screen, it will stay on-screen at that position even as Mega Man moves to the right.
- In the final, the Carry platform stops rotating a second before it disappears. This little warning sign isn't in the prototype.
- The Mirror Buster is nonfunctional in the prototype, although all of its sprites are in the ROM. Attempting to use it will cause the Mirror Buster's reflection sprite to appear, although like Carry it will stay in the same spot relative to the screen. Once the sprite appears on-screen, the game can't be paused until a new area is entered.
| Proto | Final |
|---|---|
- The proper Mirror Buster sprite uses lighter colors in the prototype, changed presumably for visibility reason.
Enemies & Objects
- The Sniper Joe enemies can't be damaged while frozen by the Ice Slasher, even if they were frozen during their shooting animation.
- The Y offset on the Big Eye enemy's hitbox isn't properly set in the prototype, and can hit (and be hit) four pixels above its actual sprite.
- The Big Eyes don't have any sound effects at this point.
- The flame geysers in Fire Man's stage don't have the "shots pass through" flag in the prototype, which means the Mega Buster will ricochet off and other weapons will disappear with the "plink" sound.
- Additionally, the floor flames in Fire Man's stage, when frozen, act as platforms in the prototype. This is because they share the same object ID and Ice Slasher code as the flame geysers.
- Finally, neither the flame geysers nor the floor flames are affected by the Time Stopper in the prototype.
- The Mole enemies have 5 HP in the prototype and 3 HP in the final. They're also affected normally by the Ice Slasher, rather than just freezing for half a second. This was changed due to a bug: if they're scrolled offscreen while frozen, they'll never spawn again.
- The Appearing Block's hitbox is placed one pixel higher than it should be in the prototype version.
- Like the flame geysers, the electric bolts in Elec Man's stage don't have the "shots pass through" flag, which means that they can be frozen by the Ice Slasher in the prototype. They also have no sound effects yet.
- The Scworm enemies have 10 HP in the prototype, but only 6 HP in the final. The tubes they shoot out have 5 HP in the prototype and 2 HP in the final.
- The Pipi enemies' eggs can be frozen in both games, but in the prototype version, Pipis will continue to spawn while an egg is on-screen. If four eggs are present at once and they all hit the ground, the object limit will be hit and the game will freeze. Pipis don't appear in any prototype level, possibly due to that bug. Change ROM address 1404E to 13 to replace the first enemy in Cut Man's stage with Pipi.
- The Metalls in Wily Station are unusual. They act like normal (Mega Man 1) Metalls for two cycles, lifting their helmet to shoot three shots, but then raise their helmet and scurry forward like in the final, but without shooting.
- The metal blocks used in the Wily Station act differently. Change ROM address 1404E to 1D to see one in Cut Man's stage.
| Proto | Final |
|---|---|
The blocks use the same graphics as the ice cubes in Ice Man's stage.
| Proto | Final |
|---|---|
The blocks aren't corroded by Atomic Fire, but by Fire Storm.
Robot Masters
- All of the Robot Masters use the default damage table, which means that Ice Slasher and Time Stopper can't hurt any of them and that their weaknesses don't do any extra damage. Their invulnerability time is also identical to an average enemy's invulnerability, so they can be defeated much faster.
- Bubble Man swims twice as fast in the prototype, making it very difficult to avoid taking damage.
- Flash Man's Time Stopper isn't implemented yet.
- Quick Man, Bubble Man, and Flash Man are affected by the Ice Slasher... sort of. Their colors will invert, but they won't actually freeze.
- The Wily Castle bosses don't drop a large Life Energy pickup in the prototype.
| Proto | Final |
|---|---|
The last note of the "Victory" theme doesn't decrease in volume in the prototype. The last note is held but appears cut off in-game.
Cut Man
Graphical Changes
| Proto | Final |
|---|---|
 |
 |
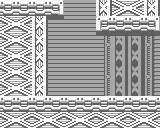
In the prototype, the background tiles use the light and dark gray colors. In the final game, those tiles are light gray and white. This was changed to establish a standard distinguishing exterior (dark) and interior (bright) color schemes. This standard allows enemies in this level to be recycled in the Wily stages without worry of them blending into the background.
| Proto | Final |
|---|---|
 |
 |
In addition to the aforementioned palette changes, all solid foreground tiles gained an outline in the final game. The added border means that some of those tiles had to be redrawn to fit. The cross blocks also gained more advanced shading.
| Proto | Final |
|---|---|
To fit the new background scheme, the spikes on the Cutting Wheel enemies were recolored. Two pixels were added to the top of the eyes as well in the final.
Layout Changes
| Proto | 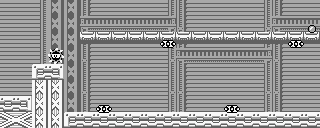 |
|---|---|
| Final |  |
Layout changes, right at the start of the stage. In the prototype, a path leading to a small Life Energy pickup is located above the Screw Drivers. Since there's no point in putting Life Energy at the beginning of a stage, the path was closed off in the final game.
| Proto | Final |
|---|---|
 |
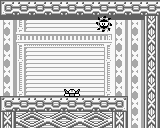 |
An extra Cutting Wheel was added to the end of the first horizontal area.
| Proto | Final |
|---|---|
 |
 |
The ceiling Screw Driver was replaced with a second Cutting Wheel. A platform with a large Life Energy pickup was removed from the left side.
| Proto | Final |
|---|---|
 |
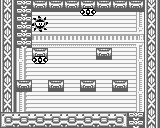 |
Two more Screw Drivers were added to this barren area in the final.
| Proto |  |
|---|---|
| Final | 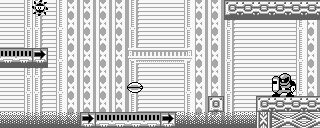 |
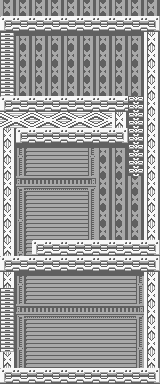
A feature common to all prototype levels is something that's absent from the final game: properly-sized shutters! However, there's no actual shutter object in the prototype, so they're not solid.
| Proto | Final |
|---|---|
 |
 |
Since the boss shutters don't work here, the pre-boss areas had to be aligned vertically. This was supposed to be a temporary fix (see the shutters on the left side of Cut Man's arena, plus the lack of hole in the ceiling), but this unusual setup didn't change in the final game. The final moves the shutters (now taller) and the Dr. Wily logo to the middle room and removes the ladder connecting the top and middle rooms. Note that these changes apply to all four Robot Master stages.
Two Super Cutters were added to the former pre-boss room at the top, which is now an extension of the previous area.
Ice Man
Graphical Changes
| Proto | Final |
|---|---|
The pixels on the top left and top right of the icy platform tiles were changed from white to dark gray. The prototype's platforms blend in well with the interior sections, while the final platforms work better in the exterior sections. Since the platforms use a dark gray border anyway, this change was arguably for the better. And that's entirely too many words written about four pixels in a Game Boy game.
Layout Changes
| Proto | Final |
|---|---|
 |
 |
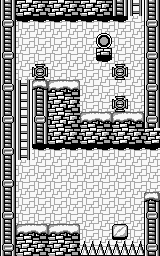
The ladder at the start of the ice block room was lengthened, allowing the player to go back and pick up the large Life Energy pickup if they so choose.
| Proto |  |
|---|---|
| Final | 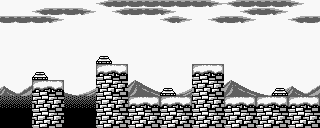 |
The two Suzys at the end of the stage were replaced with two more Scworm enemies, and the boss entrance was removed.
| Proto | Final |
|---|---|
 |
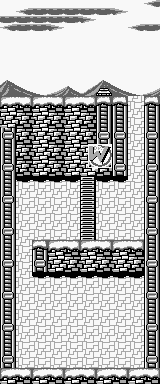 |
The changes seen in Cut Man's stage also apply here. An extra Scworm was added to the top room.
Elec Man
Graphical Changes
| Proto | Final |
|---|---|
The propellers on the Kaminari Goros' platforms were redrawn, and their lightning bolts were recolored.
Layout Changes
| Proto | Final |
|---|---|
 |
 |
To cover up a quirk in the game engine (the player can't climb a ladder if they're standing on the ground), the ladder on the left is one block higher in the final.
| Proto |  |
|---|---|
| Final |  |
Since the boss entrance had to be removed, the cloud layer at the top needed to be adjusted as well. A Metall was also added for the final game.
| Proto | Final |
|---|---|
 |
 |
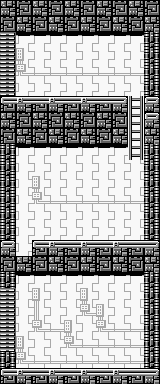
The Metall at the top is only present in the final version. Strangely, all of the background decorations were removed from the pre-boss room and boss arena.
Fire Man
Graphical Changes
| Proto | Final |
|---|---|
 |
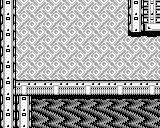 |
As in Cut Man's level, the background tiles use a new, brighter color scheme.
| Proto | Final |
|---|---|
 |
 |
Also as in Cut Man's stage, each foreground block gained a black border in the final game. This affected more tiles in Fire Man's stage, though, with the ceiling and flame spouting tiles being largely redrawn. The tiles that fade into black were also redrawn using all three possible colors instead of just two.
| Proto | Final |
|---|---|
Every flame-based object in the prototype uses a white outline. These were recolored to use a black outline in the final game.
Layout Changes
| Proto | Final |
|---|---|
 |
 |
To tone down this area's difficulty, two blocks were added beneath the ladder. This keeps the two Suzys on the left from blindsiding the player if they drop down too early.
| Proto | Final |
|---|---|
 |
 |
There's a small, nigh-insignificant change here: the floor blocks to the right of the bottom-left ladder were extended, and the wall block lowered.
| Proto |  |
|---|---|
| Final |  |
The pickup here (only accessible through clever use of the Ice Slasher) was changed from small Life Energy to large Life Energy. The two Bunby Helis were removed for the final game.
| Proto |  |
|---|---|
| Final |  |
As in the second room, some of the floor/wall blocks were changed, ensuring that the floor blocks are always above the wall blocks. The third Changkey Maker was moved to the right, where the boss entrance and shutters used to be.
| Proto | Final |
|---|---|
 |
 |
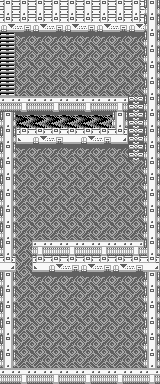
One more Changkey Maker was placed in the top area. Interestingly enough, and unlike every other boss arena so far, there are no shutters in Fire Man's room! This, plus the hole in the ceiling, indicates that by the time work started on Fire Man's stage, the developers were already planning to finalize this new vertically-oriented setup.
Wily Castle
Layout Changes
Important (to this page, anyway) note: the layouts of the Wily Castle levels don't match up 1:1 between versions; Wily Castle is actually several screens longer in the final game.
| Proto | Final |
|---|---|
 |
 |
- The Suzys in the first room start out in mid-air in the prototype version.
- One of the blocks under the large Weapon Energy pickup was removed.
- The wall to the right of the two fan boxes was extended up by two blocks.
- A Big Eye enemy was added to the fourth room in the final.
- A change that applies to the entire level is how the walls are laid out. In the prototype, there are several places where the floor tiles are placed on the left and right borders of the screen. In the final version's map, the walls are consistent throughout the level.
- The messy looking block patterns have been fixed in the final. The girder objects aren't present in the prototype section, though they do appear later in the level.
- Even the backgrounds have been touched up. In the prototype map, there are more openings in the pipe(?) structures seen throughout the level here.
| Proto |  |
|---|---|
| Final |  |
To set up a proper difficulty curve for the stage, the floors in the first Mole section were made completely flat in the final version. Additionally, the pipes on either side of the room extend all the way up/down in the final level.
| Proto | Final |
|---|---|
 |
 |
The platforms and small Weapon Energy pickups are no longer present in the final game, though there's a good reason for this...
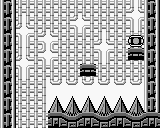
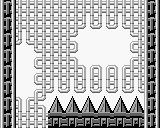
...the first falling section has been extended by four screens! This is supposed to encourage the player to use their newly acquired Carry item to dodge what would otherwise be unfairly placed traps, such as the spikes, electric bolt, and Changkey Maker.
| Proto | Final |
|---|---|
 |
 |
This encouragement extends to the end of this section, where two platforms above the floor spikes (and the large Weapon Energy pickup) were removed. If the player doesn't fall from the left side, they're forced to use Carry to survive.
| Proto |  |
|---|---|
| Final |
This section was changed greatly for the final version. The prototype version, besides being a screen longer, puts more of an emphasis on platforming here: the final version has just four spike pits, while the prototype section has nine of them! The Sniper Joe enemy was moved to the start of the area, one of the Metalls was removed, and both Screw Drivers at the end were excised and replaced with six Bunby Helis.
| Proto | Final |
|---|---|
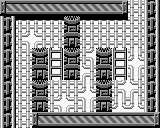 |
 |
This is the only area in either version with ladders. There's no real point to having them in the prototype, though, since there are no enemies here.
| Proto |  |
|---|---|
| Final | 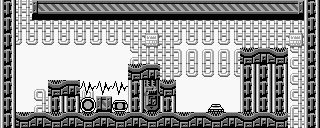 |
Two small Life Energy pickups (thanks) were upgraded to large Life and Weapon Energy items. The player is forced to use Carry to proceed in the final version, probably to key them in to the next vertical section. The Gabyoall and Screw Driver enemies were replaced with a single Scworm, which the player can use to grind Weapon Energy if they've run out of Carry energy by this point.
| Proto | Final |
|---|---|
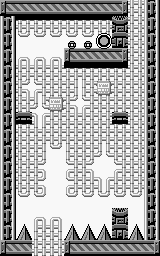 |
 |
It's possible to make it through this section in the final version without using Carry, but it is a real tight jump the player has to perform [1] as he cannot hit his head on the ceiling. To be 100% sure to not die, the player is adviced to use Carry. If the player falls down to the platform in the next screen, he is forced to use Carry, as he wouldn't be unable to make this jump without it.
This is not the case in the prototype, where the gap is far enough to the right to jump through from both platforms. The Life Energy pickups were changed to three large Weapon Energy items for the final, though to get them the player would need to use Carry at least twice. This is probably the logic behind the Scworm placement in the previous room.
| Proto | 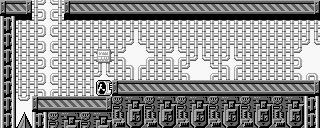 |
|---|---|
| Final |  |
There's a fan box in each room, but that's where the similarities end. In the prototype, the fan pushes the player into a spike pit, while in the final game it's pushing the player into some Elec Beams. A Gabyoall was added to the right side of the room for the final. Notice that in the prototype, the area continues right, while in the final game the area leads to a room below.
This simple Pipi room reuses the second room's layout.
| Proto | |
|---|---|
| Final |  |
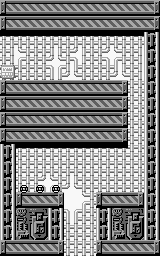
Possibly the most annoying change in the entire stage: this Mole section in the prototype is a short, one screen affair, but in the final version it takes four damn screens to clear. That's a lot of stop-and-go gameplay so close to the end of the level. At least the floor layout is more interesting.
| Proto | Final |
|---|---|
 |
 |
The Mole section ends here in the final game. Three small Weapon Energy pickups were replaced with an extra life, but because the gap between platforms was lengthened, it can't be reached without using the Carry item at least twice.
Hopefully, the player has learned the dangers of vertical sections by this point in the final.
| Proto | Final |
|---|---|
 |
 |
This area has no walls in the prototype version, and the fade into black starts about a block earlier.
Teleport System
The teleport system is already present. After defeating the four Robot Masters here, the game will reset back to the title screen.
| Proto | Final |
|---|---|
 |
 |
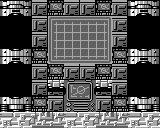
The standard background palette changes. The "Dr. Wily Teleport System" and teleporter light objects have yet to be programmed, leaving this room unanimated and rather lifeless as a result.
| Proto (Prior) | Proto (After) | Final |
|---|---|---|
|
|

|
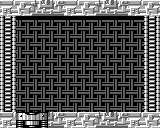
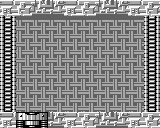
The boss rooms have the same change, with an odd caveat. The first boss room in the prototype version uses a darker palette than subsequent rooms. This is due to how the Teleport System is stored as a stage: after clearing the last falling section in Wily Castle (stage ID 05), the player remains in that stage when they reach the Teleport System. However, as soon as they defeat one of the Robot Masters, they're taken to a new stage (ID 06) that only includes the Teleport System.
| Proto | Final |
|---|---|
 |
 |
The palettes on the second set of Robot Masters were changed, because they're just plain wrong. Come on, look at them.
| Proto |    |
|---|---|
| Final |    |
Bubble Man's sprite work is a bit wonky in the prototype, most evident in his swimming animations.
| Proto | |
|---|---|
| Final |
Wily Station
To access this stage, either set RAM address DF8C to 07 or enter the GameShark code 01078CDF on the stage select menu, and press Start.
Graphical Changes
| Proto | Final |
|---|---|
The Wily Station's walls were changed from a mechanical design to something more abstract.
| Proto | Final |
|---|---|
The windows aren't as detailed in the prototype, lacking the outline around the window pane and the screws by the corners.
| Proto | Final |
|---|---|
 |
 |
While the final boss hasn't been coded yet, the background portion of the Wily Machine is already in the ROM. The prototype boss is 8 pixels wider, though those extra tiles are just used for more wires and the right half of the machine's power supply. It's also slightly taller and has a darker dome than the final Wily Machine, not that it really matters.
There's a third Wily Machine floor design in the prototype. These graphics, along with the extra Wily Machine tiles, were deleted to free up ROM space.
Layout Changes
The layout in Wily Station is 100% unique to the prototype, and as such trying to compare it to the final layout is a bit pointless.
A set of platforming challenges make up the start of the stage. This highlights a difference in the design philosophy between versions; with the exception of the extra life at the start of the stage, all of the jumps here can be made without the help of the Carry item. A small Weapon Energy pickup marks the end of the section.
There are two more small Weapon Energy items here, followed by the only two enemies in this section.
Some simple room setups, though since Elec Beams are marked as solid in the prototype, hitting the Sniper Joe is made slightly harder than it needs to be.
Probably the most interesting area in any of the prototype levels. The first screen is similar to (and uses the same block graphics as) the Picopico room from Mega Man 2! There's an entry for the Picopico in the final game's cast list, though the enemy itself was never coded. Three of the otherwise unused Drillun enemies make their first and only appearance on the third screen here. Strangely, it's possible to briefly stand on them before taking damage.
The powerups at the start of this room are impossible to collect. If this layout were finished, that block would probably be replaced with a destructible Fire Storm block.
After passing through a duplicate of the Sniper Joe room, the player begins a long fall downwards. Suzy enemies make residence in block-sized holes in the walls. This area seems reminiscent of the Quick Man laser rooms, minus, of course, the instant death lasers.
There should be two small Weapon Energy items to pick up on the last screen, but someone placed them inside the floor. Oops.
More spikes, plus four small Life Energy items. After defeating the Big Eye and Sniper Joe enemies, Mega Man makes his way to his most frightening foe...
...nothing. There's no boss here, as it hasn't been coded yet. Which is just as well, because there's no ending sequence either.


